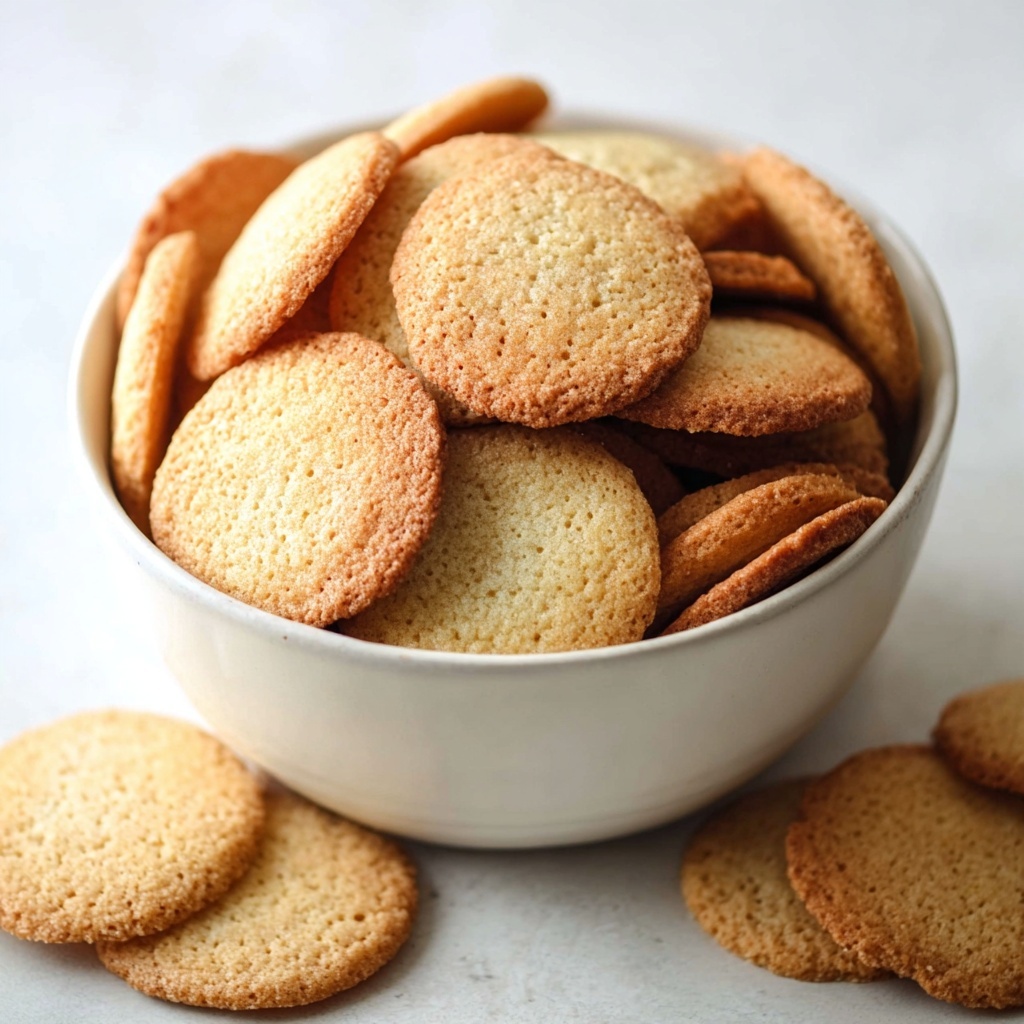
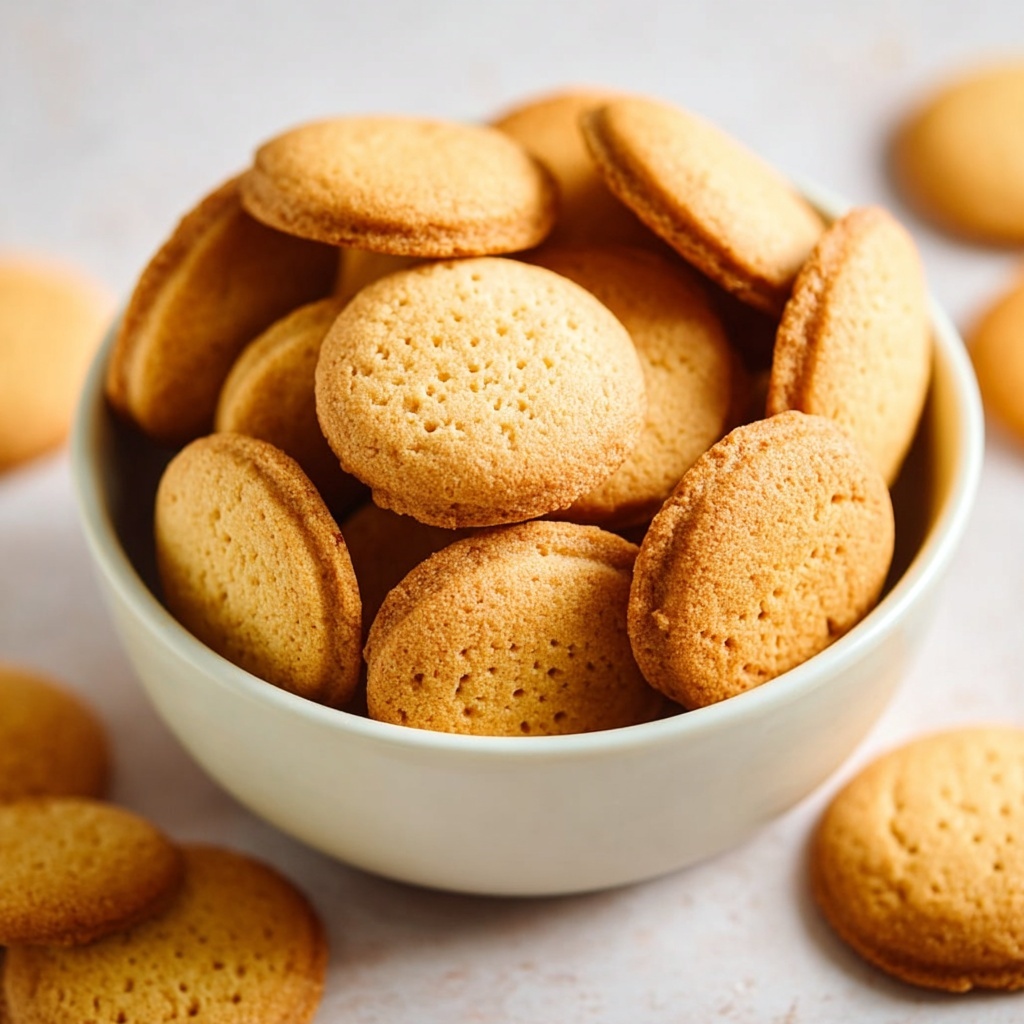
If you’re on the lookout for a truly delightful, plant-based treat that feels just like a warm hug, look no further than this Vegan Vanilla Wafers Recipe. These little cookies are beautifully crisp on the edges and tender in the middle, bursting with pure vanilla flavor and the kind of sweetness that makes you want to reach for just one more. What’s more, they’re entirely vegan, proving that you can enjoy classic comfort without any compromise. Whether you’re baking for a crowd or simply craving a friendly nibble alongside your afternoon tea, these vanilla wafers bring simple ingredients together to create magic in every bite.
Ingredients You’ll Need
The magic behind these Vegan Vanilla Wafers Recipe lies in a handful of straightforward, pantry-friendly ingredients that each play a starring role. From the creamy vegan butter that lends richness to the aquafaba which works wonders as an egg replacer, every component contributes to the perfect balance of texture, flavor, and that gorgeous golden color.
- Vegan butter (100 g, room temperature): Provides the creamy richness and buttery flavor essential for tender wafers.
- Granulated sugar (120 g): Sweetens the wafers just right, helping create that classic vanilla wafer crisp.
- Aquafaba (40 ml): The secret vegan superstar that acts like egg whites, giving the cookies structure and lightness.
- Vanilla extract (2 tablespoons): Packs a fragrant, aromatic punch that elevates the simple dough into a delightful vanilla cookie dream.
- Plain flour (170 g): The foundation of the cookie, giving it body and crumb.
- Baking powder (1 teaspoon): Adds a gentle lift to keep the wafers from getting dense.
- Sea salt (½ teaspoon): Balances sweetness and enhances all the flavors.
- Soy milk (or almond/oat milk) (1 tablespoon): Adds just enough moisture to bring the dough together perfectly without heaviness.
How to Make Vegan Vanilla Wafers Recipe
Step 1: Prep Your Oven and Trays
Start by heating your oven to 175°C (347°F) and lining two large baking trays with parchment paper. This simple step ensures your wafers bake evenly and won’t stick—a tiny effort that makes a big difference in the final crispness.
Step 2: Cream the Butter and Sugar
In a large mixing bowl or the bowl of your stand mixer, combine the vegan butter and sugar. Whisk them together for about 3-4 minutes until the mixture turns light and fluffy. This creaming process is the heart of getting those wafers tender and airy.
Step 3: Add Aquafaba and Vanilla
Slowly pour in the aquafaba while continuing to whisk, integrating it smoothly into your mixture. Then, whisk in the vanilla extract to fill your kitchen with that unmistakable, cozy aroma we all love.
Step 4: Combine the Dry Ingredients and Mix
In a separate medium bowl, stir together the plain flour, baking powder, and sea salt. Sift these dry ingredients into your wet mixture so there are no lumps. Add the soy milk and gently fold everything together with a spatula until just combined to avoid overmixing.
Step 5: Pipe the Dough onto Baking Trays
Transfer the dough into a piping bag fitted with a medium tip, or simply snip off the end of a disposable piping bag. Pipe small mounds (about 1 teaspoon for petite wafers or 1.5 teaspoons for larger ones) onto your lined trays, leaving 1.5 to 2 inches between each mound for even baking. Pop any leftover dough into the fridge until it’s time for another batch.
Step 6: Bake and Cool
Bake your cookies until they turn an inviting golden brown, looking perfectly baked but not overdone. Remove from the oven and let them cool on the baking tray for 5 minutes before carefully sliding the parchment paper onto a cooling rack. Allow them to reach room temperature, which gives you that crisp texture we aim for.
How to Serve Vegan Vanilla Wafers Recipe
Garnishes
These wafers shine on their own but a light dusting of powdered sugar or a drizzle of melted vegan chocolate can make them feel extra special. Fresh berries or edible flowers add a charming pop of color and a touch of freshness.
Side Dishes
Pair these vanilla wafers with a creamy vegan yogurt or a scoop of coconut milk ice cream for a simple yet indulgent dessert experience. They’re also fantastic alongside a hot cup of chai tea or a cold glass of almond milk for a classic combo.
Creative Ways to Present
Why not use these wafers to build mini dessert stacks? Layer them with dairy-free whipped cream and sliced fruits for an elegant, impressive treat perfect for parties. Alternatively, crush them up to create a crunchy vegan crust for pies or tarts.
Make Ahead and Storage
Storing Leftovers
Your Vegan Vanilla Wafers Recipe cookies keep beautifully at room temperature in an airtight container for up to a week, staying crisp and fresh. This makes them a great candidate for baking ahead when you want to have a sweet snack on hand.
Freezing
If you want to save them for even longer, place the wafers in a freezer-safe container or bag and freeze for up to 3 months. Just be sure to separate layers with parchment paper to prevent sticking and preserve their shape.
Reheating
When you’re ready to enjoy frozen wafers, simply thaw them at room temperature. If you want that fresh-baked warmth and crunch back, pop them in a preheated oven at 160°C (320°F) for 5 minutes and enjoy them just as if they were freshly made.
FAQs
Can I use a different plant-based milk besides soy milk in this Vegan Vanilla Wafers Recipe?
Absolutely! Almond, oat, or any other unsweetened plant-based milk will work just fine here. They each bring a slightly different flavor note, but none will compromise the texture or rise.
What is aquafaba and why is it used in this recipe?
Aquafaba is the liquid from cooked chickpeas or canned chickpeas. It mimics the properties of egg whites, making it perfect for vegan baking as it helps bind and aerate the cookies without animal products.
Can I make these wafers gluten-free?
While this Vegan Vanilla Wafers Recipe uses plain flour for the best texture, you can experiment with gluten-free all-purpose flour blends. Just keep in mind the texture might be slightly different, but still delicious in its own way.
How do I know when the wafers are perfectly baked?
You want to see an even golden brown color across the edges and tops. They’ll feel firm but not hard when you gently press, indicating the ideal crispy-yet-tender texture.
Can these wafers be made ahead of time for events or gifting?
Definitely! These wafers store well and keep their crunch for days, making them excellent for packing into gift boxes or preparing for parties in advance.
Final Thoughts
There is something truly joyful about biting into a crisp, fragrant vanilla wafer that’s entirely plant-based, and this Vegan Vanilla Wafers Recipe delivers that perfectly. Easy to whip up with simple ingredients, it’s the kind of recipe that becomes a staple in your kitchen for whenever that sweet tooth calls. Trust me, once you make these, you’ll keep coming back to share the love and the recipe with all your friends.
Print
Vegan Vanilla Wafers Recipe
- Prep Time: 10 minutes
- Cook Time: 12 minutes
- Total Time: 22 minutes
- Yield: 100 servings (small wafers)
- Category: Dessert
- Method: Baking
- Cuisine: Vegan
- Diet: Vegan
Description
Delight in these crisp and buttery Vegan Vanilla Wafers, perfect for a light, dairy-free snack or a sweet treat alongside your favorite tea or coffee. Made with simple ingredients including vegan butter, aquafaba, and a hint of vanilla, these wafers deliver classic vanilla flavor and a satisfying crunch in every bite.
Ingredients
Wet Ingredients
- 100 g vegan butter (room temperature)
- 120 g granulated sugar
- 40 ml aquafaba
- 2 tablespoons vanilla extract
- 1 tablespoon soy milk (or almond milk, or oat milk)
Dry Ingredients
- 170 g plain flour
- 1 teaspoon baking powder
- ½ teaspoon sea salt
Instructions
- Preheat Oven: Preheat your oven to 175°C (347°F) and line two large baking trays with parchment paper. Prepare to bake in batches if the trays are smaller.
- Mix Butter and Sugar: In a large mixing bowl or stand mixer, whisk together the vegan butter and granulated sugar for 3-4 minutes until the mixture is light and fluffy, creating a smooth base.
- Add Aquafaba and Vanilla: While whisking, slowly pour in the aquafaba until fully incorporated, then whisk in the vanilla extract to infuse the dough with its rich aroma.
- Combine Dry Ingredients: In a separate bowl, stir together plain flour, baking powder, and sea salt. Sift this blend into the wet mixture. Add the soy milk and gently fold with a spatula until just combined to form the cookie dough.
- Pipe the Dough: Transfer the dough to a piping bag fitted with a medium tip. Pipe small mounds onto the prepared trays, spacing them 1.5-2 inches apart. Adjust size per preference, using about 1 to 1.5 teaspoons per wafer. Refrigerate any leftover dough until ready to bake.
- Bake Cookies: Bake in the preheated oven until the wafers are evenly golden brown, approximately 10-12 minutes. Remove from oven and let cool on the tray for 5 minutes.
- Cool on Rack: Carefully lift the parchment paper with the cookies and place it on a cooling rack. Allow the wafers to cool completely for 15-20 minutes to set their crisp texture.
- Storage: Store the baked wafers in an airtight container at room temperature for up to one week, or freeze in a sealed container for up to three months.
Notes
- Ensure vegan butter is softened to room temperature for easier mixing and better texture.
- Aquafaba acts as an egg substitute, providing structure and moisture—avoid using too much or too little.
- You can substitute soy milk with almond or oat milk depending on preference or allergies.
- If cookie dough softens during piping, refrigerate briefly to firm up before continuing.
- Spacing wafers apart helps prevent them from spreading and sticking together while baking.

