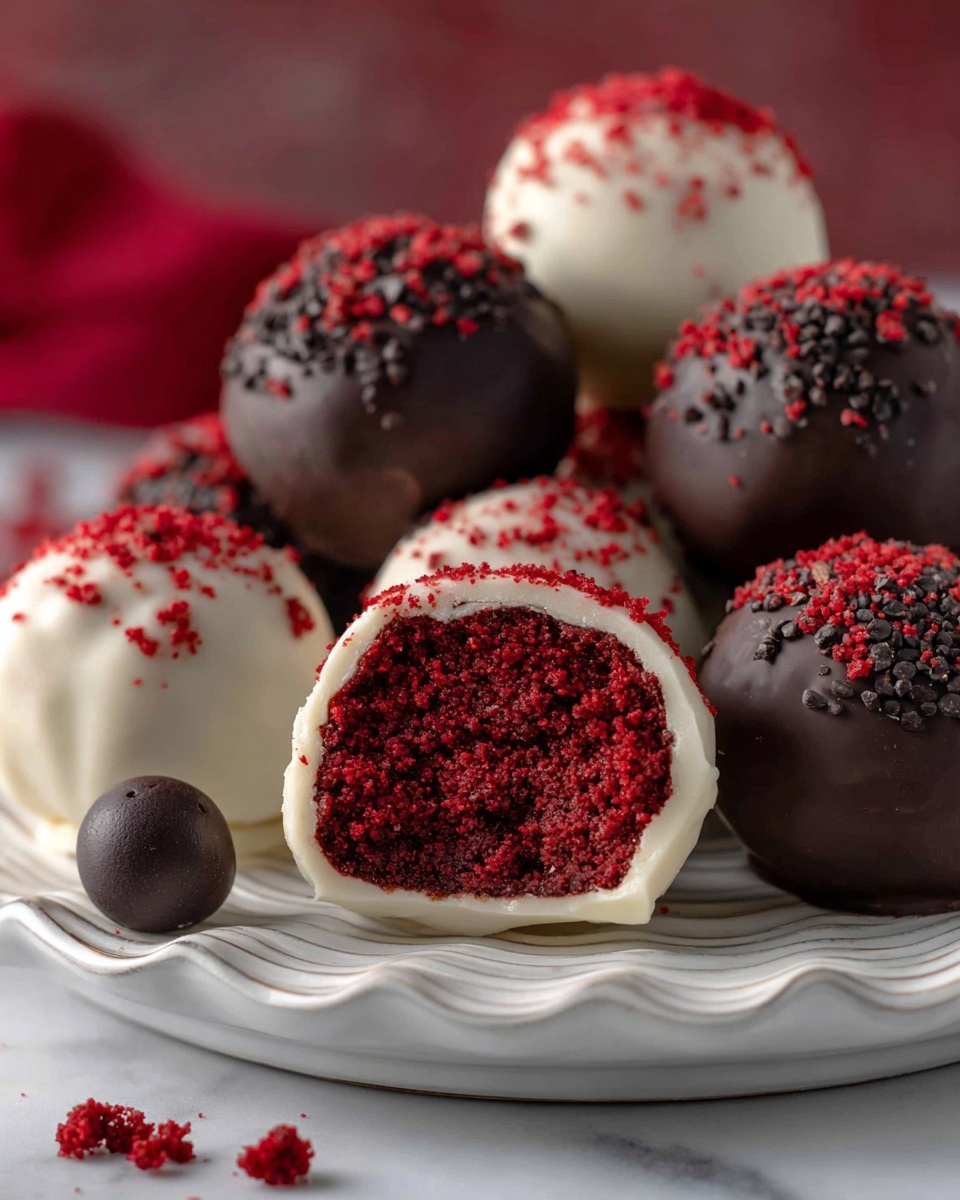
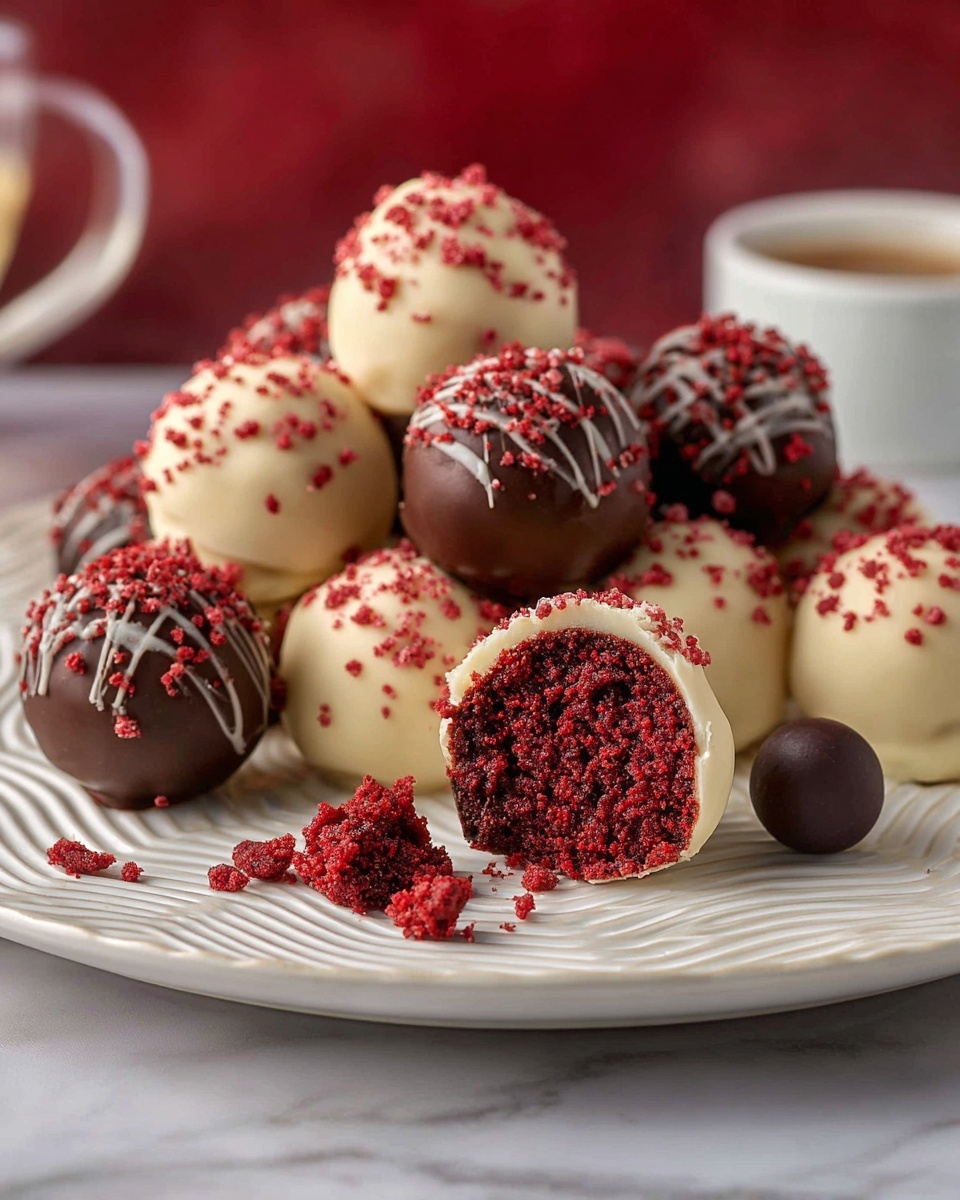
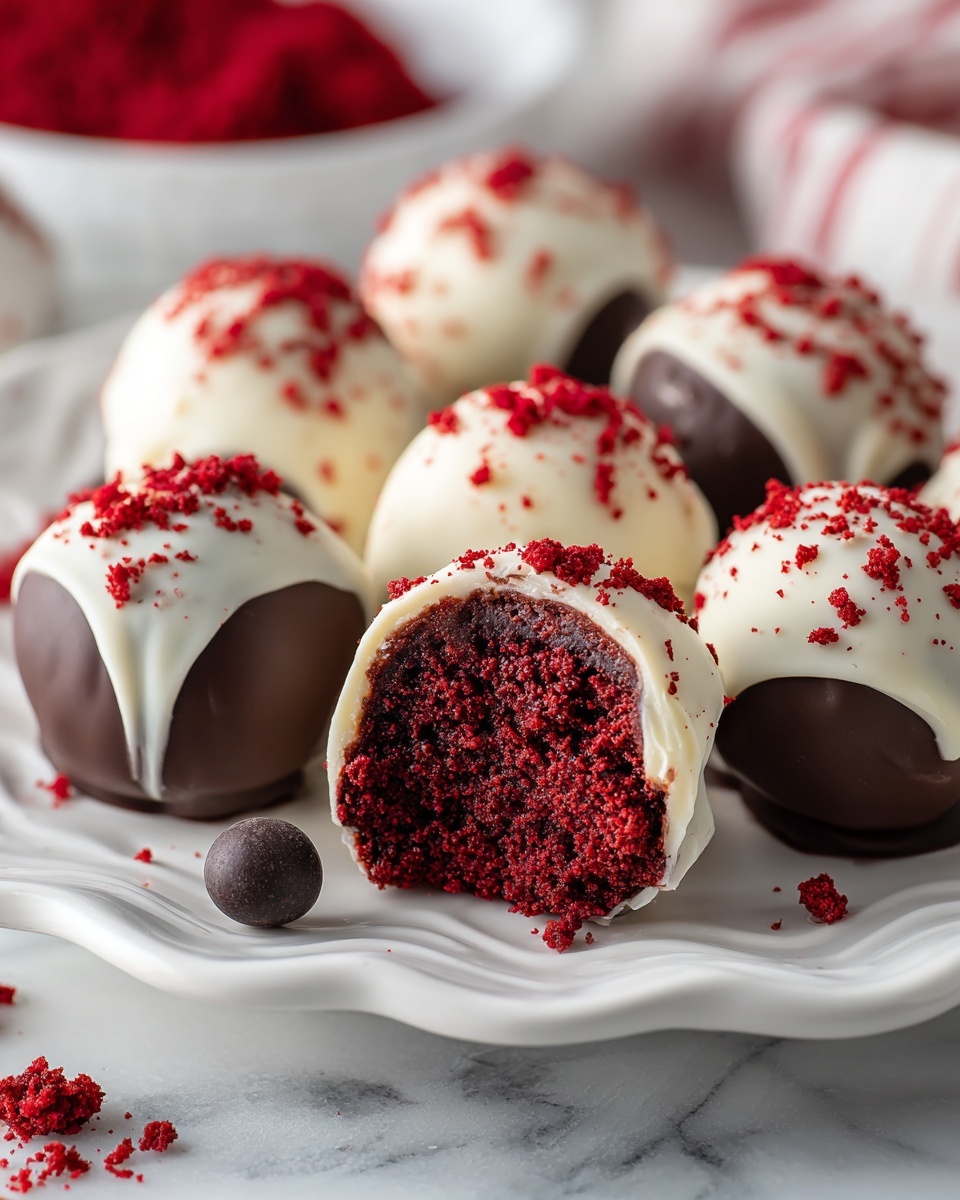
If you are looking for a decadent and adorable treat that’s bursting with flavor, the Red Velvet Cake Balls Recipe is an absolute must-try. Imagine all the rich, velvety goodness of red velvet cake transformed into luscious, bite-sized spheres that are perfect for parties, gifts, or a fun snack anytime. These cake balls marry the softness of cake with creamy frosting, then get a delightful chocolate coating, creating a perfect harmony of texture and taste that’s sure to impress your friends and family. Once you try this Red Velvet Cake Balls Recipe, you’ll wonder why you didn’t make them sooner!
Ingredients You’ll Need
The magic behind this Red Velvet Cake Balls Recipe lies in the simplicity and quality of its ingredients. Each one plays a vital role in delivering the perfect texture, flavor, and color, without any fuss.
- Red velvet cake mix: The base of the recipe that delivers that classic, slightly tangy, and beautifully red crumb — homemade or boxed works great.
- Cream cheese frosting: Adds creamy richness and helps bind the crumbled cake into perfect little balls.
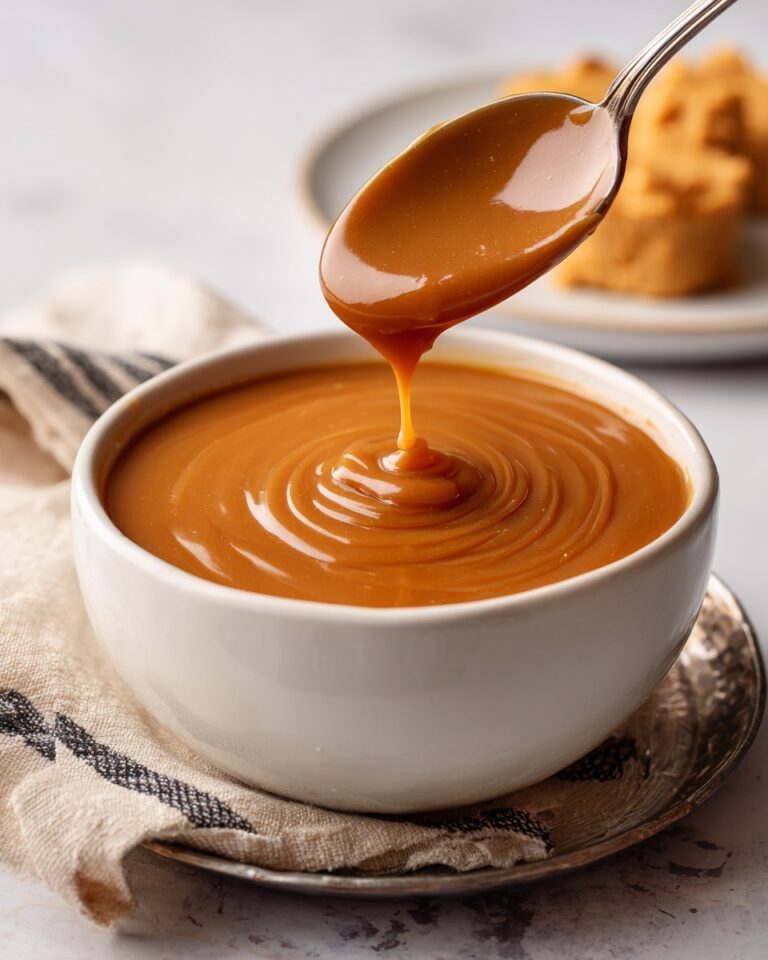
- Chocolate or candy melts: For that smooth, glossy coating that seals in the moistness and adds an irresistible finishing touch.
How to Make Red Velvet Cake Balls Recipe
Step 1: Prepare the Cake
Start by baking your red velvet cake according to the package directions or your favorite homemade recipe. It’s essential to let the cake cool completely before moving on so that it crumbles easily and mixes well without becoming a sticky mess.
Step 2: Crumble the Cake
Once cooled, break the cake into fine crumbs inside a large bowl. This step ensures your cake balls have no large chunks and remain tender in every bite.
Step 3: Mix in the Frosting
Gently fold in the cream cheese frosting a little at a time. The frosting acts like glue, holding the crumbs together while contributing that luscious cream cheese tang that pairs perfectly with red velvet’s cocoa flavor.
Step 4: Form the Cake Balls
Grab a small amount of the mixture and roll it between your palms until you form tidy quarter-sized balls. Place them on a wax paper–lined baking sheet to keep them from sticking around.
Step 5: Chill
Pop the shaped balls into the refrigerator for at least one hour. Chilling firms them up so they hold their shape throughout the dipping process, which means less mess and a neater finish.
Step 6: Melt the Chocolate
While the balls chill, melt your chocolate or candy melts according to package instructions. A smooth, fluid coating is crucial for an even, glossy finish.
Step 7: Dip and Set
Using a fork or dipping tool, submerge each chilled cake ball into the melted chocolate until fully coated. Gently shake off excess and transfer back to the wax paper. Let them sit until the coating hardens completely, locking in that tempting softness inside.
Step 8: Enjoy
Your Red Velvet Cake Balls Recipe culminates in these irresistible bites that are ready to serve or package as thoughtful homemade gifts. Trust me, no leftovers last long once everyone dives in!
How to Serve Red Velvet Cake Balls Recipe
Garnishes
Take your cake balls up a notch by sprinkling the chocolate coating with festive sprinkles, crushed nuts, or a drizzle of white chocolate before it sets. These small touches add color, crunch, and a little extra wow factor that guests will adore.
Side Dishes
While cake balls often shine on their own, pairing them with fresh berries or a dollop of whipped cream can provide a refreshing contrast. A warm cup of coffee or a creamy latte also complements this dessert beautifully, making any occasion feel extra cozy.
Creative Ways to Present
Arrange your cake balls on a tiered stand for a delightful centerpiece at parties. Try placing each one inside small cupcake liners or cellophane bags tied with a ribbon for gift-giving. For a party, you might even stick them with decorative toothpicks to create fun “cake pops” that are easy to handle.
Make Ahead and Storage
Storing Leftovers
If you have any leftovers, store them in an airtight container in the refrigerator to maintain freshness. They should keep well for up to one week, allowing you to enjoy that Red Velvet Cake Balls Recipe magic whenever a craving hits.
Freezing
To preserve them even longer, freeze the cake balls on a parchment-lined tray until firm, then transfer to an airtight container or freezer bag. Frozen, they maintain their quality for up to three months. When you’re ready to enjoy, thaw them overnight in the fridge for the best texture.
Reheating
Because cake balls are best served chilled or at room temperature, reheating isn’t generally necessary. However, if you prefer them slightly softer, leave them out for about 15 minutes at room temperature—never microwave—to prevent melting the coating.
FAQs
Can I use homemade red velvet cake instead of a mix?
Absolutely! Homemade red velvet cake adds a personal touch and rich flavor. Just ensure it’s fully cooled before crumbling and mixing with frosting.
What type of cream cheese frosting works best?
A classic cream cheese frosting that is creamy but not too runny is ideal to help the cake balls hold their shape and add that tangy balance to the sweetness.
Can I substitute the chocolate coating with white chocolate?
Yes, white chocolate or candy melts in different colors are great alternatives and can be customized with sprinkles or other toppings to match your occasion.
How do I make sure the coating doesn’t crack?
Make sure your cake balls are well chilled before dipping, and let the chocolate dry at room temperature rather than in the fridge to prevent cracking caused by rapid temperature changes.
Is it possible to make this recipe gluten-free?
Yes, just substitute the red velvet cake mix with a gluten-free version and verify all other ingredients are gluten-free. The recipe works wonderfully with those adjustments!
Final Thoughts
There’s something truly special about the Red Velvet Cake Balls Recipe that brings warmth and joy with every bite. They are a perfect treat for both casual get-togethers and festive celebrations because they combine ease with elegance in a small, delightful package. I encourage you to give this recipe a try—you might find these cake balls becoming your new favorite sweet obsession!
Print
Red Velvet Cake Balls Recipe
- Prep Time: 20 minutes
- Cook Time: 40 minutes
- Total Time: 2 hours (including chilling time)
- Yield: Approximately 45 cake balls
- Category: Dessert
- Method: No-Cook
- Cuisine: American
- Diet: Vegetarian
Description
Delight in these luscious Red Velvet Cake Balls, a perfect bite-sized treat combining moist red velvet cake with creamy frosting, all coated in a smooth layer of melted chocolate. Ideal for parties, holidays, or a decadent snack, these cake balls are easy to make and sure to impress.
Ingredients
Cake and Frosting
- 1 box red velvet cake mix (or homemade red velvet cake)
- 1 can (16 oz) cream cheese frosting
Coating
- Chocolate or candy melts for coating (approximately 12 oz)
Instructions
- Prepare the Cake: Bake the red velvet cake according to the package instructions or your homemade recipe. After baking, allow the cake to cool completely to ensure it is firm enough to handle.
- Crumble the Cake: Once cooled, crumble the cake into a large mixing bowl. Break up any large pieces to create fine crumbs.
- Mix in Frosting: Add the entire can of cream cheese frosting to the crumbled cake. Mix thoroughly until the cake and frosting are evenly combined into a dough-like consistency.
- Form Balls: Using your hands or a small scoop, roll the mixture into quarter-sized balls. Place each ball onto a baking sheet lined with wax paper, spacing them out evenly.
- Chill: Refrigerate the cake balls for at least 1 hour to firm them up. This step is crucial to ensure they hold their shape during coating.
- Melt Chocolate: Melt the chocolate or candy melts according to the package directions, typically using a microwave or double boiler, stirring until smooth.
- Dip and Coat: Using a fork or dipping tool, dip each chilled cake ball into the melted chocolate, ensuring it is fully coated. Allow excess chocolate to drip off before placing the coated cake balls back onto the wax paper.
- Set and Harden: Let the chocolate coating harden completely at room temperature or in the refrigerator before serving or packaging.
Notes
- For best results, use cream cheese frosting for the classic red velvet flavor contrast.
- Ensure cake is fully cooled before crumbling to prevent the mixture from becoming too sticky.
- If the mixture is too soft, add a little more cake or chill again before shaping.
- Use parchment or wax paper-lined baking sheets to prevent sticking during chilling and coating.
- Decorate the cake balls with sprinkles or drizzle different colored melts for added flair.
