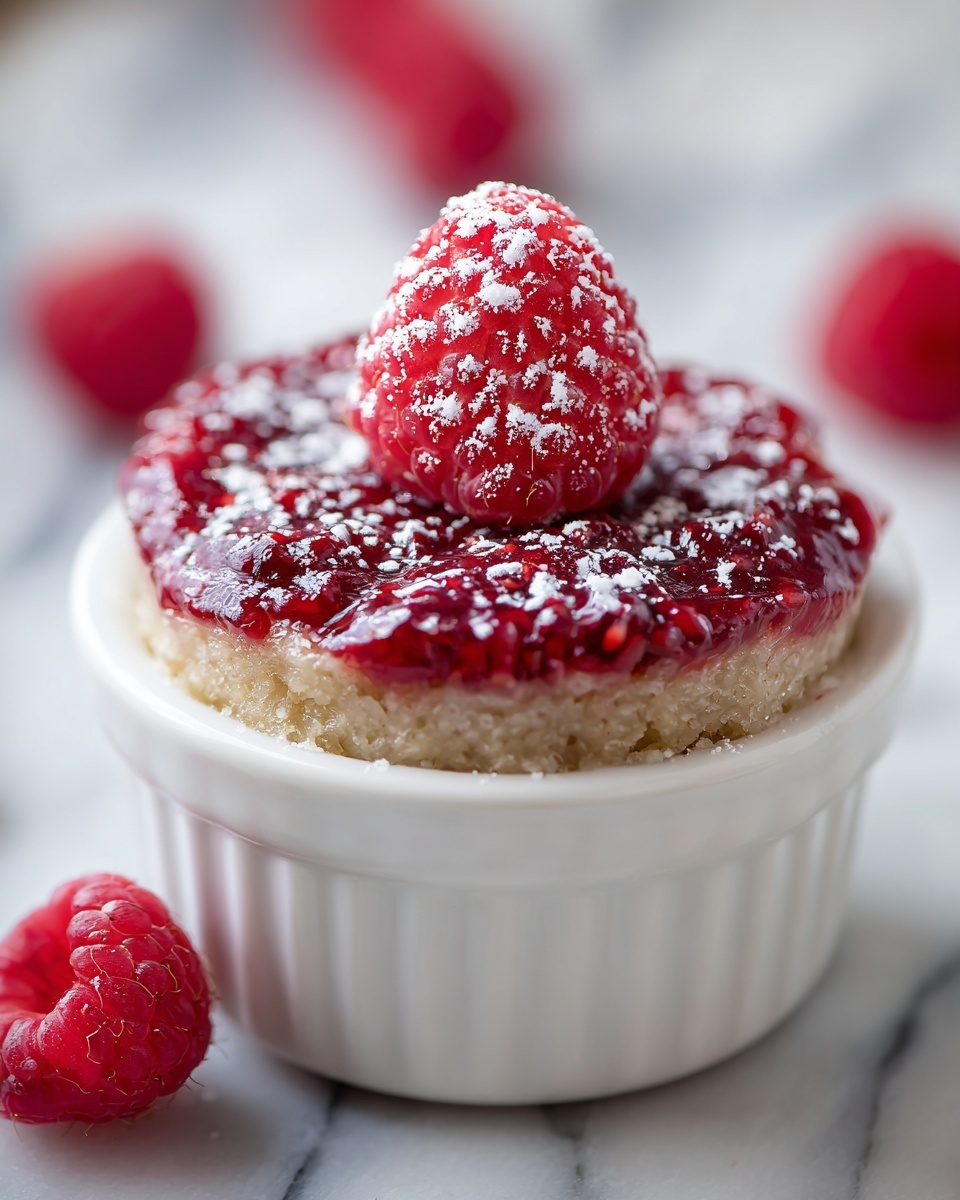
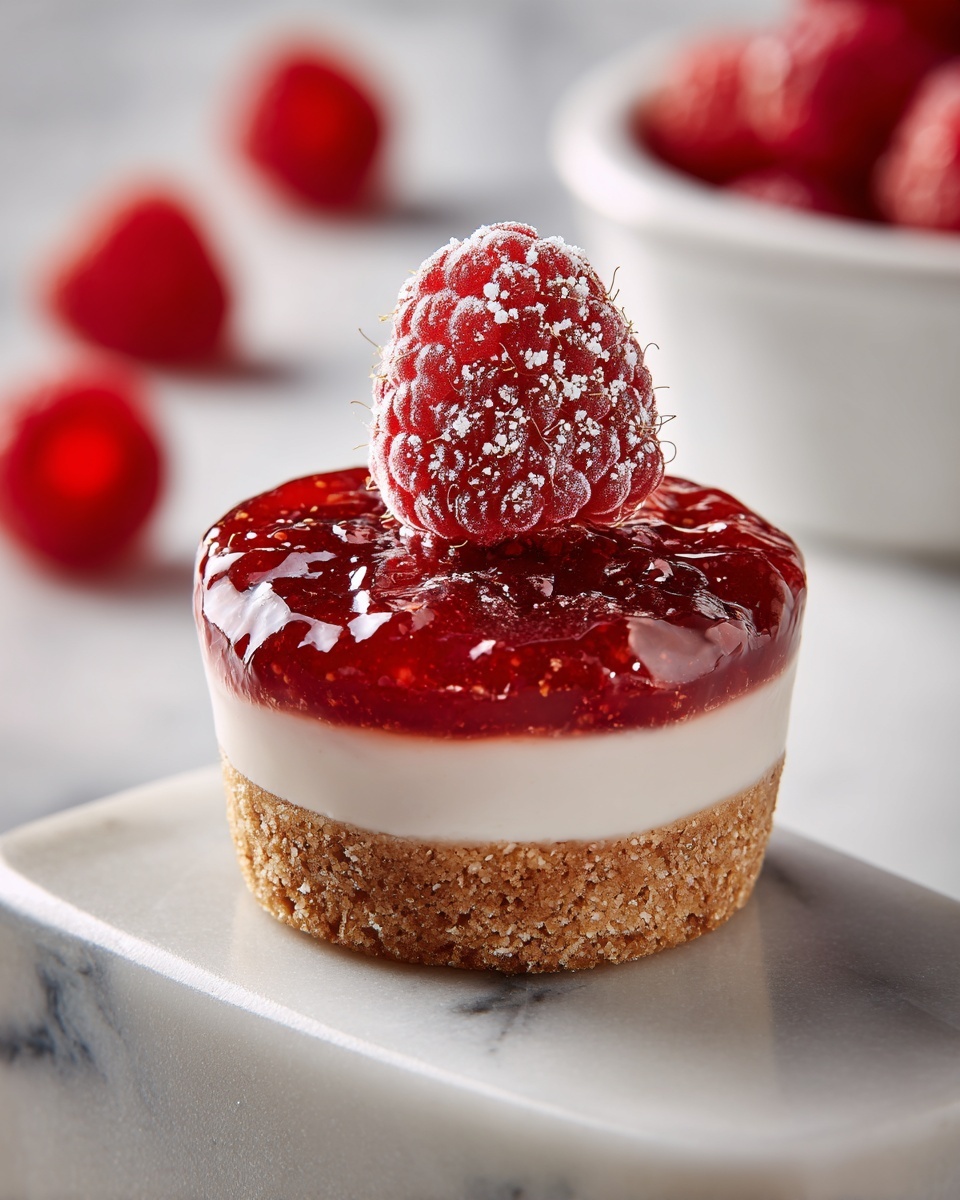
If you’re dreaming of a luscious, vibrant fruit filling that brings a burst of fresh flavor and beautiful color to your desserts, this Raspberry Filling for Desserts Recipe is your new best friend. Crafted with fresh raspberries and a few simple pantry staples, this filling is wonderfully versatile and easy enough to whip up whenever you crave that perfect balance of sweet and tart. Whether you’re layering it into tarts, dolloping it over cheesecakes, or swirling it into your favorite pastries, this recipe delivers a silky, thick fruit filling that elevates every bite.

Ingredients You’ll Need
The magic of this Raspberry Filling for Desserts Recipe lies in its uncomplicated ingredients—each one thoughtfully selected to create a balanced, flavorful, and visually stunning filling. From the bright raspberries to the subtle touch of vanilla, these components work together seamlessly to provide the perfect texture and taste.
- 6 cups fresh raspberries: The star of the show, fresh or thawed frozen raspberries bring natural tartness and vibrant color.
- 1 cup granulated sugar: Sweetens the filling while allowing the raspberry flavor to shine through; adjust to your taste.
- 1/4 cup cornstarch: Acts as the thickener, giving the filling that luscious, spoon-coating consistency.
- 1/4 cup cold water: Used to make the cornstarch slurry, essential for smooth thickening.
- 1 tablespoon lemon juice: Adds brightness and balances the sweetness with a subtle tang.
- 1/2 teaspoon vanilla extract (optional): Offers warmth and depth, enhancing the raspberry flavor beautifully.
- Pinch of salt: Elevates all the flavors and cuts through the sweetness perfectly.
How to Make Raspberry Filling for Desserts Recipe
Step 1: Rinse and Prepare the Raspberries
Start by gently rinsing your fresh raspberries under cold water to remove any debris. If you’re using frozen berries, make sure they are completely thawed and drained to avoid excess water in your filling. This step ensures your filling won’t be watery and will maintain a rich, concentrated flavor.
Step 2: Combine Raspberries and Sugar
In a medium saucepan, stir together the raspberries and granulated sugar. Coating the berries evenly with sugar allows the fruit to gradually release its natural juices and creates that classic sweet-tart balance we all love in a raspberry filling.
Step 3: Simmer the Mixture
Place the pan over medium heat and bring the raspberry and sugar mixture to a gentle simmer. This slow cooking process softens the berries, encouraging them to break down naturally and infuse your filling with intense raspberry flavor.
Step 4: Cook Down the Berries
Keep simmering for 8 to 10 minutes, stirring regularly. You’ll notice the berries soften and their juices blend into a fragrant syrup. Frequent stirring prevents sticking and helps create a smooth filler base.
Step 5: Smash Some of the Berries (Optional)
If you prefer a smoother texture, gently smash some of the raspberries with a potato masher or the back of a spoon against the saucepan’s side. This step is optional but recommended for a filling that feels silky while still having some fruity texture.
Step 6: Whisk Cornstarch and Water
In a small bowl, whisk together the cornstarch and cold water until perfectly smooth. This slurry will thicken your filling without clumps or lumps—critical for a professional finish.
Step 7: Slowly Add Slurry to Raspberry Mixture
Pour the cornstarch slurry slowly into the simmering raspberry mixture while stirring constantly. This careful incorporation prevents lumps and ensures an even, glossy texture.
Step 8: Stir Constantly and Simmer
Continue stirring as the filling simmers over medium heat. The cornstarch activates with heat to thicken the raspberries, transforming the liquid into a rich, spreadable filling.
Step 9: Cook Until Desired Consistency
After adding the slurry, simmer for an additional 2 to 3 minutes until the filling coats the back of a spoon. This is the sweet spot for spoonability that won’t run or become rubbery as it cools.
Step 10: Remove from Heat and Add Final Touches
Take your pan off the stove and stir in the lemon juice and vanilla extract. Finally, add a pinch of salt to balance and amplify all the natural flavors. Give it a quick taste and tweak sugar or lemon to better suit your palate.
Step 11: Cool Slightly
Let the filling cool before using. As it cools, it will thicken further, making it perfect for spreading or layering into your favorite desserts.
How to Serve Raspberry Filling for Desserts Recipe
Garnishes
Consider topping your raspberry filling with fresh raspberries, mint leaves, or a dusting of powdered sugar for a pretty presentation. These simple garnishes add visual appeal and a hint of contrasting textures that make every bite exciting.
Side Dishes
This filling pairs spectacularly with crisp shortbread cookies, flaky puff pastry, or buttery pound cake. The combination of tart raspberry and rich baked goods is truly irresistible. Don’t forget a dollop of whipped cream or a scoop of vanilla ice cream to complete the experience.
Creative Ways to Present
Get creative by swirling the raspberry filling into cheesecake batter before baking, dolloping it inside crepes, or layering it with mascarpone and granola in parfait glasses. You can even freeze small portions in silicone molds to make quick, flavorful frozen treats.
Make Ahead and Storage
Storing Leftovers
Keep your raspberry filling in an airtight container in the refrigerator for up to one week. Because it’s made with fresh fruit and minimal preservatives, it tastes best when enjoyed within this time frame.
Freezing
You can freeze the raspberry filling in freezer-safe containers or bags for up to three months. Thaw overnight in the refrigerator and give it a gentle stir before using.
Reheating
To reheat, warm the filling gently in a saucepan over low heat while stirring to restore its luscious texture. Avoid boiling, as this may affect the fresh flavor and consistency.
FAQs
Can I use frozen raspberries instead of fresh?
Absolutely! Frozen raspberries work wonderfully in this Raspberry Filling for Desserts Recipe. Just make sure they’re fully thawed and drained to keep the filling from becoming too watery.
Is it possible to make this filling without cornstarch?
While the cornstarch is the best thickener here, you can try using tapioca starch or arrowroot powder as a substitute. Just be mindful that the texture and thickening time may vary slightly.
Can I reduce the sugar to make it less sweet?
Yes, you can adjust the sugar level to your liking, especially if your raspberries are very sweet. Just remember to taste as you go so the filling maintains a nice balance of tart and sweet.
How long does the raspberry filling last in the fridge?
Stored properly in an airtight container, your Raspberry Filling for Desserts Recipe will remain fresh and delicious for up to one week in the refrigerator.
Can I use this filling for savory dishes?
This raspberry filling is designed for sweet desserts due to its sugar content and flavor profile. For savory dishes, it’s better to try fresh or unsweetened raspberries in a sauce or chutney format.
Final Thoughts
I can’t recommend this Raspberry Filling for Desserts Recipe enough—it’s a total game-changer in the kitchen when you want to add a burst of bright, fresh fruit flavor with minimal fuss. Whether it becomes your secret weapon for pie nights, cheesecake days, or casual weekend treats, I promise you’ll find yourself coming back to this recipe again and again. So go ahead, try it out, and watch your desserts become instant favorites!
Print
Raspberry Filling for Desserts Recipe
- Prep Time: 10 minutes
- Cook Time: 15 minutes
- Total Time: 25 minutes
- Yield: Approximately 3 cups
- Category: Dessert Filling
- Method: Stovetop
- Cuisine: American
Description
This homemade raspberry filling is a luscious, vibrant accompaniment perfect for a variety of desserts. Made by simmering fresh or thawed frozen raspberries with sugar and thickened with a cornstarch slurry, this filling offers a balanced blend of sweet and tart flavors enhanced by fresh lemon juice and vanilla extract. Its smooth, jam-like consistency makes it ideal for pies, tarts, cheesecakes, and more.
Ingredients
Main Ingredients
- 6 cups fresh raspberries (about 3 pints), or frozen raspberries (thawed)
- 1 cup granulated sugar (adjust to taste)
- 1/4 cup cornstarch
- 1/4 cup cold water
- 1 tablespoon lemon juice, freshly squeezed
- 1/2 teaspoon vanilla extract (optional, but highly recommended)
- Pinch of salt
Instructions
- Rinse the Raspberries: Gently rinse the fresh raspberries under cold water. If using frozen raspberries, ensure they are completely thawed and drain any excess liquid to avoid watering down the filling.
- Combine Raspberries and Sugar: In a medium saucepan, gently mix the raspberries with granulated sugar, evenly coating the berries with sugar to help extract their natural juices.
- Simmer the Mixture: Place the saucepan over medium heat and bring the raspberry and sugar mixture to a gentle simmer, stirring occasionally to prevent sticking.
- Cook Down the Berries: Continue simmering for 8-10 minutes until raspberries soften and release ample juice, stirring frequently to avoid burning or sticking on the pan bottom.
- Smash Some of the Berries (Optional): Use a potato masher or the back of a spoon to gently crush some raspberries for a smoother texture while still retaining some berry chunks.
- Whisk Cornstarch and Water: In a small bowl, blend the cornstarch and cold water until fully smooth, creating a slurry to thicken the filling.
- Slowly Add Slurry to Raspberry Mixture: Gradually pour the cornstarch slurry into the simmering berries while stirring continuously to prevent lumps.
- Stir Constantly: Maintain steady stirring as the cornstarch blends with the raspberries to evenly thicken the mixture.
- Simmer and Thicken: Keep simmering the filling over medium heat for another 2-3 minutes until it reaches a thick consistency that coats the back of a spoon.
- Remove from Heat: Once the desired thickness is achieved, take the saucepan off the heat to stop cooking.
- Add Lemon Juice and Vanilla Extract: Stir in fresh lemon juice and optional vanilla extract to brighten the flavor and add aromatic depth.
- Add a Pinch of Salt: Add a small pinch of salt to enhance and balance the natural sweetness and tartness of the filling.
- Taste and Adjust: Sample the filling and tweak sweetness or acidity as needed to suit your palate.
- Cool Slightly: Allow the raspberry filling to cool before using or storing; it will thicken further as it cools, perfect for spreading or spooning into desserts.
Notes
- Adjust sugar based on the sweetness of your raspberries or preference.
- Use fresh lemon juice for best flavor, not bottled.
- The filling will thicken more as it cools; if too thick, gently reheat with a splash of water.
- Store in an airtight container in the refrigerator for up to one week or freeze for longer storage.
- For seedless filling, strain through a fine mesh sieve after cooking.


