
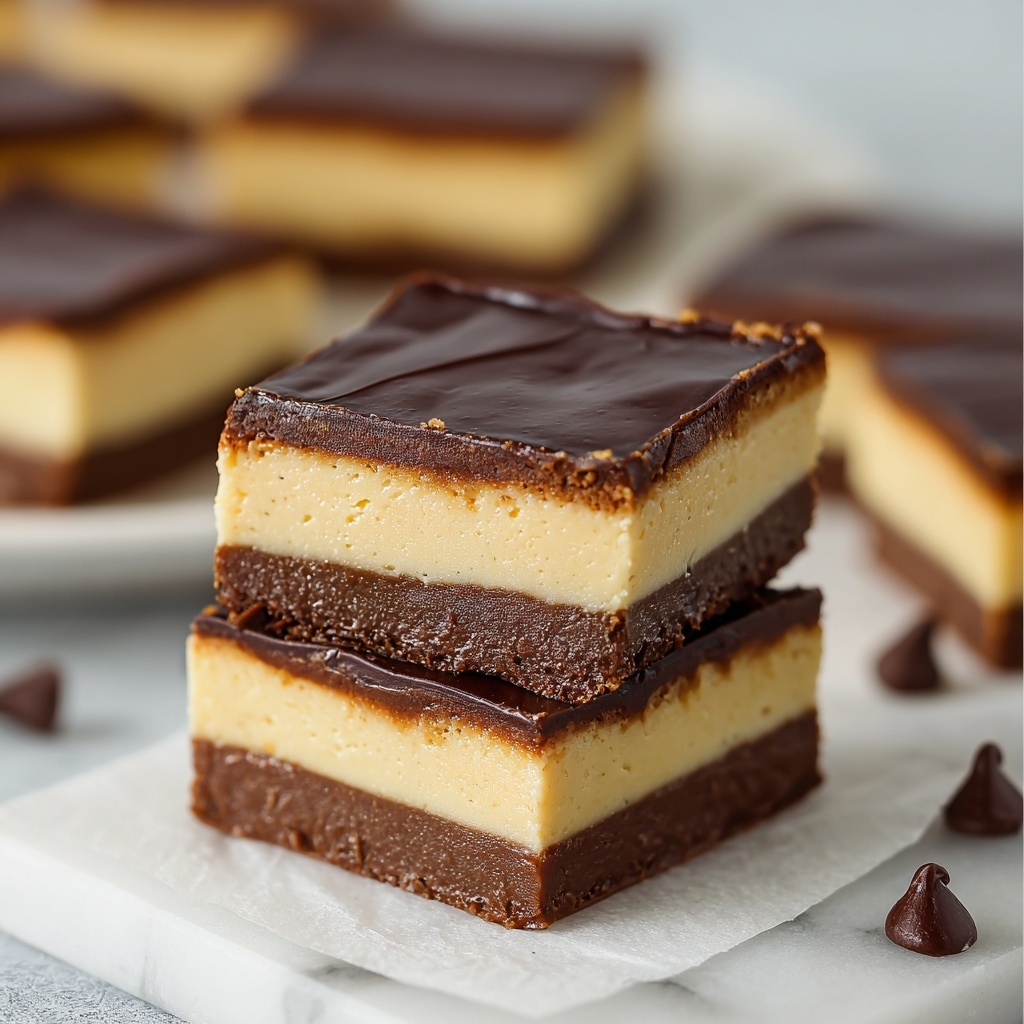
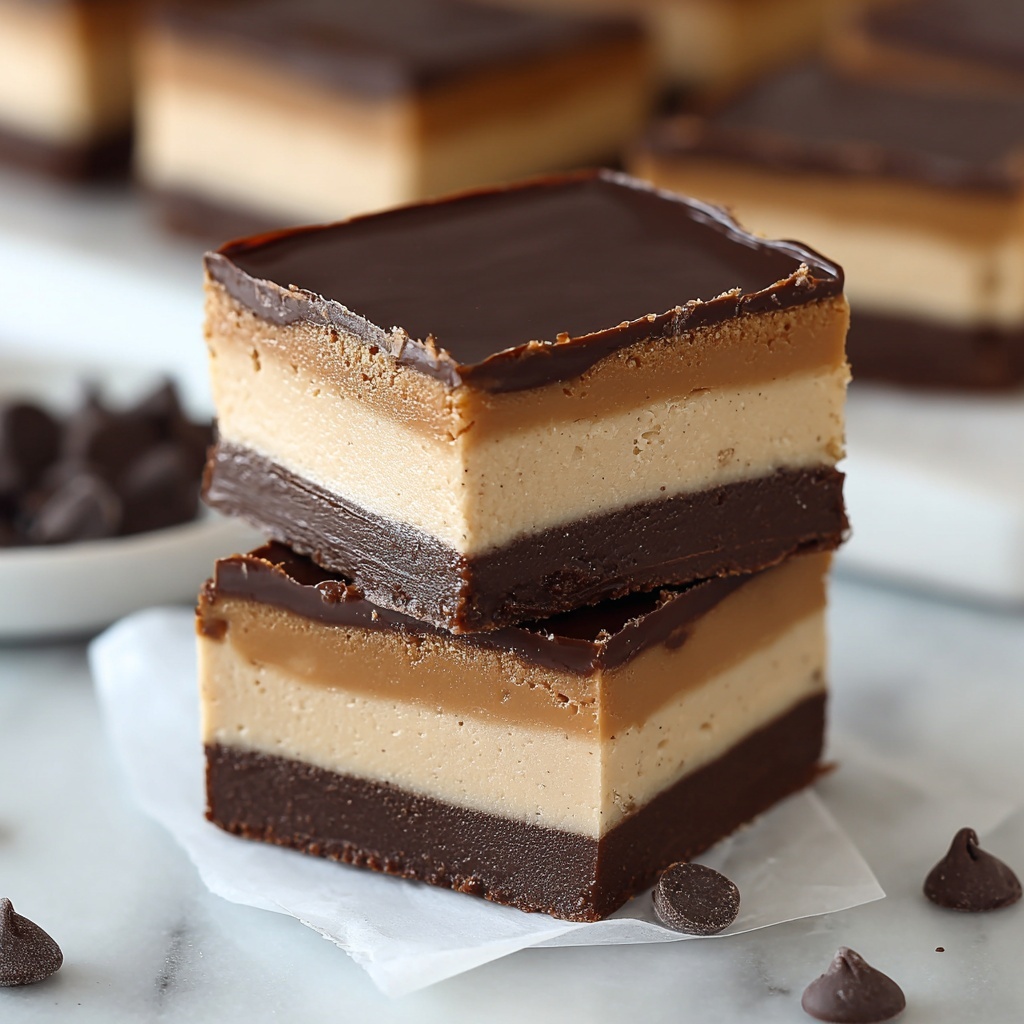
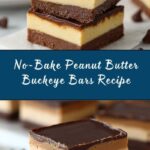
If you’re craving a rich and irresistibly creamy treat that comes together without turning on the oven, you’re going to love this No-Bake Peanut Butter Buckeye Bars Recipe. These bars capture the classic peanut butter and chocolate flavor combo in a smooth, luscious dessert that’s as easy to make as it is to devour. Perfectly sweet with a hint of vanilla, every bite is pure comfort and nostalgia rolled into a simple, no-fuss recipe that your friends and family will ask for again and again.
Ingredients You’ll Need
Gathering the right ingredients is the first step to homemade bliss. Each component in this No-Bake Peanut Butter Buckeye Bars Recipe plays a crucial role in building the perfect balance of creamy, sweet, and chocolaty layers. From the nutty peanut butter to the melt-in-your-mouth chocolate topping, these essentials come together beautifully with just a few pantry staples.
- 1 1/2 cups peanut butter: Use a creamy peanut butter for a smooth texture that holds together without crumbly bits.
- 1/2 cup unsalted butter, melted: Adds richness and helps bind the peanut butter layer perfectly.
- 2 cups powdered sugar: Sweetens and firms up the peanut butter mixture with a delicate texture.
- 1 tsp vanilla extract: Provides a warm, subtle depth to the peanut butter filling.
- 2 cups semi-sweet chocolate chips: The luscious chocolate topping that contrasts beautifully with the peanut butter.
- 2 tbsp butter (for chocolate layer): Adds silkiness and shine to the melted chocolate, making it easier to spread.
How to Make No-Bake Peanut Butter Buckeye Bars Recipe
Step 1: Mix the Peanut Butter Filling
Begin by combining the peanut butter, melted butter, powdered sugar, and vanilla extract in a large mixing bowl. Stir these ingredients together until you achieve a smooth, creamy consistency with no lumps in sight. This mixture forms the rich, decadent base of the bars, and getting it silky smooth ensures each bite will be irresistibly creamy.
Step 2: Press Into the Pan
Next, line an 8×8-inch baking dish with parchment paper to prevent sticking and make removal a snap. Press the peanut butter mixture evenly into the dish, firmly packing it down so the bars hold their shape when sliced. This step shapes the foundation of your bars, and an even layer means every piece is equally delicious.
Step 3: Melt the Chocolate Topping
Place the semi-sweet chocolate chips and 2 tablespoons of butter into a microwave-safe bowl. Heat gently in 30-second increments, stirring after each, until the chocolate melts completely into a smooth, glossy mixture. This luscious chocolate layer is going to crown your peanut butter base with a decadent, shiny finish that sets beautifully in the fridge.
Step 4: Spread the Chocolate Layer
Pour the melted chocolate over the peanut butter mixture and use a spatula to spread it evenly. Take your time here—creating a smooth chocolate top not only looks gorgeous but also ensures every bar gives you a perfect balance of chocolate and peanut butter in every bite.
Step 5: Refrigerate and Slice
Place the dish in the refrigerator for about 1 hour, or until the chocolate is firm to the touch. Once set, lift the bars out using the parchment paper and cut into 16 generous squares. These bars are now ready to be enjoyed, offering a sweet, peanut-packed treat without any baking fuss.
How to Serve No-Bake Peanut Butter Buckeye Bars Recipe
Garnishes
For an attractive touch that also adds a little texture, sprinkle chopped peanuts or a light dusting of powdered sugar on top of the chocolate layer before refrigerating. A drizzle of melted white chocolate can also create a beautiful contrast and enhance the visual appeal, making these bars perfect for sharing at parties or as gifts.
Side Dishes
No-Bake Peanut Butter Buckeye Bars Recipe pairs wonderfully with a scoop of vanilla ice cream or a dollop of whipped cream. For a refreshing contrast, serve alongside fresh berries or a simple fruit salad to brighten up the rich, chocolatey flavors.
Creative Ways to Present
Consider cutting the bars into bite-size cubes and serving them on a decorative platter with cocktail picks for an easy, crowd-pleasing appetizer at gatherings. You could also layer these bars in a glass trifle dish with alternating layers of whipped cream for a stunning dessert presentation.
Make Ahead and Storage
Storing Leftovers
Keep any leftover No-Bake Peanut Butter Buckeye Bars Recipe stored in an airtight container in the refrigerator. They will stay fresh and maintain their texture for up to one week, making them a great make-ahead treat to enjoy throughout the week.
Freezing
If you want to keep these bars for longer, they freeze beautifully. Wrap individual bars in plastic wrap and place them in a freezer-safe container or bag. They can be frozen for up to two months. When ready to eat, simply thaw them in the refrigerator overnight.
Reheating
Since these bars are best enjoyed chilled, reheating isn’t typically necessary. However, if you prefer a softer texture, let the bars sit at room temperature for about 15 minutes before serving. Avoid microwaving as it can cause the chocolate to melt unevenly and become oily.
FAQs
Can I use natural peanut butter for this recipe?
You can substitute natural peanut butter, but be aware it has a thinner consistency, which might affect the firmness of the bars. You may need to adjust with a little extra powdered sugar to help bind the mixture well.
Is it possible to make these bars vegan?
Yes! Use a plant-based butter substitute and dairy-free chocolate chips, and make sure your powdered sugar is vegan-friendly. This simple swap keeps the bars delicious without animal products.
How long do these bars stay fresh at room temperature?
Because these bars contain butter and chocolate, it’s best to store them in the refrigerator. Left at room temperature, they can soften or spoil within a day, depending on the heat and humidity.
Can I add other flavors or mix-ins?
Absolutely! Adding a pinch of sea salt on top or mixing in chopped nuts or mini chocolate chips with the peanut butter layer can add exciting texture and flavor variations.
What can I do if my chocolate layer doesn’t harden?
If your chocolate topping remains soft, try chilling it longer and ensure your chocolate and butter were fully melted and properly mixed. Any added moisture can prevent it from setting firmly.
Final Thoughts
Once you try this No-Bake Peanut Butter Buckeye Bars Recipe, it’s going to become one of your treasured go-to desserts for its simplicity and incredible flavor. No oven, no hassle, just pure, satisfying indulgence that’s perfect anytime you want a sweet treat fast. Get ready to impress everyone with this easy, crowd-pleasing favorite!
Print
No-Bake Peanut Butter Buckeye Bars Recipe
- Prep Time: 10 minutes
- Cook Time: 0 minutes
- Total Time: 1 hour 10 minutes
- Yield: 16 servings
- Category: Dessert
- Method: No-Cook
- Cuisine: American
- Diet: Vegetarian
Description
Delicious and easy no-bake peanut butter buckeye bars featuring a creamy peanut butter base topped with a rich chocolate layer. Perfect for a quick treat without turning on the oven.
Ingredients
Peanut Butter Layer
- 1 1/2 cups peanut butter
- 1/2 cup unsalted butter, melted
- 2 cups powdered sugar
- 1 tsp vanilla extract
Chocolate Layer
- 2 cups semi-sweet chocolate chips
- 2 tbsp butter
Instructions
- Prepare Peanut Butter Mixture: In a mixing bowl, combine the peanut butter, melted butter, powdered sugar, and vanilla extract. Mix thoroughly until the mixture is smooth and well combined.
- Press Mixture into Pan: Line an 8×8-inch baking dish with parchment paper. Evenly press the peanut butter mixture into the dish, creating a flat, uniform layer.
- Melt Chocolate and Butter: Place the semi-sweet chocolate chips and 2 tablespoons of butter into a microwave-safe bowl. Microwave in 30-second intervals, stirring after each, until the mixture is fully melted and smooth.
- Spread Chocolate Layer: Pour the melted chocolate over the peanut butter layer in the baking dish, spreading it evenly with a spatula to cover the entire surface.
- Chill and Serve: Refrigerate the assembled bars for about 1 hour or until the chocolate layer has set firmly. Once firm, slice into bars and serve.
Notes
- Use creamy peanut butter for a smoother texture.
- Ensure butter and chocolate are melted gently to avoid burning.
- Store bars in an airtight container in the refrigerator for up to one week.
- For firmer bars, chill longer before slicing.
- Use parchment paper to make removing bars easier.

