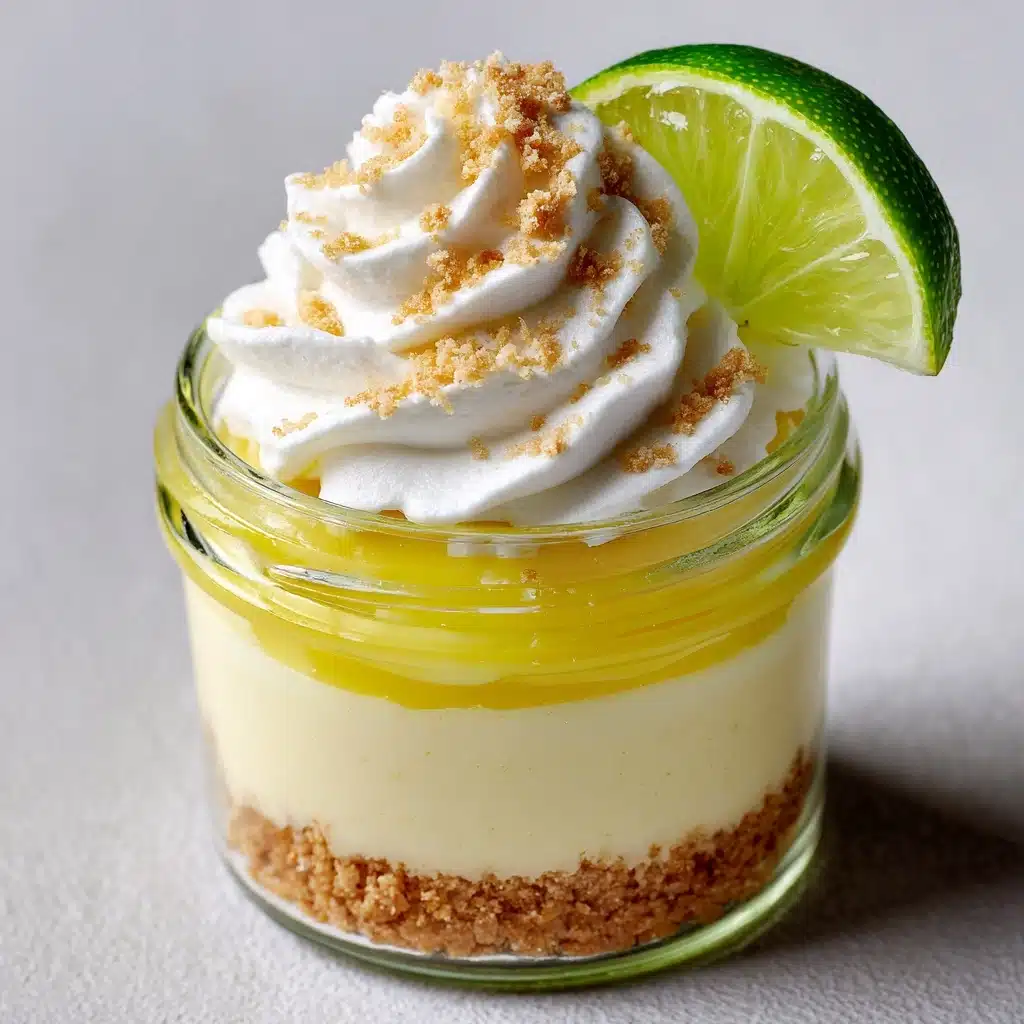
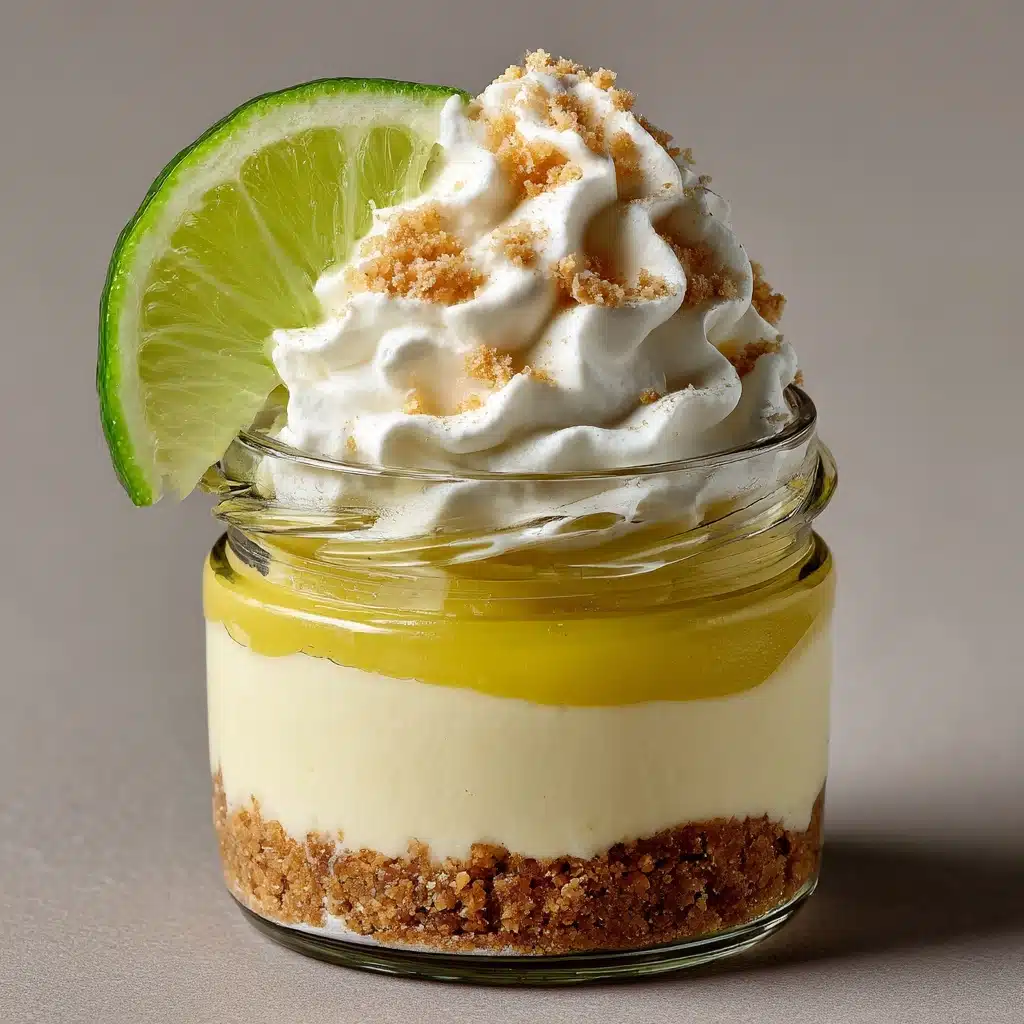
Key Lime Pie Jars Recipe
If you’re searching for a dessert that’s as bright and zesty as a tropical vacation, look no further than these Key Lime Pie Jars. They’re brimming with tart key lime, lusciously creamy filling, and buttery graham cracker crumbs — all layered beautifully in an adorable little jar. Not only do Key Lime Pie Jars deliver classic flavor in every spoonful, but they also pack a playful, portable punch that’s perfect for parties, picnics, or cozy nights at home.
Ingredients You’ll Need
You only need a few staple ingredients to whip up these delightful Key Lime Pie Jars, and each one plays a starring role in making this dessert irresistibly good. From the tangy limes to the velvety cream cheese, here’s how each component brings the whole treat to life.
- Graham cracker crumbs: The signature buttery, slightly sweet crunch that always anchors a classic key lime pie.
- Granulated sugar: Adds just enough sweetness and helps the crust stick together like a dream.
- Unsalted butter (melted): Binds the crumbs into a rich, decadent base — don’t skimp on this!
- Sweetened condensed milk: The magical ingredient that gives the filling its creamy, dreamy texture and signature sweetness.
- Key lime juice (fresh or bottled): Delivers authentic, tangy lime flavor; fresh is wonderful, but bottled is handy and still delicious.
- Key lime zest: Packs an extra punch of lime oil and adds flecks of color throughout the filling.
- Cream cheese (softened): Gives the filling a luscious body and silky consistency — make sure it’s soft for easy blending.
- Heavy whipping cream: Whipped into soft clouds, it lightens the filling and makes a dreamy topping.
- Powdered sugar: Sweetens the whipped cream without any grittiness — it dissolves beautifully.
- Vanilla extract: Adds a subtle warmth and aroma that balances the tartness of the limes.
- Extra lime zest or lime slices (for garnish): A fresh, colorful finish that offers a hint of what’s inside each jar.
How to Make Key Lime Pie Jars
Step 1: Mix the Graham Cracker Crust
Start by stirring together your graham cracker crumbs, granulated sugar, and melted butter in a small bowl. When the mixture starts to look like wet sand and everything’s evenly coated, you’re good to go! This layer is the crunchy, buttery foundation for your dessert jars and really brings that nostalgic pie flavor.
Step 2: Prepare the Creamy Key Lime Filling
In a separate bowl, whisk the sweetened condensed milk, key lime juice, lime zest, and softened cream cheese until everything is super smooth and creamy. Don’t rush this part — a silky filling makes all the difference! This step ensures a tangy, luscious middle that’s impossible to resist.
Step 3: Whip the Cream
Take another bowl and beat the heavy cream with powdered sugar and vanilla extract until you get stiff peaks. This means the whipped cream will stand tall and hold its shape when you lift your whisk. Reserve half the whipped cream for a dreamy topping, and gently fold the remainder into your key lime mixture to give it a light, airy lift.
Step 4: Assemble Your Key Lime Pie Jars
Spoon about two tablespoons of the buttery graham cracker crust into the bottom of each small jar or dessert cup, pressing it lightly to form a solid base. Top with a generous layer of your creamy key lime filling. Depending on the size of your jars, you can repeat with another layer of crust and more filling. The layering makes every bite a perfect balance of creamy, tart, and crunchy.
Step 5: Top and Chill
Finish each jar with a big, gorgeous dollop of the reserved whipped cream. Garnish with extra lime zest or a tiny lime wedge for a pop of color and zestiness. Chill the jars in your fridge for at least one hour — the wait sets the layers and lets the flavors mingle into pure dessert bliss!
How to Serve Key Lime Pie Jars
Garnishes
Don’t skip the garnish! A sprinkle of fresh lime zest or a thin round of lime perched on top gives your Key Lime Pie Jars a burst of color and fresh aroma that hints at the zippy flavors inside. If you’re feeling fancy, a few tiny mint leaves or a dusting of extra graham crumbs will also jazz them up beautifully.
Side Dishes
While these jars are showstoppers on their own, they play well with other light and summery treats. Serve them alongside a bowl of juicy mixed berries, a platter of fresh pineapple slices, or even shortbread cookies for an extra-special dessert spread. These complement the tangy lime without stealing the spotlight.
Creative Ways to Present
If you’re entertaining, try lining up the jars in a colorful tray for easy grab-and-go treats at a picnic or potluck. Or tie a ribbon and tiny spoon around each jar for edible party favors! Mini mason jars, vintage teacups, or even little espresso glasses turn your Key Lime Pie Jars into star attractions.
Make Ahead and Storage
Storing Leftovers
Cover the jars tightly with lids or plastic wrap and tuck them into the fridge. They’ll stay delicious and fresh for up to two days — which also allows the flavors to meld even more!
Freezing
Want to prep ahead for a busy week or an impromptu party? You can freeze the filled (but ungarnished) Key Lime Pie Jars for up to a month! Just thaw them in the fridge overnight before finishing with whipped cream and garnishes.
Reheating
No reheating required here! These treats are best served cold, straight from the fridge. If they’ve been frozen, allow them to thaw fully to regain their soft, creamy texture.
FAQs
Can I use regular limes if I can’t find key limes?
You sure can! While key limes are traditional and have a slightly floral, more intense tartness, regular Persian limes work beautifully and are much easier to find. Your Key Lime Pie Jars will still taste fantastic.
What size jars should I use?
Small 4-ounce to 8-ounce jars work perfectly for serving. Mason jars, dessert glasses, or even little cups you have handy can be used — just layer the ingredients according to the jar size for the best presentation.
Is there a dairy-free or vegan option?
Absolutely! Swap out the cream cheese and whipped cream for your favorite dairy-free alternatives, and use sweetened condensed coconut milk. The texture and flavor hold up well with these substitutions, so everyone can enjoy a bite.
Can I make Key Lime Pie Jars ahead of time?
Definitely. In fact, they’re even better after a short chill in the fridge! You can assemble them up to two days in advance, just add the whipped cream and garnish right before serving to keep them looking fresh.
How do I keep the crust from getting soggy?
Chilling your Key Lime Pie Jars for at least an hour helps the crust firm up and maintain its texture. If you want extra crunch, assemble the crust and filling separately, and layer them just before serving.
Final Thoughts
If you’ve been craving the sunshine and sweetness of key lime pie with a playful twist, these Key Lime Pie Jars are just the thing. Give them a whirl for your next gathering or treat-yourself dessert moment — once you see those layers and taste that bright lime filling, you might never look back!
Print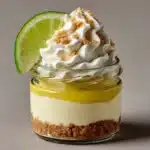
Key Lime Pie Jars Recipe
- Total Time: 1 hour 20 minutes (including chilling time)
- Yield: 6 jars 1x
- Diet: Non-Vegetarian
Description
Indulge in the refreshing tangy sweetness of Key Lime Pie in a portable and adorable jar form. Creamy key lime filling layered with buttery graham cracker crust, topped with a dollop of whipped cream – a perfect summer treat!
Ingredients
Graham Cracker Crust:
- 1 cup graham cracker crumbs
- 3 tablespoons granulated sugar
- 5 tablespoons unsalted butter, melted
Key Lime Filling:
- 1 can (14 ounces) sweetened condensed milk
- ½ cup key lime juice (fresh or bottled)
- 1 tablespoon key lime zest
- 4 ounces cream cheese, softened
Whipped Cream:
- 1 cup heavy whipping cream
- 2 tablespoons powdered sugar
- ½ teaspoon vanilla extract
Additional:
- Extra lime zest or lime slices (for garnish)
Instructions
- Graham Cracker Crust: In a small bowl, combine graham cracker crumbs, granulated sugar, and melted butter. Mix until evenly coated.
- Key Lime Filling: Whisk together sweetened condensed milk, key lime juice, lime zest, and cream cheese until smooth.
- Whipped Cream: Whip heavy cream with powdered sugar and vanilla until stiff peaks form. Fold half into lime mixture.
- Assembly: Layer graham cracker crust, key lime filling, and whipped cream in jars or cups.
- Chill: Top with whipped cream, lime zest, chill for at least 1 hour.
Notes
- Jars can be made up to 2 days in advance and stored covered in the refrigerator.
- Try using crushed vanilla wafers or gingersnaps for a different crust flavor.
- Prep Time: 20 minutes
- Cook Time: 0 minutes
- Category: Dessert
- Method: No-Bake
- Cuisine: American
Nutrition
- Serving Size: 1 jar
- Calories: 410
- Sugar: 32g
- Sodium: 170mg
- Fat: 26g
- Saturated Fat: 16g
- Unsaturated Fat: 9g
- Trans Fat: 0g
- Carbohydrates: 40g
- Fiber: 1g
- Protein: 5g
- Cholesterol: 70mg


