If you’ve been on the lookout for a delicious treat that you can feel good about giving to your little ones, this Homemade Healthy Chocolate for Kids Recipe is about to become your new best friend. It’s a simple, no-cook delight crafted from wholesome ingredients like cocoa powder, coconut oil, and natural sweeteners, all coming together to make a smooth, creamy chocolate that’s naturally sweetened and free from preservatives. It’s perfect for kids and even adults who crave a healthier indulgence. Let me show you how easy and fun it is to whip up this guilt-free favorite right at home!
Ingredients You’ll Need
Getting started with this recipe is a breeze because the ingredients list is short, straightforward, and thoughtfully chosen. Each one plays a vital role in the final texture, flavor, and overall nutritional goodness of your homemade chocolate.
- 1/2 cup cocoa powder (unsweetened): The rich, intense chocolate flavor base without any added sugar.
- 1/4 cup coconut oil (melted): Adds smoothness and helps the chocolate set perfectly at room temperature.
- 1/4 cup honey or maple syrup: A natural sweetener that keeps this treat wholesome and kid-friendly.
- 1/2 teaspoon vanilla extract: Enhances the chocolate’s depth and aroma.
- A pinch of salt: Balances flavors and makes the chocolate taste even richer.
- Optional – 2 tablespoons milk powder or oat milk powder: For a creamier texture and a subtle mellow taste kids love.
- Optional toppings (mini chocolate chips, sprinkles, chopped nuts): Add fun texture and a personal touch for your kids to enjoy.
How to Make Homemade Healthy Chocolate for Kids Recipe
Step 1: Mix Dry Ingredients
Start off by whisking together the unsweetened cocoa powder and a pinch of salt in a mixing bowl. This ensures that the cocoa is evenly distributed and the salt will lift the chocolate flavor in every bite.
Step 2: Combine Wet Ingredients
Next, stir in the melted coconut oil, your choice of honey or maple syrup, and the vanilla extract. Whisk everything together until you have a smooth and glossy chocolate mixture that looks irresistibly shiny.
Step 3: Add Creaminess (If Using)
If you want your chocolate to have an even creamier feel, go ahead and whisk in the milk powder or oat milk powder now until it’s fully incorporated and the mixture remains silky smooth.
Step 4: Pour Into Molds or Pan
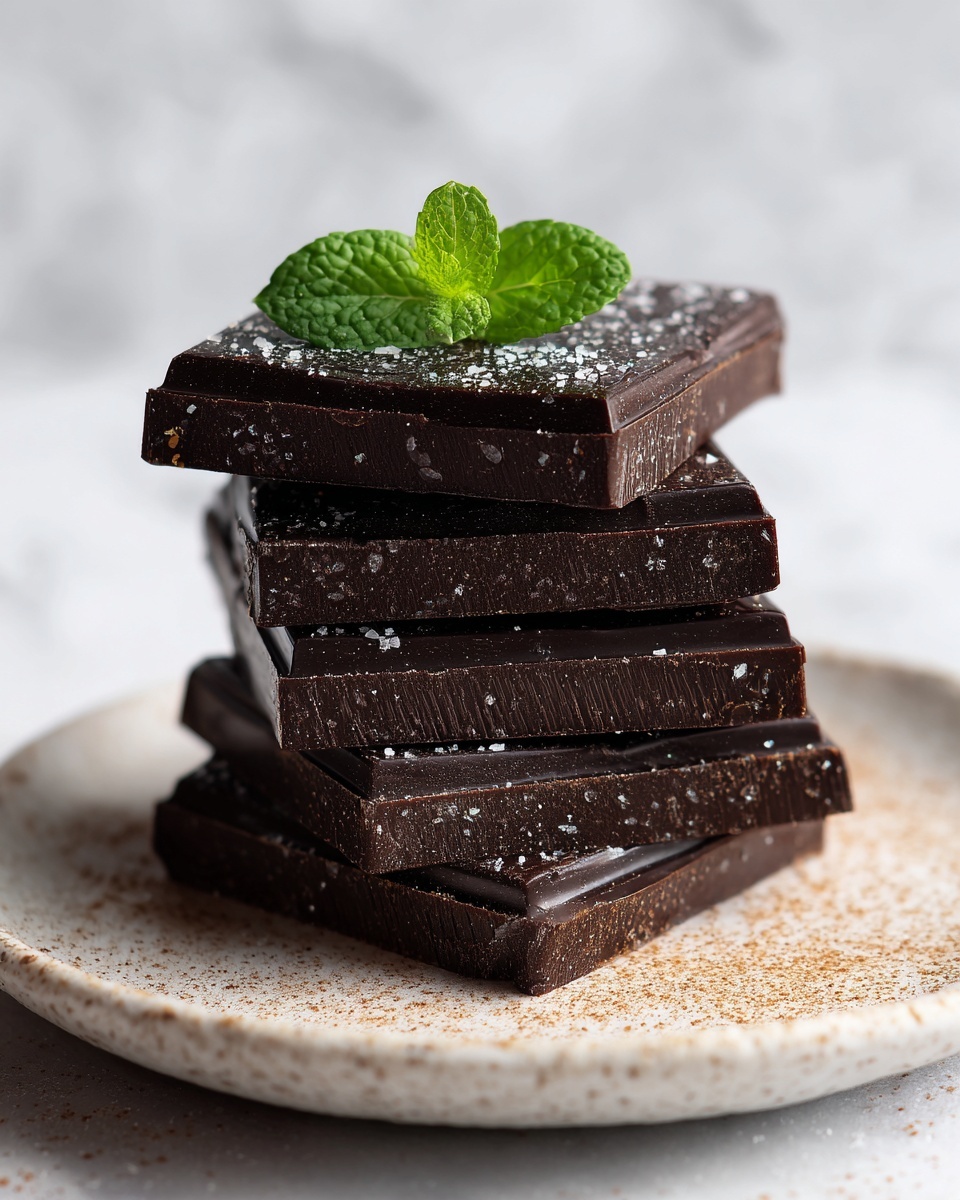
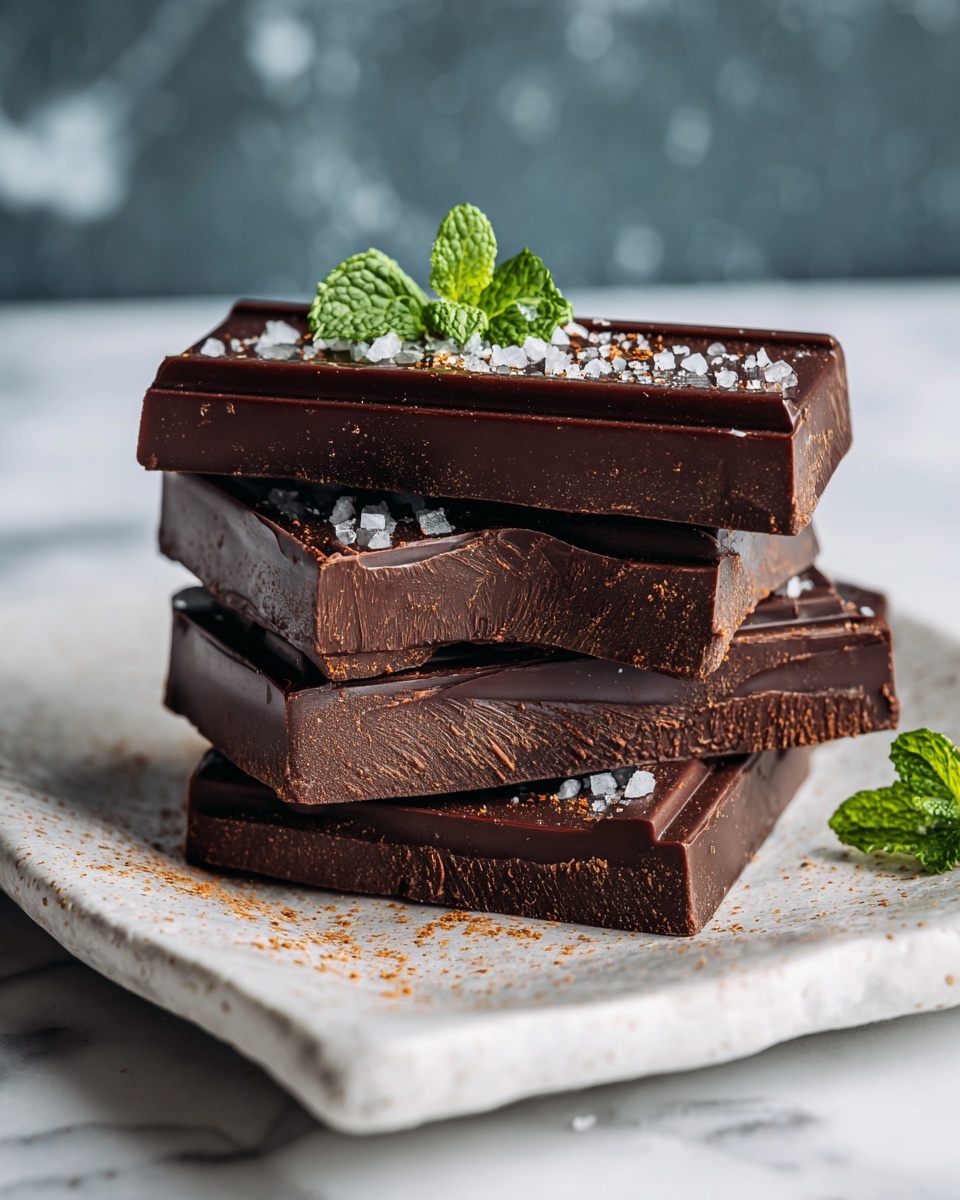
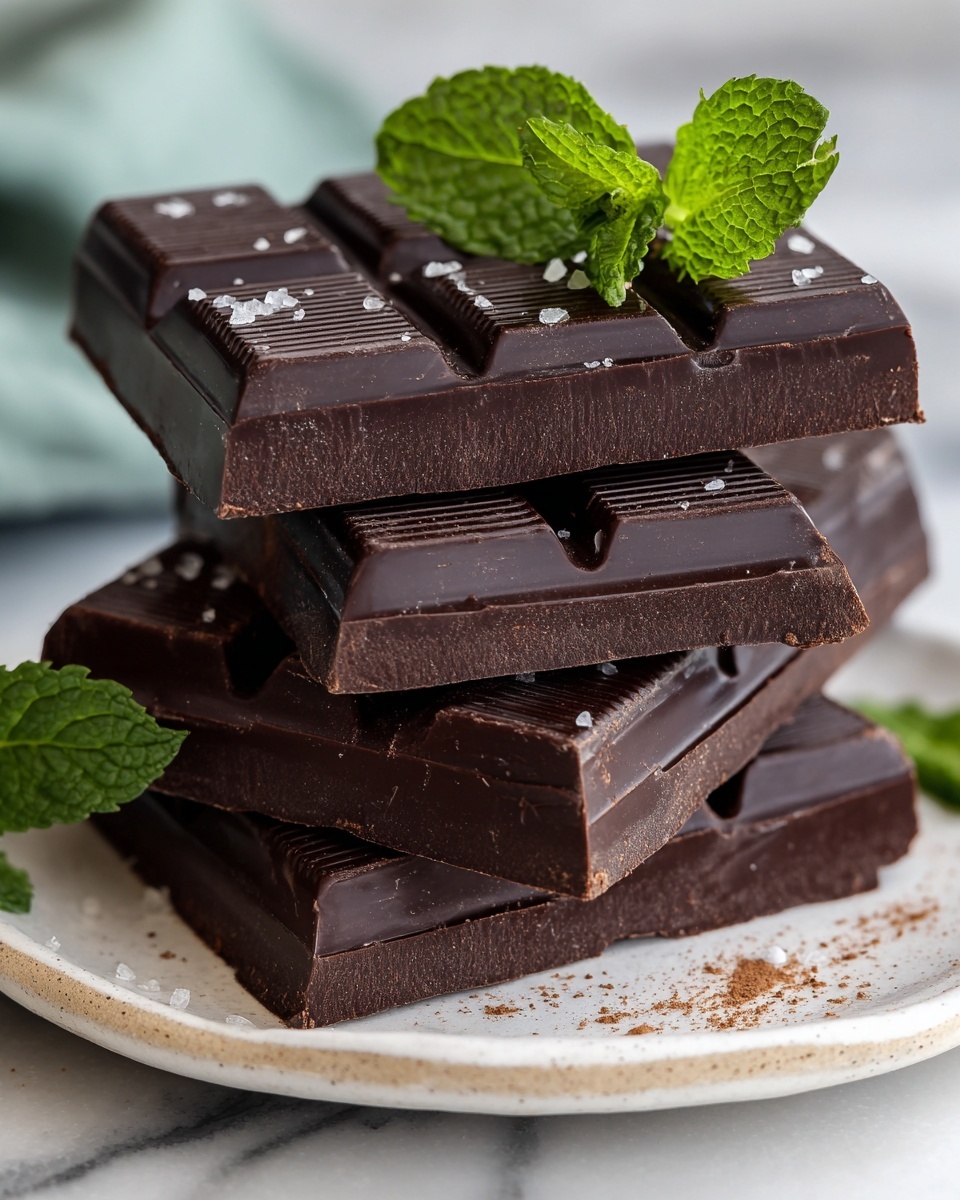
Pour the chocolate mixture into silicone molds or ice cube trays for easy portioning. Alternatively, you can spread it evenly in a parchment-lined loaf pan if you prefer break-apart chocolate bars. This is a great way to customize the shape and size of the pieces.
Step 5: Add Toppings
This is the fun part where you sprinkle mini chocolate chips, colorful sprinkles, or chopped nuts on top. It not only adds texture but also makes the chocolate appealing and exciting for kids.
Step 6: Chill Until Set
Place your chocolate creation in the refrigerator for 30 to 45 minutes. Let it firm up completely so it’s easy to pop out of molds or slice into small pieces ready to share.
How to Serve Homemade Healthy Chocolate for Kids Recipe
Garnishes
Even when serving simple chocolate, a little extra flair can go a long way. Try adding a light dusting of cocoa powder or a sprinkle of finely chopped freeze-dried fruits on top. These add a pop of color and a fruity brightness that makes the homemade chocolate feel even more special for kids’ snack time.
Side Dishes
This chocolate pairs beautifully with fresh fruit like strawberries, banana slices, or apple wedges. Offering fruit alongside adds a refreshing contrast and boosts the nutritional punch of the snack, making it balanced and satisfyingly sweet without being overwhelming.
Creative Ways to Present
Turn your pieces into little bite-sized gifts by wrapping them individually in colorful parchment paper or placing them in mini cupcake liners. For party treats, arrange them on a decorative platter with other kid-friendly snacks like nuts and dried fruit to create a healthy and inviting dessert table.
Make Ahead and Storage
Storing Leftovers
Keep your homemade chocolate in an airtight container in the refrigerator to maintain its freshness and firmness. It will stay delicious for up to two weeks, which is great for making in batches ahead of time or for unexpected sweet cravings.
Freezing
If you want to keep your chocolate longer or prepare it well in advance, freezing works wonderfully. Place the chocolate pieces in a freezer-safe container separated by parchment paper to prevent sticking, and freeze for up to three months. When you want a sweet bite, just thaw in the fridge for a couple of hours before enjoying.
Reheating
This recipe requires no cooking, so reheating isn’t necessary. However, if your chocolate becomes too firm from refrigeration or freezing, simply leave it at room temperature for 10 to 15 minutes to soften slightly before serving. It melts delightfully in your hands or mouth!
FAQs
Can I use a different sweetener instead of honey or maple syrup?
Absolutely! You can substitute with agave syrup or even brown rice syrup if you want to keep it vegan or adjust sweetness. Just remember that liquid sweeteners affect the consistency, so keep the ratios close to the recipe.
Is this chocolate safe for kids with nut allergies?
Yes, since this recipe doesn’t require nuts, it’s allergy-friendly as long as you skip nut-based toppings. Use oat milk powder instead of dairy milk powder if dairy is also a concern.
How do I make the chocolate creamier without using milk powder?
If you want a creamier texture without milk powder, you can experiment with adding a teaspoon or two of coconut cream or a splash of oat milk. Just be cautious not to add too much liquid to keep the firmness intact.
Can I add flavors like mint or orange to this recipe?
Definitely! Adding a few drops of peppermint or orange extract to the chocolate mix boosts the flavor and keeps things exciting. Just add them along with the vanilla extract in step 2 for a subtle twist kids will love.
What molds work best for shaping the chocolate?
Silicone molds and ice cube trays are perfect because they make it easy to remove the chocolate without breaking. Silicone molds come in fun shapes that can make the treat even more appealing to kids.
Final Thoughts
This Homemade Healthy Chocolate for Kids Recipe is a joyful way to create a sweet treat that’s both nourishing and utterly delicious. It’s quick, simple, and customizable, making it perfect for busy families who want to offer something special without compromising on health. I encourage you to gather these easy-to-find ingredients and get creative with your toppings and shapes. Once you try it, you’ll wonder why you ever bought store-bought chocolate again!
Print
Homemade Healthy Chocolate for Kids Recipe
- Prep Time: 10 minutes
- Cook Time: 0 minutes
- Total Time: 10 minutes (plus chilling time)
- Yield: 12 small pieces
- Category: Snack
- Method: No-Cook
- Cuisine: American
- Diet: Gluten Free, Vegetarian
Description
This homemade chocolate recipe is a delicious and healthy treat perfect for children. Made with natural ingredients like cocoa powder, coconut oil, and honey or maple syrup, it’s free from preservatives and customizable with fun toppings such as mini chocolate chips or chopped nuts. It’s quick to prepare, requiring no cooking, and is ideal for a nutritious snack or a sweet treat that parents can feel good about.
Ingredients
Chocolate Base
- 1/2 cup cocoa powder (unsweetened)
- 1/4 cup coconut oil (melted)
- 1/4 cup honey or maple syrup
- 1/2 teaspoon vanilla extract
- A pinch of salt
Optional Add-ins
- 2 tablespoons milk powder or oat milk powder (for creamier texture)
- Mini chocolate chips, sprinkles, or chopped nuts for fun toppings
Instructions
- Mix Dry Ingredients: In a mixing bowl, whisk together the cocoa powder and a pinch of salt to combine evenly.
- Add Wet Ingredients: Stir in the melted coconut oil, honey or maple syrup, and vanilla extract, mixing until the mixture is smooth and glossy.
- Incorporate Milk Powder: If using, whisk in the milk powder or oat milk powder thoroughly until fully blended for a creamier chocolate texture.
- Prepare Molds and Toppings: Pour the chocolate mixture into silicone molds, ice cube trays, or spread into a parchment-lined loaf pan to create break-apart bars. Sprinkle with your choice of mini chocolate chips, sprinkles, or chopped nuts on top for extra fun and flavor.
- Chill to Set: Place the molds or pan in the refrigerator and chill for 30 to 45 minutes, or until the chocolate is completely set and firm.
- Serve and Store: Once set, pop the chocolates out of the molds or slice into small pieces if using a loaf pan. Store the chocolates in an airtight container in the refrigerator to keep them fresh.
Notes
- This homemade chocolate uses natural sweeteners and contains no preservatives, making it a healthy treat option for kids.
- Use allergy-friendly versions of ingredients as needed, such as dairy-free milk powder or nut-free toppings for sensitive children.
- Always supervise young children while eating small candy pieces to avoid choking hazards.


