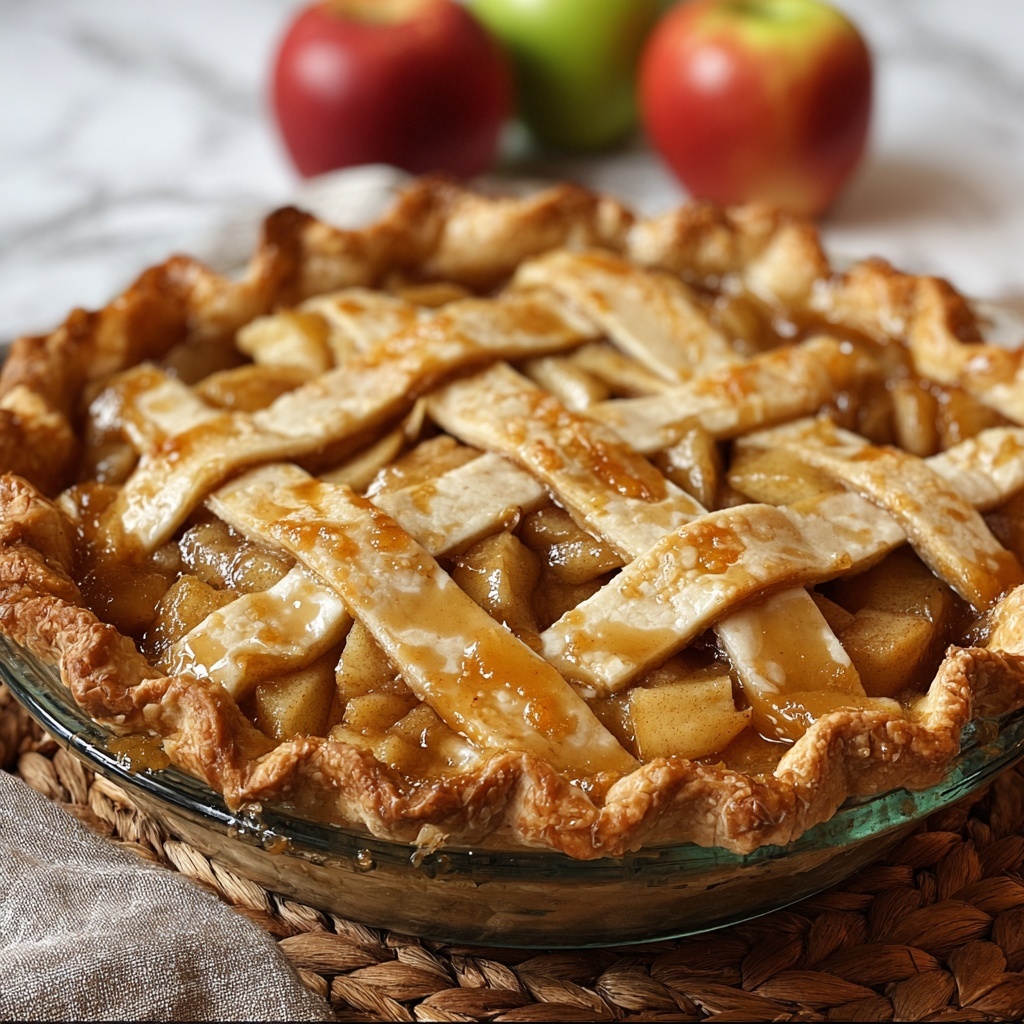
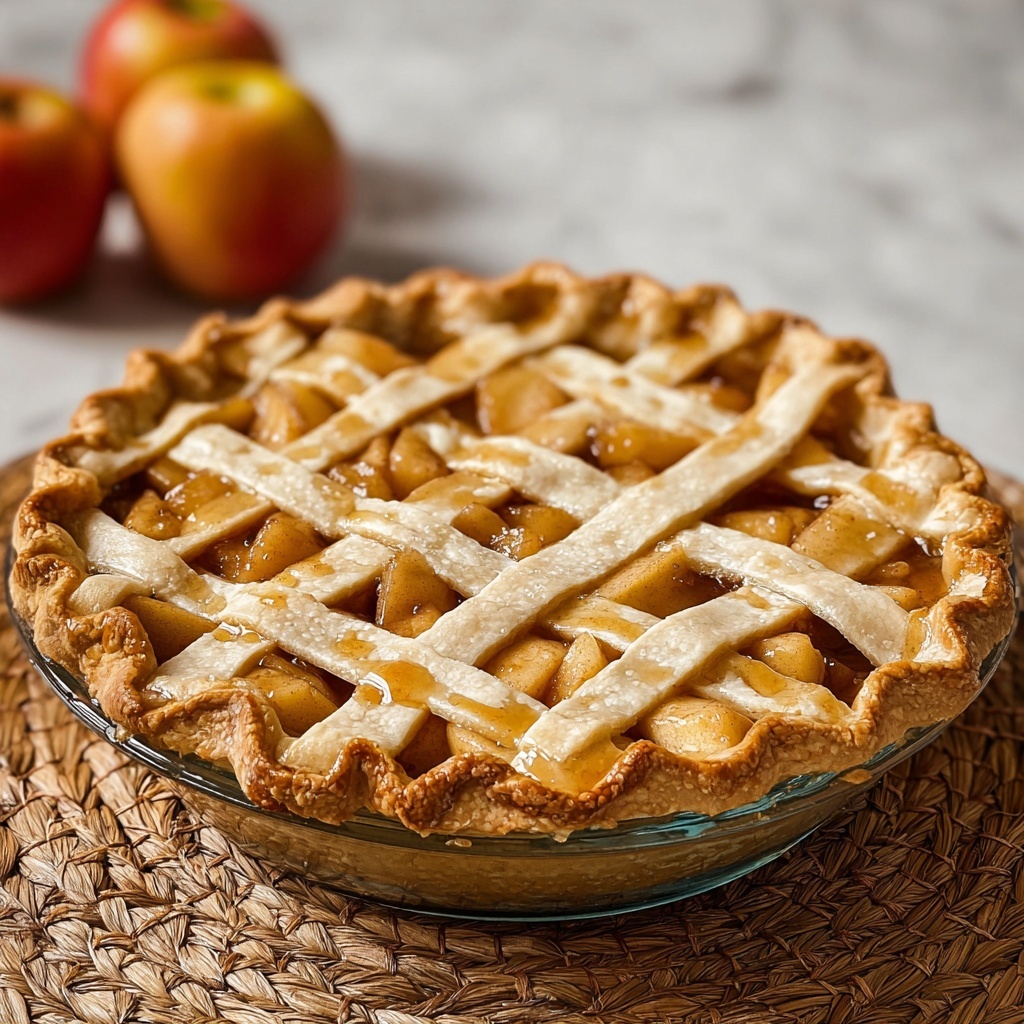
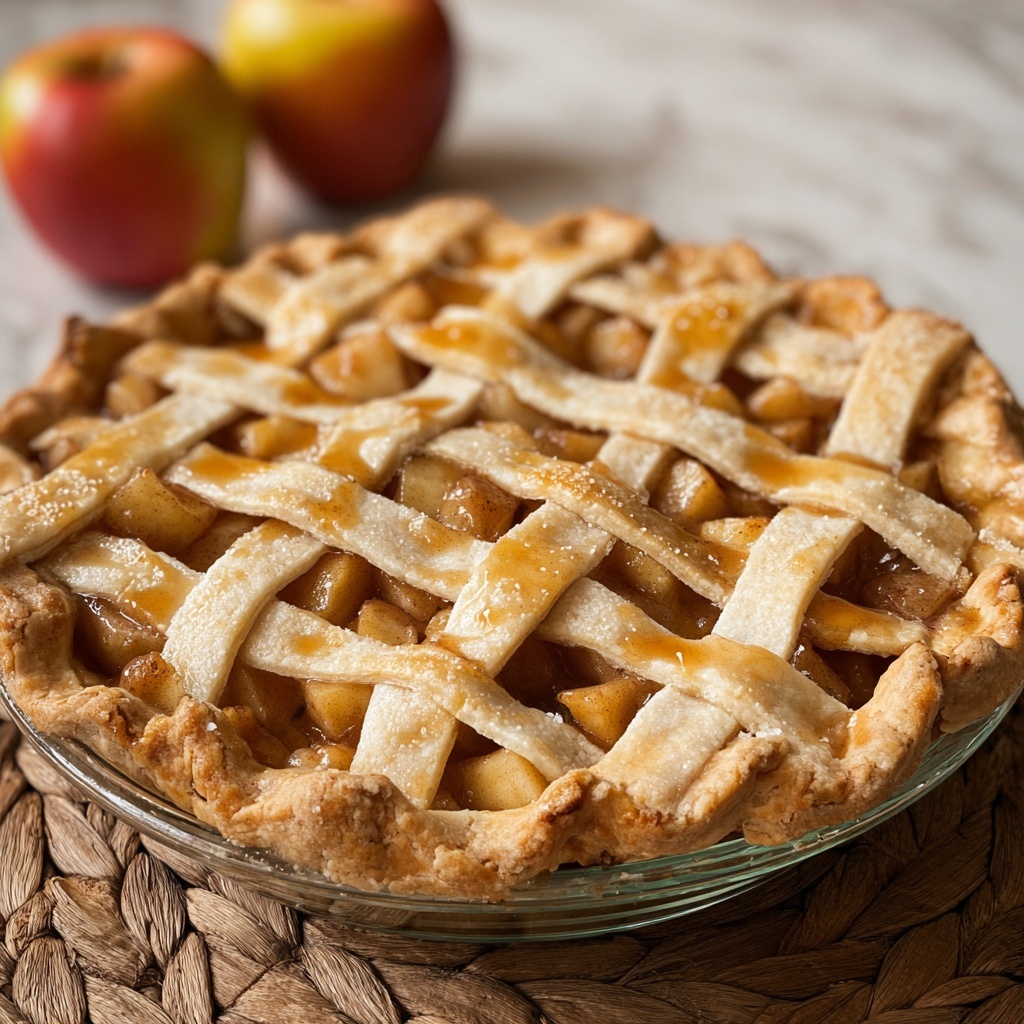
If you have a soft spot for warm, comforting desserts that fill your kitchen with an irresistible aroma, you are going to adore this Homemade Classic Apple Pie Recipe. It’s the perfect balance of a flaky, buttery crust and a sweet-tart apple filling spiced just right to bring back memories of cozy family gatherings and festive celebrations. This pie is truly a timeless treat that showcases the best qualities of fresh apples and simple, pantry-friendly ingredients that come together beautifully every time.
Ingredients You’ll Need
To craft the perfect Homemade Classic Apple Pie Recipe, you only need a handful of straightforward ingredients. Each one plays a crucial role in building the pie’s texture, flavor, and charm – from the crisp, buttery crust to the tender, spiced filling that bursts with apple goodness.
- 2 1/2 cups all-purpose flour: Provides the sturdy, yet tender base for your pie crust.
- 1 cup unsalted butter, cold and cubed: Essential for creating that flaky, melt-in-your-mouth texture in the crust.
- 1 teaspoon salt: Balances the sweetness and enhances the overall flavor of the crust.
- 1 teaspoon sugar: Adds just a touch of sweetness to the crust’s flavor profile.
- 6-8 tablespoons ice water: Brings the dough together without warming the butter, keeping it flaky.
- 6 cups thinly sliced apples (Granny Smith or Honeycrisp recommended): The heart of the pie, offering both tartness and natural sweetness.
- 3/4 cup granulated sugar: Sweetens the filling just right without overpowering the apples.
- 1/4 cup brown sugar: Adds a deep, caramel-like richness to the filling.
- 2 tablespoons all-purpose flour: Thickens the filling to prevent it from being too runny.
- 1 teaspoon ground cinnamon: Brings a warm, comforting spice that lifts the apple flavors.
- 1/4 teaspoon ground nutmeg: Adds a subtle nutty warmth and complexity.
- 1/8 teaspoon ground allspice: Offers a hint of aromatic spice that complements the cinnamon and nutmeg.
- 1 tablespoon lemon juice: Brightens the filling and prevents apples from browning.
- 2 tablespoons unsalted butter, cubed: Dotting the filling with butter enriches its flavor and silkiness.
- 1 egg, beaten (for egg wash): Gives the pie crust its beautiful golden shine.
- 1 tablespoon sugar (for sprinkling): Adds a little crunch and sparkling sweetness to the top crust.
How to Make Homemade Classic Apple Pie Recipe
Step 1: Prepare the Pie Crust
Start by combining your flour, salt, and sugar in a large bowl. Now, cut in that cold, cubed butter using a pastry blender or your fingertips until the mixture looks like coarse crumbs. This is the secret to flaky layers that melt in your mouth, so don’t rush it! Slowly add the ice water, one tablespoon at a time, just until the dough holds together when pressed. Divide the dough into two disks, wrap them tightly in plastic wrap, and chill in the fridge for at least one hour to allow the gluten to relax and the butter to firm back up.
Step 2: Make the Apple Filling
While your dough chills, toss your thinly sliced apples with granulated sugar, brown sugar, flour, cinnamon, nutmeg, allspice, and lemon juice in a large bowl. This aromatic blend transforms simple apples into a mouthwatering filling packed with the perfect balance of sweet, tart, and spice. Let this mixture rest for 15 minutes; this step helps the apples release just the right amount of juices to keep the filling juicy but not soggy.
Step 3: Roll Out and Assemble the Pie
Preheat your oven to 375°F (190°C) so it’s ready when you are. Roll out one of the chilled dough disks on a lightly floured surface until it’s about 12 inches in diameter. Gently fit it into a 9-inch pie pan, trimming any excess dough around the edges. Fill the crust with your apple mixture and dot the top with the cubed butter – those little nuggets will melt into rich pockets of flavor while baking. Next, roll out the second dough disk and place it over the filling. Trim the edges and crimp them together to seal. Don’t forget to cut small slits in the top crust to let steam escape while baking, which ensures your pie cooks evenly and the crust stays crisp.
Step 4: Bake to Golden Perfection
Brush the top crust with the beaten egg to give it that stunning golden color and sprinkle with sugar for a lovely sparkle. Pop the pie into the oven and bake for 50-60 minutes. You’ll know it’s done when the crust is golden brown and you can see the filling bubbling through the vents. Let your pie cool completely for about two hours – this waiting period is crucial as it allows the filling to set and makes slicing neat and satisfying.
How to Serve Homemade Classic Apple Pie Recipe
Garnishes
When it comes to garnishing your Homemade Classic Apple Pie Recipe, simplicity often wins. A dollop of freshly whipped cream or a scoop of vanilla ice cream adds creamy richness that beautifully contrasts the warm, spiced apples. For a touch of elegance and flavor, sprinkle a little cinnamon or freshly chopped nuts on top of the whipped cream for that extra wow factor.
Side Dishes
This pie shines as a standalone dessert, but it pairs wonderfully with warm beverages like spiced chai tea, coffee, or even a glass of apple cider. For a more substantial finale to your meal, serve it alongside a sharp cheddar cheese wedge — that combination of sweet and savory might just become your new favorite indulgence.
Creative Ways to Present
If you want to get creative with your presentation, try serving warm slices topped with caramel sauce drizzled in a zigzag pattern or a sprinkle of crushed toffee bits for added texture. Another charming idea is to cut mini pies or hand pies using this recipe and serve them as delightful bite-sized treats that are perfect for gatherings or potlucks.
Make Ahead and Storage
Storing Leftovers
Leftover pie? No problem! Wrap it tightly in plastic wrap or store slices in an airtight container in the fridge. This will keep your Homemade Classic Apple Pie Recipe tasting fresh for up to 4 days, making it easy to enjoy a slice or two without rushing.
Freezing
You can freeze both unbaked and baked pies. For unbaked, assemble the pie, wrap it well with plastic wrap and foil, and freeze for up to 3 months. When ready to bake, do so straight from the freezer, adding extra baking time as needed. For baked pies, allow it to cool completely before wrapping and freezing. Thaw in the fridge overnight before serving.
Reheating
Reheat your slice in a 350°F (175°C) oven for about 15-20 minutes to enjoy that fresh-baked warmth again. Avoid microwaving if you want to preserve the crispiness of the crust; the oven method is your best bet for that perfect texture.
FAQs
Can I use other types of apples besides Granny Smith or Honeycrisp?
Absolutely! While Granny Smith and Honeycrisp offer a great balance of tartness and sweetness, you can mix in Fuji, Pink Lady, or Gala apples. Just make sure you use varieties that hold their shape when baked to avoid a mushy filling.
How can I make the crust extra flaky?
The key to a flaky crust is keeping your butter cold and not overworking the dough. Use ice water and handle the dough gently. Also, chilling the dough before rolling and baking helps develop those beautiful flaky layers.
What if my pie filling is too runny?
If your filling is watery, it can make the crust soggy. Using flour or a bit of cornstarch as a thickener in the filling helps absorb excess juices. Also, letting the apple mixture rest before filling the crust allows excess liquid to settle.
Can I make this pie vegan?
Yes! Substitute the butter in the crust and filling with vegan butter alternatives, and use a plant-based milk wash instead of the egg wash. The apples and spices remain the same, so the flavor stays just as delightful.
How far ahead can I prepare this pie?
You can make the crust and filling up to two days ahead and keep them refrigerated separately. Assemble and bake the pie when you’re ready to serve for the freshest result.
Final Thoughts
This Homemade Classic Apple Pie Recipe really captures the magic of a traditional dessert that feels like a warm hug. It’s approachable enough for any home baker and always delivers that perfect cozy, nostalgic taste. So why wait? Grab those apples, dust off your rolling pin, and treat yourself and your loved ones to a slice of pie bliss – you won’t regret it!
Print
Homemade Classic Apple Pie Recipe
- Prep Time: 30 minutes
- Cook Time: 1 hour
- Total Time: 1 hour 30 minutes
- Yield: 8 servings
- Category: Dessert
- Method: Baking
- Cuisine: American
Description
This classic Homemade Apple Pie features a flaky, buttery crust filled with a sweet and spiced apple filling made from Granny Smith or Honeycrisp apples. Perfectly baked to a golden finish, this pie is a timeless dessert ideal for any occasion.
Ingredients
Pie Crust
- 2 1/2 cups all-purpose flour
- 1 cup unsalted butter, cold and cubed
- 1 teaspoon salt
- 1 teaspoon sugar
- 6–8 tablespoons ice water
Apple Filling
- 6 cups thinly sliced apples (Granny Smith or Honeycrisp recommended)
- 3/4 cup granulated sugar
- 1/4 cup brown sugar
- 2 tablespoons all-purpose flour
- 1 teaspoon ground cinnamon
- 1/4 teaspoon ground nutmeg
- 1/8 teaspoon ground allspice
- 1 tablespoon lemon juice
- 2 tablespoons unsalted butter, cubed
Topping
- 1 egg, beaten (for egg wash)
- 1 tablespoon sugar (for sprinkling)
Instructions
- Prepare the crust: In a large bowl, combine the all-purpose flour, salt, and sugar. Cut in the cold, cubed unsalted butter using a pastry cutter or your fingers until the mixture resembles coarse crumbs.
- Form the dough: Gradually add ice water, one tablespoon at a time, mixing gently until the dough comes together and can be formed into a ball. Avoid overworking the dough.
- Chill the dough: Divide the dough into two equal disks, wrap each in plastic wrap, and refrigerate for at least 1 hour to firm up the butter and relax the gluten.
- Make the filling: In a large bowl, toss the thinly sliced apples with granulated sugar, brown sugar, flour, cinnamon, nutmeg, allspice, and lemon juice until well coated. Let the mixture sit for 15 minutes to allow the flavors to meld.
- Preheat the oven: Set your oven to 375°F (190°C) to preheat while assembling the pie.
- Roll out bottom crust: On a lightly floured surface, roll out one disk of chilled dough to fit a 9-inch pie pan. Carefully transfer it to the pan and trim the edges to slot slightly over the edge of the pan.
- Add filling and butter: Pour the apple filling into the crust and evenly dot the top with the cubed unsalted butter.
- Prepare top crust: Roll out the second dough disk and cover the pie with it. Trim excess dough, crimp the edges together to seal, and cut small slits in the top crust to allow steam to escape during baking.
- Apply egg wash and sugar: Brush the top crust with the beaten egg for a shiny golden finish, then sprinkle with sugar to add a subtle crunch and sweetness.
- Bake the pie: Place the pie on the middle rack of the oven and bake for 50-60 minutes until the crust is golden brown and the filling is bubbling through the slits.
- Cool the pie: Remove the pie from the oven and allow it to cool on a wire rack for at least 2 hours to let the filling set before slicing and serving.
Notes
- For best results, use tart apple varieties like Granny Smith or crisp Honeycrisp for a well-balanced flavor and texture.
- Keep your butter and water very cold to ensure a flaky crust.
- You can cover the crust edges with foil if they brown too quickly during baking.
- The pie is delicious served warm with vanilla ice cream or whipped cream.
- Leftovers can be stored covered at room temperature for 2 days or refrigerated for up to 4 days.


