
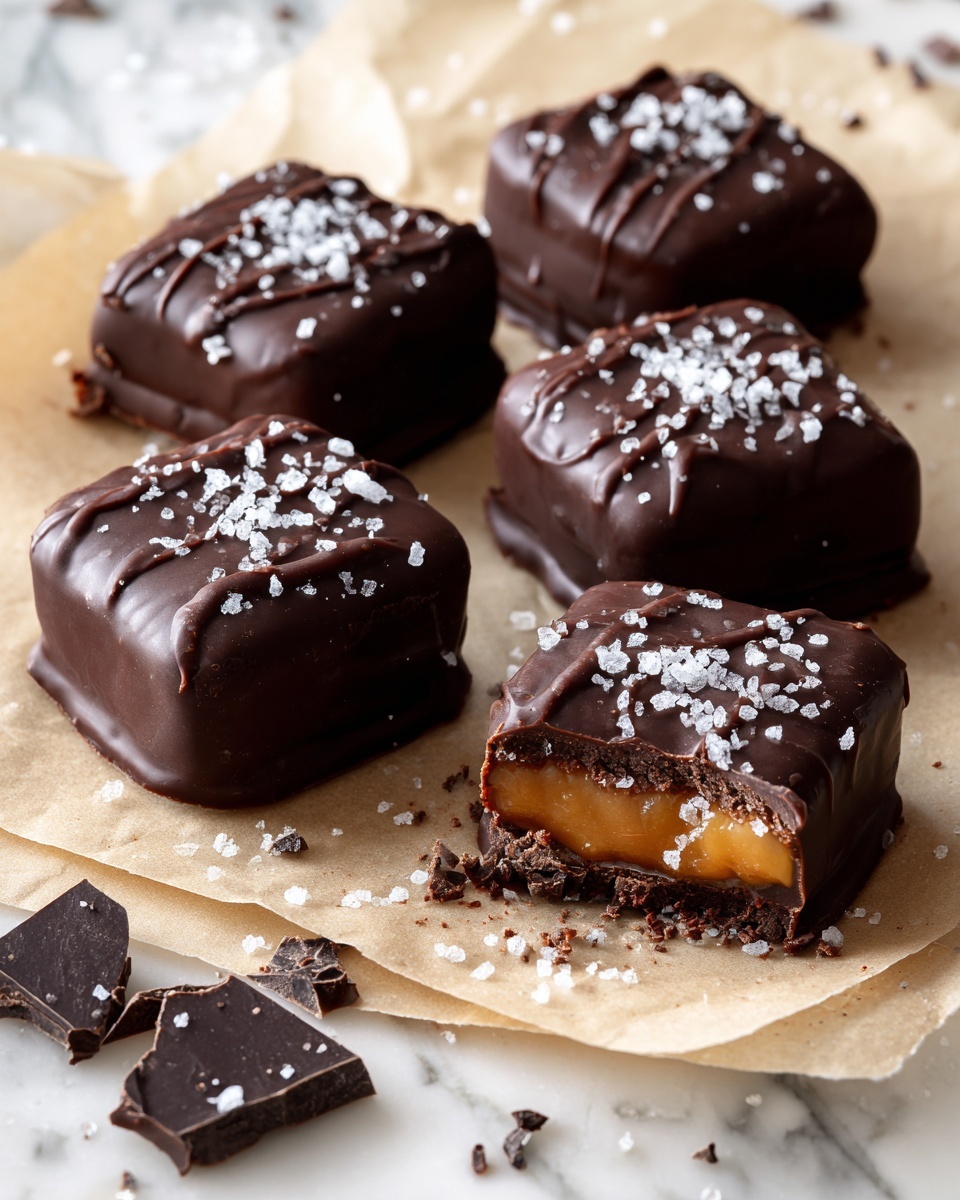
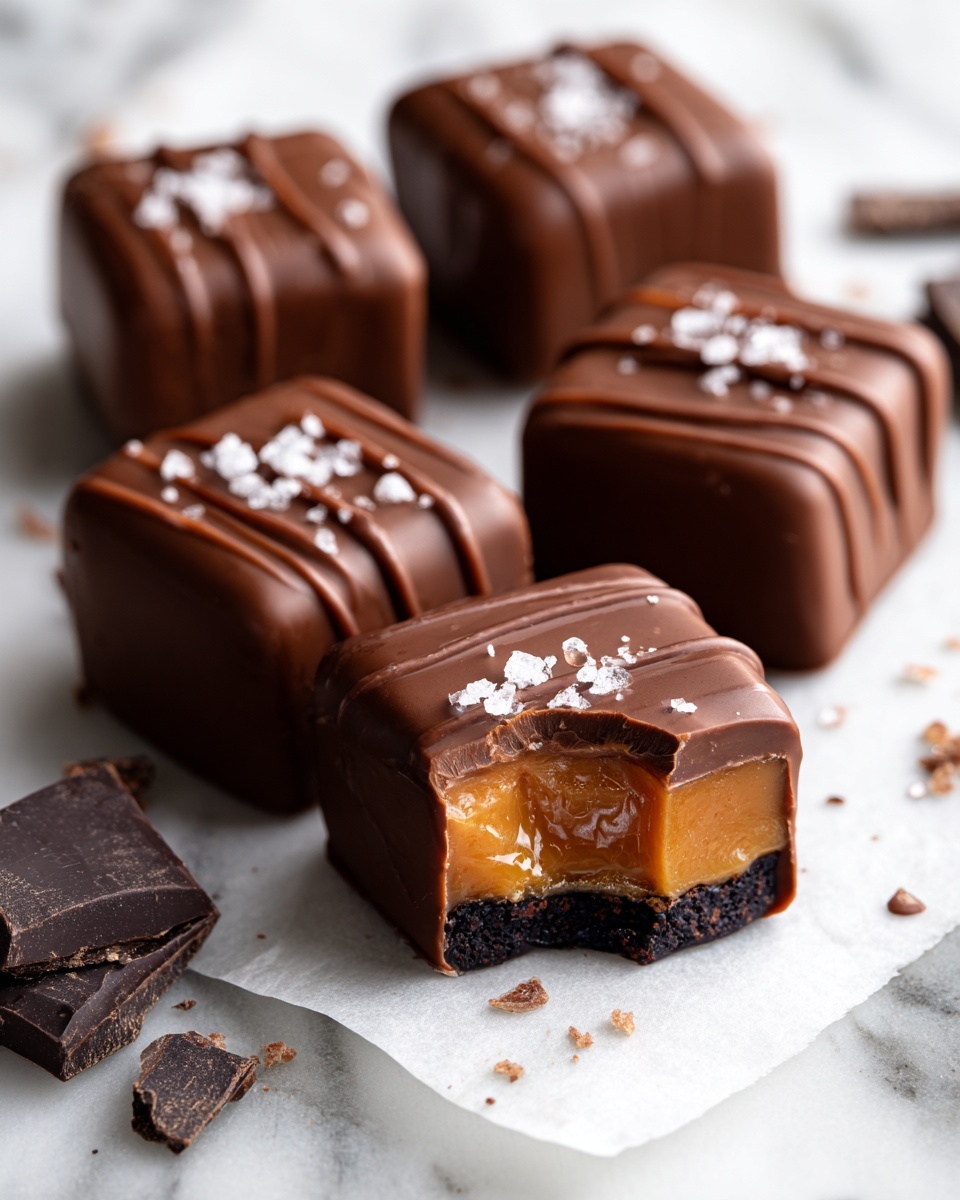
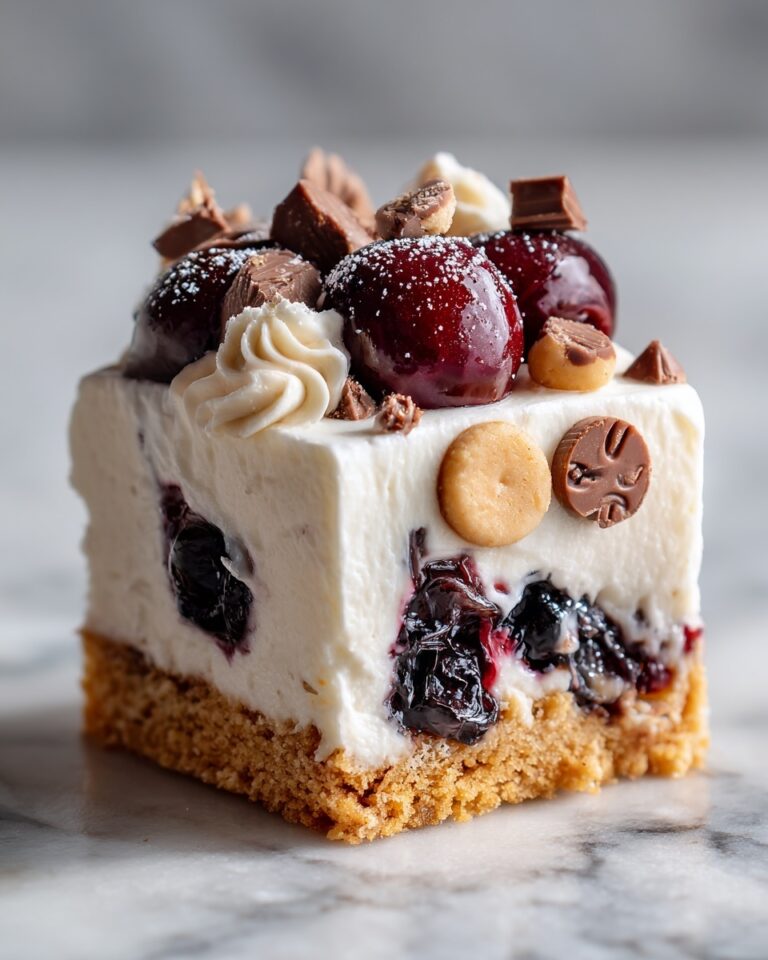
If you have a sweet tooth and a love for rich, melt-in-your-mouth treats, then this Homemade Chocolate Caramels Recipe is going to be your new favorite indulgence. Imagine soft, buttery caramel squares cloaked in luscious milk chocolate, with just the right hint of sea salt to balance sweetness perfectly. This delightful combination will transport your taste buds to candy heaven and is surprisingly straightforward to make right in your own kitchen. Whether you’re treating yourself, gifting friends, or adding a homemade touch to celebrations, these caramels will impress every time.
Ingredients You’ll Need
This Homemade Chocolate Caramels Recipe uses a handful of everyday ingredients that each play an essential role in crafting perfect caramels with a smooth texture and irresistible flavor. From the richness of butter to the sweetness of brown sugar and the creamy depth of condensed milk, every item counts towards that perfect bite.
- Butter: Adds a creamy, rich base that lends a smooth, buttery flavor to your caramels.
- Sugar: Provides the fundamental sweetness needed to caramelize effectively and balance the recipe.
- Brown sugar: Contributes a deep molasses note that adds complexity and moistness to the caramel.
- Light corn syrup: Helps prevent crystallization, keeping your caramel exceptionally smooth.
- Sweetened condensed milk: Infuses the caramel with luscious creaminess and soft chewiness.
- Milk chocolate chips: Offer a sweet, creamy coating once melted and dipped on the caramels.
- Vegetable oil: Ensures the melted chocolate stays shiny and smooth for dipping.
- Coarse sea salt: A final sprinkle to highlight and balance the caramel’s sweetness beautifully.
How to Make Homemade Chocolate Caramels Recipe
Step 1: Combine the Caramel Base
To start your Homemade Chocolate Caramels Recipe, gather the butter, sugar, brown sugar, corn syrup, and sweetened condensed milk in a microwave-safe bowl. Mix everything together until the mixture is smooth and well blended. This is the foundation of your caramel’s luscious texture and flavor.
Step 2: Microwave and Stir
Cook the combined mixture in the microwave for six minutes total, but make sure to stop and stir every two minutes. This careful stirring prevents burning and promotes even caramelization, transforming the sugary blend into a perfectly cooked caramel base ready to set.
Step 3: Pour and Cool
Once the caramel mixture is done, pour it evenly into a 9 x 9 inch baking pan lined or greased appropriately. Let it cool completely at room temperature. This step is crucial because a fully cooled caramel means clean cuts into neat squares without sticking or smudging.
Step 4: Dip in Melted Chocolate
After your caramel has set firmly, cut it into 24 squares. Melt the milk chocolate chips with the vegetable oil until smooth and glossy. Dip each caramel square completely in the melted chocolate and place it on a wax paper-lined baking sheet. This chocolate coating adds a luscious, velvety outer layer.
Step 5: Add Sea Salt and Set
Sprinkle each dipped caramel with a pinch of coarse sea salt immediately after dipping, while the chocolate is still wet. This will give you that perfect salty-sweet contrast. Leave the caramels at room temperature until the chocolate hardens fully, resulting in a satisfying snap and rich flavor.
How to Serve Homemade Chocolate Caramels Recipe
Garnishes
For an elegant touch, consider adding tiny flakes of edible gold leaf over the sea salt or a light dusting of cocoa powder just before serving. These garnishes enhance the visual appeal while complementing the caramel’s deep tones, making your presentation absolutely stunning for special occasions.
Side Dishes
Pair your Homemade Chocolate Caramels Recipe with a cup of freshly brewed coffee or a glass of cold milk to balance the richness. Additionally, serving alongside fresh berries or a light fruit salad can provide a refreshing contrast, making your dessert experience even more delightful.
Creative Ways to Present
Wrap each caramel in clear cellophane tied with a pretty ribbon for charming homemade gifts. Alternatively, place the caramels in small decorative boxes or arrange them on a tiered dessert tray for parties. Using parchment paper cups can also keep each piece separate and create a refined look that guests will love.
Make Ahead and Storage
Storing Leftovers
Keep your Homemade Chocolate Caramels Recipe leftovers fresh by placing the caramels in an airtight container at room temperature. They will maintain their texture and flavor for up to two weeks, making them perfect for prepping ahead or enjoying over time without worry.
Freezing
If you want to store these treats longer, freezing is a great option. Wrap each caramel individually in wax paper, then place them in an airtight container or freezer-safe bag. They can be frozen for up to three months. Thaw at room temperature before serving for best taste and texture.
Reheating
While caramels typically don’t require reheating, if you’d like to soften them just a touch before serving, warm them gently in the microwave for 5-10 seconds. Avoid overheating, as this can change the texture or melt the chocolate coating.
FAQs
Can I use dark chocolate instead of milk chocolate for the coating?
Absolutely! Dark chocolate offers a richer, slightly bittersweet contrast that pairs beautifully with the sweet caramel inside. Just melt it the same way with vegetable oil for a silky finish.
Why does my caramel turn grainy sometimes?
Graininess usually happens when sugar crystals form during cooking. Using corn syrup, stirring carefully, and avoiding overcooking can help keep your Homemade Chocolate Caramels Recipe silky smooth every time.
Is it possible to make these caramels without a microwave?
Yes, you can cook the caramel mixture on the stovetop over medium heat, stirring constantly until it reaches the desired thickness. Just be careful to avoid burning and use a candy thermometer to monitor temperature.
How do I know when the caramel is ready before cooling?
The caramel should look thick, glossy, and start pulling away slightly from the sides of the bowl when stirred. It will also darken in color. If you’re unsure, you can test by dropping a small amount in cold water to see if it firms up.
Can I adjust the salt level in this recipe?
Definitely! The coarse sea salt adds a fantastic flavor contrast, but you can reduce or omit it according to your preference. Just keep in mind it helps balance the sweetness and enhances the overall flavor profile.
Final Thoughts
There is something incredibly satisfying about making candy from scratch, and this Homemade Chocolate Caramels Recipe is no exception. With simple ingredients and clear steps, you’ll end up with a batch of sweet, salty, buttery delights that taste like they came from an artisanal shop. So gather your supplies, embrace the process, and treat yourself or loved ones to these irresistible caramels that truly showcase homemade goodness.
Print
Homemade Chocolate Caramels Recipe
- Prep Time: 10 minutes
- Cook Time: 10 minutes
- Total Time: 1 hour 20 minutes
- Yield: 24 servings
- Category: Candy
- Method: Microwaving and No-Cook
- Cuisine: American
Description
These Homemade Chocolate Caramels are rich, chewy, and buttery treats with a perfect balance of sweet caramel and smooth milk chocolate, topped with a hint of coarse sea salt for an irresistible flavor combination. Perfect for gifting or indulging in a delightful homemade candy experience.
Ingredients
Caramel Base
- ¼ cup butter
- ½ cup sugar
- ½ cup brown sugar
- ½ cup light corn syrup
- ½ cup sweetened condensed milk
Chocolate Coating
- 3 cups milk chocolate chips
- 2 teaspoons vegetable oil
Topping
- 1 teaspoon coarse sea salt (for topping)
Instructions
- Prepare the Caramel Mixture: In a microwave-safe bowl, combine the butter, sugar, brown sugar, light corn syrup, and sweetened condensed milk. Stir the mixture until it is smooth and well blended.
- Cook the Caramel: Microwave the mixture for 6 minutes total, stirring every two minutes to ensure it cooks evenly and prevents burning. The caramel should thicken and develop a rich amber color.
- Set the Caramel: Pour the cooked caramel into a 9 x 9 inch baking pan. Let it cool completely at room temperature until it firms up enough to be cut into squares without sticking or melting.
- Cut and Dip: Once cooled, cut the caramel into small squares. Melt the milk chocolate chips with the vegetable oil until smooth. Dip each caramel square into the melted chocolate, ensuring it is fully coated.
- Finish and Chill: Place the chocolate-covered caramels on a baking sheet lined with wax paper. Sprinkle each piece with coarse sea salt while the chocolate is still wet. Allow them to cool completely until the chocolate hardens, then store in an airtight container.
Notes
- Use a sharp knife or kitchen scissors dipped in hot water to cut clean caramel squares.
- Vegetable oil helps to keep the chocolate smooth and shiny when melted.
- Sea salt adds a nice contrast to the sweetness, but can be omitted if desired.
- Store caramels in a cool, dry place in an airtight container for up to 2 weeks.
- Ensure the caramel is fully cooled before dipping to avoid melting the chocolate coating.


