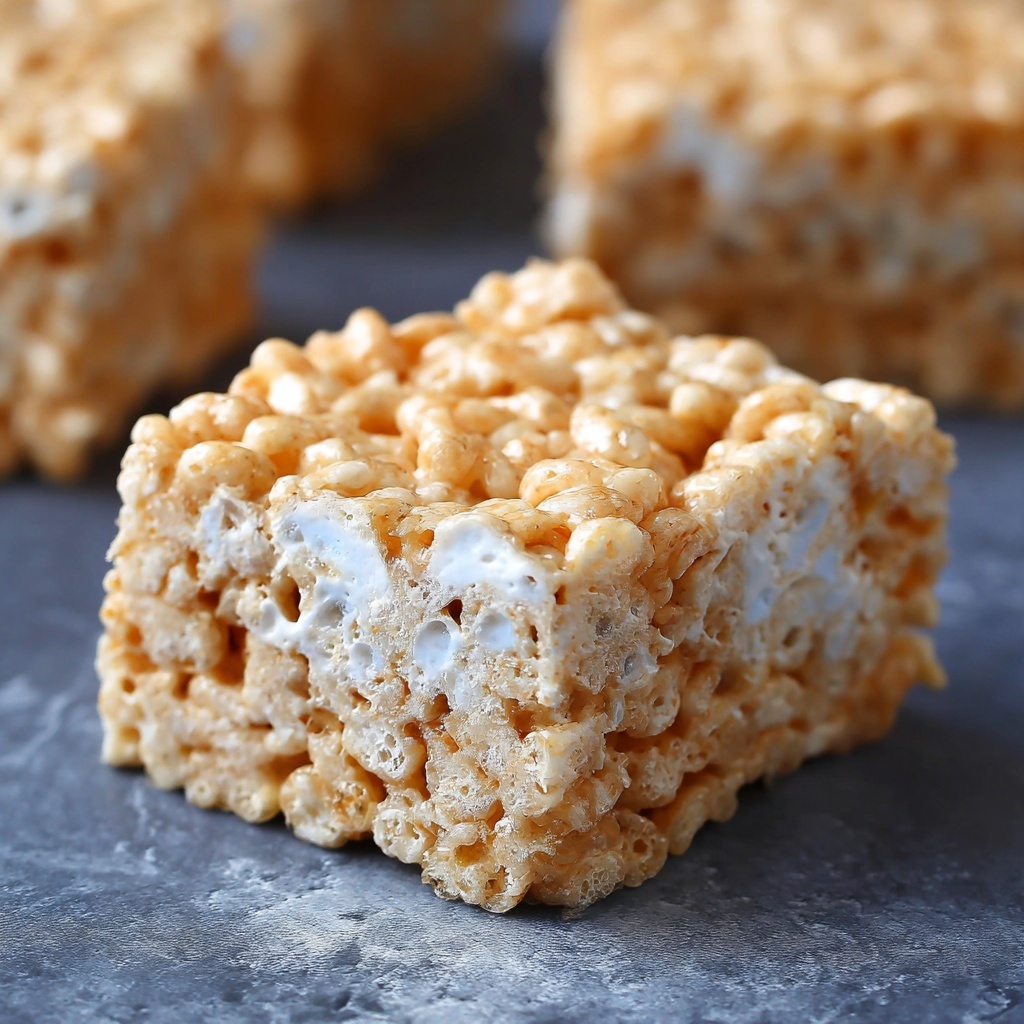
If you’ve ever craved a nostalgic, sweet, and crunchy treat that comes together in minutes, you are going to fall head over heels for this Classic Rice Krispie Treats Recipe. Nothing beats the buttery marshmallow coating enveloping crispy rice cereal that creates the perfect texture combination. Whether it’s for a quick snack, a party delight, or a comforting dessert, these treats deliver that simple happiness we all look for in a homemade snack. Let me take you through how to whip up this beloved no-bake classic that never fails to bring smiles!
Ingredients You’ll Need
The magic behind this Classic Rice Krispie Treats Recipe lies in a handful of straightforward ingredients, each playing a vital role in the final flavor and texture. They are easy to find and come together effortlessly to create that iconic chewy-crispy bite everyone loves.
- 6 cups crispy rice cereal: Provides the crunchy base and light texture that defines the treat.
- 10 ounces mini marshmallows: Melts into a smooth, sweet binder that delivers the gooey, soft layer.
- 3 tablespoons unsalted butter: Adds richness and helps the marshmallows melt evenly without scorching.
- 1 teaspoon vanilla extract: Brings a delicate warmth and depth to the sweet mixture.
- Pinch of salt: Balances sweetness and enhances all the flavors for a more rounded taste.
How to Make Classic Rice Krispie Treats Recipe
Step 1: Melt the Butter
Start by gently melting the unsalted butter over low heat in a large pot. This slow, careful melting ensures the butter doesn’t burn and creates the perfect base in which the marshmallows will melt smoothly. Patience here makes all the difference for that silky finish!
Step 2: Add Marshmallows
Once the butter is melted, add the mini marshmallows to the pot. Stir continuously as they melt into a thick, luscious mass. Keep the heat gentle and your stir consistent for an even melt with no lumps, turning it into a marshmallow sauce that’s ready to bind your crispy cereal perfectly.
Step 3: Stir in Vanilla and Salt
After removing the pot from heat, stir in the vanilla extract and a pinch of salt. The vanilla adds a lovely aromatic touch that elevates the flavor, while the salt keeps the sweetness in check and makes everything pop.
Step 4: Combine with Crispy Rice Cereal
Pour the crispy rice cereal into the marshmallow mixture gently, folding it in with a spatula until every crunchy piece is coated in that sticky, buttery marshmallow glaze. This is where your Classic Rice Krispie Treats Recipe really begins to take shape.
Step 5: Press Into a Baking Dish
Transfer the mixture into a baking dish lined with parchment paper or lightly greased. Lightly grease your hands or spatula to press the mixture evenly without compacting it too firmly—press just enough so it holds together but stays airy and delightfully chewy.
Step 6: Let Cool and Cut
Allow the treats to cool completely at room temperature until set. Once firm, slice into squares, and you’re ready to enjoy bite-sized pieces of sweet, crispy magic.
How to Serve Classic Rice Krispie Treats Recipe
Garnishes
To add a little extra flair, sprinkle chopped nuts, colorful sprinkles, or even mini chocolate chips on top right after pressing the mixture into the pan. These simple touches can make your treats look festive and add an extra textural contrast.
Side Dishes
Serve these treats alongside a cold glass of milk, a cup of hot cocoa, or a tangy fruit salad to balance their sweetness. They also pair perfectly with vanilla ice cream for a delightful indulgence.
Creative Ways to Present
Try cutting your Classic Rice Krispie Treats Recipe into fun shapes using cookie cutters for parties or kid-friendly snacks. Drizzle melted chocolate on top or sandwich them with peanut butter for an irresistible twist that’s sure to impress family and friends.
Make Ahead and Storage
Storing Leftovers
Store any leftover treats in an airtight container at room temperature. They will stay fresh and chewy for up to 3 days, making them an easy grab-and-go snack for busy days or unexpected guests.
Freezing
You can freeze your Classic Rice Krispie Treats Recipe by wrapping the squares tightly in plastic wrap and placing them in a freezer-safe bag. They keep well for up to a month and can be thawed at room temperature in about an hour.
Reheating
If you prefer them soft and warm, gently microwave the treats for 10 to 15 seconds. This short blast of heat brings back that melty marshmallow goodness without losing the crispy texture.
FAQs
Can I use regular marshmallows instead of mini marshmallows?
Absolutely! Regular marshmallows work just as well; you might need to chop them into smaller pieces to melt evenly, but the taste and texture will still be fantastic.
What can I add to change up the classic flavor?
Try stirring in chocolate chips, peanut butter, or sprinkle chopped nuts for added crunch. You can also experiment with different extracts like almond or coconut for a unique twist.
Is there a way to make these treats gluten-free?
Yes, simply use a gluten-free crispy rice cereal to keep your treats safe for those avoiding gluten while maintaining that classic crunch.
How do I prevent the marshmallow mixture from sticking?
Lightly greasing your hands, spatula, and baking dish with butter or non-stick spray helps prevent sticking and makes handling much easier during preparation.
Can these treats be made vegan?
Yes! Substitute the butter with a plant-based alternative and use vegan marshmallows. Just ensure that all ingredients are labeled vegan for the best results.
Final Thoughts
Making the Classic Rice Krispie Treats Recipe is like rediscovering a timeless favorite that brings pure joy with every bite. It’s quick, simple, and endlessly customizable, which makes it one of the most comforting and satisfying snacks in your repertoire. Give this recipe a try—you’ll wonder how you ever lived without it!
Print
Classic Rice Krispie Treats Recipe
- Prep Time: 10 minutes
- Cook Time: 5 minutes
- Total Time: 15 minutes
- Yield: 12 squares
- Category: Dessert
- Method: No-Cook
- Cuisine: American
- Diet: Vegetarian
Description
Classic Rice Krispie Treats are a delightful no-bake dessert made by combining crispy rice cereal with melted mini marshmallows and butter, enhanced with a touch of vanilla and salt. These easy-to-make, sweet and chewy bars are perfect for snacks, parties, or anytime a quick treat is needed.
Ingredients
Main Ingredients
- 6 cups crispy rice cereal
- 10 ounces mini marshmallows
- 3 tablespoons unsalted butter
- 1 teaspoon vanilla extract
- Pinch of salt
Instructions
- Melt Butter: In a large pot, melt the unsalted butter over low heat, ensuring it does not brown or burn for a smooth base.
- Melt Marshmallows: Add the mini marshmallows to the melted butter and stir continuously until completely melted and smooth, creating a sticky syrup.
- Add Flavoring: Remove the pot from heat and stir in the vanilla extract and a pinch of salt to enhance the flavor.
- Combine Cereal: Add the crispy rice cereal to the marshmallow mixture and gently fold it until the cereal is evenly coated without crushing it.
- Press Mixture: Transfer the coated cereal mixture to a greased or parchment-lined baking dish and press it down evenly using lightly greased hands or a spatula, avoiding compacting too firmly.
- Set and Serve: Let the mixture cool at room temperature until fully set, then cut into 12 squares and serve.
Notes
- Lightly grease your hands or spatula to prevent sticking when pressing the mixture into the pan.
- For variation, mix in chocolate chips or drizzle melted chocolate on top before the mixture sets.
- Store the treats in an airtight container at room temperature for up to 3 days to keep them fresh and chewy.


