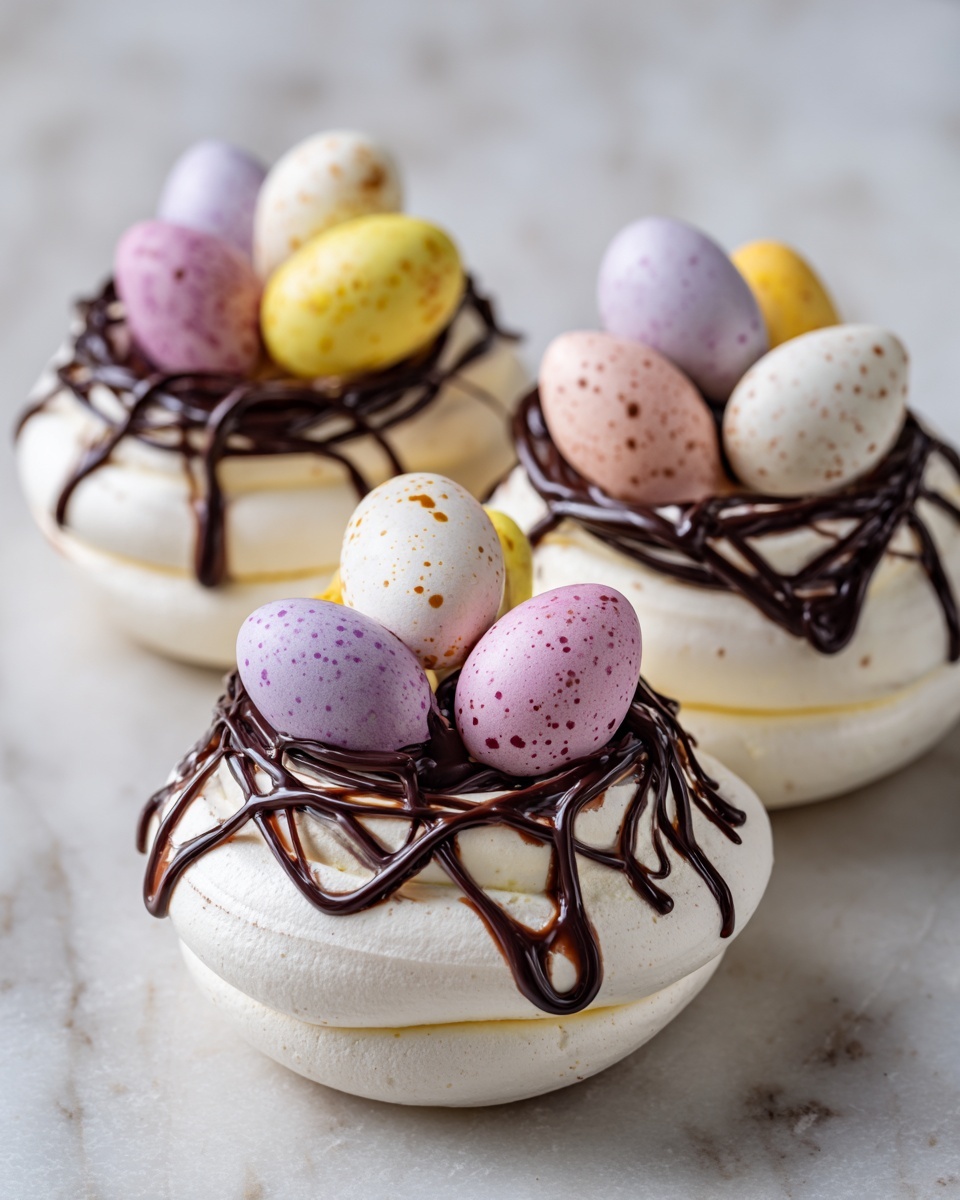
If you’re looking for a delightful treat that captures the festive spirit of Easter and satisfies your sweet tooth, this Chocolate Meringue Easter Nests Recipe is an absolute must-try. Light, airy, and beautifully chocolaty, these delicate meringue nests hold a luscious cream filling and are topped with colorful candy eggs that make them as charming as they are delicious. Whether you’re hosting an Easter gathering or simply want a whimsical dessert to brighten your day, these nests will bring joy with every bite and a smile to everyone’s face.
Ingredients You’ll Need
This Chocolate Meringue Easter Nests Recipe calls for simple, straightforward ingredients, but each one plays a key role in creating the perfect balance of texture and flavor. From the stiff, glossy meringue to the rich cocoa and creamy filling, every ingredient is essential to the nest’s irresistible charm.
- 4 large egg whites (room temperature): The foundation for a smooth and airy meringue that holds its shape beautifully.
- 1 cup granulated sugar: Adds sweetness and helps stabilize the meringue for a glossy finish.
- ¼ teaspoon cream of tartar: A small addition that ensures the egg whites whip up to stiff peaks effortlessly.
- 2 tablespoons unsweetened cocoa powder (sifted): Brings rich chocolate flavor without moisture, keeping the texture crisp.
- ½ teaspoon vanilla extract: Enhances the overall taste with warm, subtle fragrance.
- Pinch of salt: Balances sweetness and enhances all the flavors.
- 1 cup whipped cream or chocolate ganache: For filling the nests with luscious creaminess.
- Candy eggs or chocolate eggs: The festive topping that makes these nests perfect for Easter.
- Shredded coconut or sprinkles (optional): Adds a fun and decorative touch with extra texture and color.
How to Make Chocolate Meringue Easter Nests Recipe
Step 1: Prepare and Preheat
Start by preheating your oven to 225°F and lining a baking sheet with parchment paper. This low temperature will help the meringues dry out slowly, giving them that perfect crisp shell and tender interior. The parchment ensures your nests won’t stick when baking.
Step 2: Whip the Egg Whites
In a clean, dry mixing bowl, beat the egg whites with a pinch of salt and cream of tartar on medium speed until soft peaks form. This stage is where the magic begins—the meringue takes shape right here. Slowly add the sugar, one tablespoon at a time, while increasing the speed to high. Continue beating until the peaks are stiff and glossy, and the sugar has completely dissolved. This glossy texture is a sign you’ve nailed the meringue.
Step 3: Fold in Cocoa and Vanilla
Gently fold in the sifted cocoa powder and vanilla extract with a spatula. Be careful not to deflate the mixture—light, even folding is the way to keep that airy texture, while the cocoa integrates beautiful chocolate flavor.
Step 4: Shape the Nests
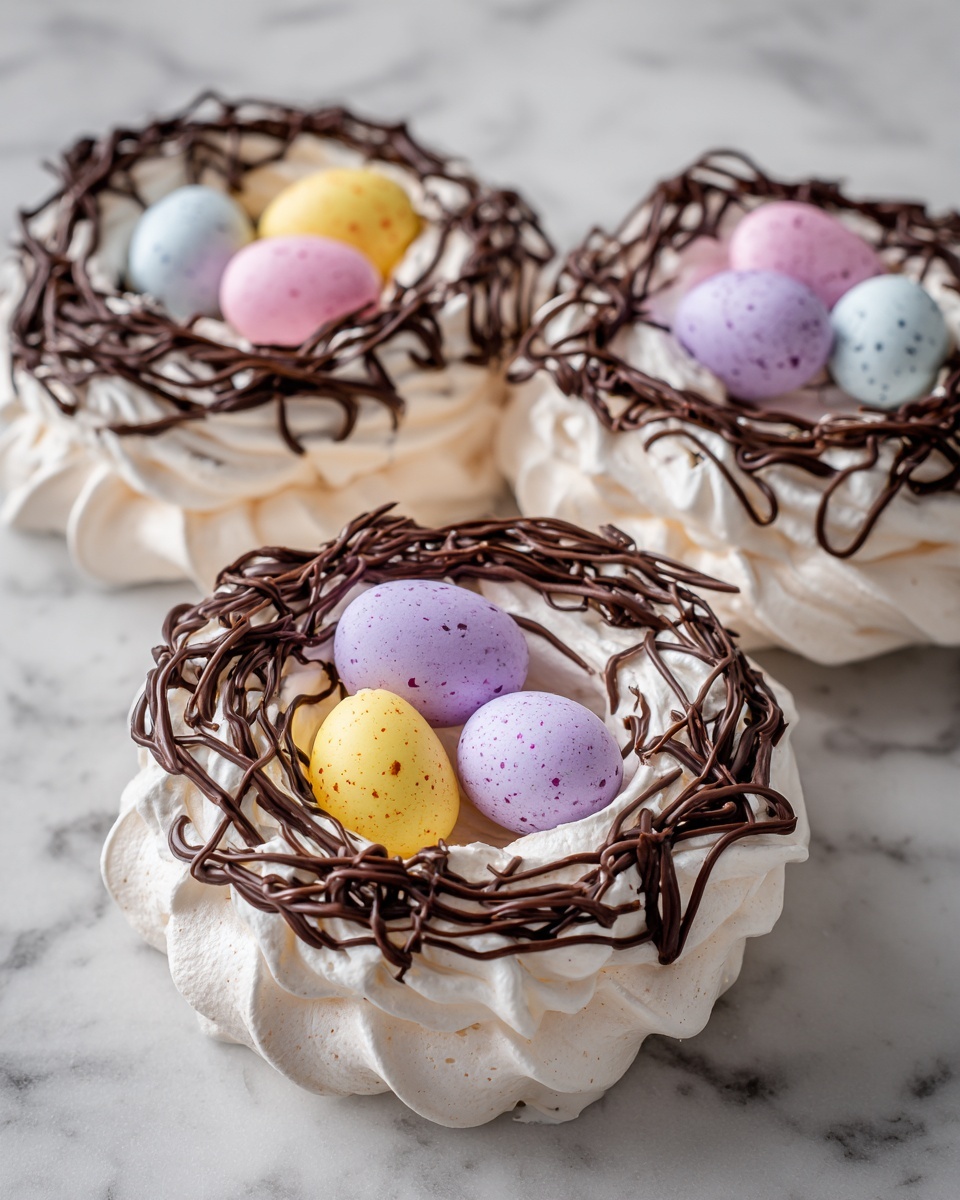
Using a spoon or piping bag, shape the meringue into 8 to 10 nest forms on your baking sheet. Make sure to create a slight well in the center of each—that’s where you’ll fill your nests later. The size can be a bit generous so there’s plenty of room for the creamy filling and colorful eggs.
Step 5: Bake and Dry
Bake the nests for 1 hour, then turn off the oven but leave the meringues inside with the door closed for another hour to dry out completely. This step is crucial to achieve the ideal texture: crisp on the outside and a bit chewy inside, just like a cloud of chocolate sweetness.
Step 6: Fill and Decorate
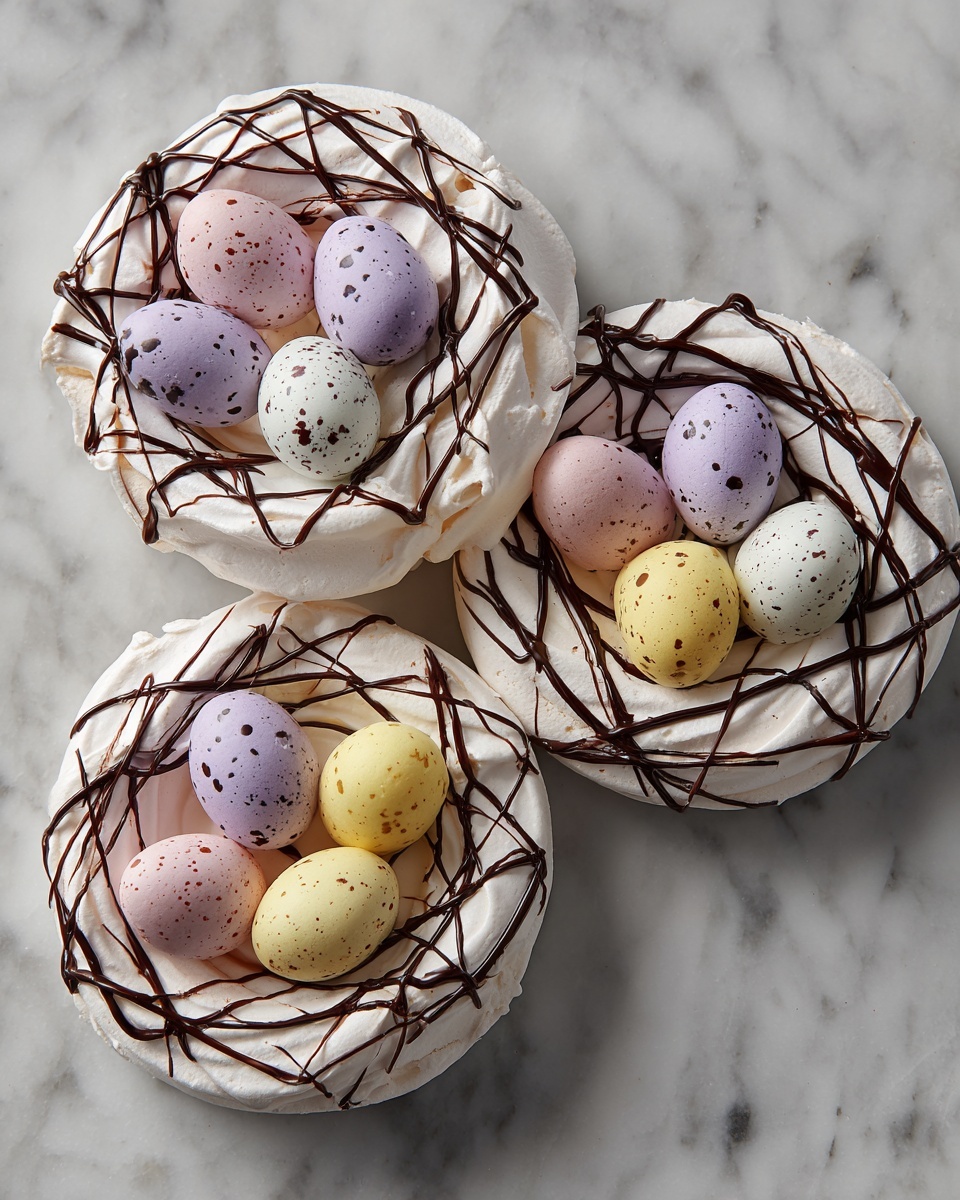
Once cooled, fill each nest with whipped cream or chocolate ganache, topping with your favorite candy eggs. If you want to add a festive flare, sprinkle shredded coconut or colorful sprinkles around the edges for extra fun and texture.
How to Serve Chocolate Meringue Easter Nests Recipe
Garnishes
The presentation of these nests is almost as delightful as the flavor. Fresh berries, edible flowers, or a drizzle of melted chocolate add a gourmet touch. A light dusting of powdered sugar can provide that fresh, snowy look that perfectly complements the Easter vibe.
Side Dishes
Serve these nests alongside a light fruit salad or a refreshing lemonade for a balance of sweet and tart. They also pair beautifully with coffee or tea, making them an ideal after-dinner treat during springtime gatherings.
Creative Ways to Present
Try serving the nests in small individual dessert cups or on decorative pastel plates to enhance the Easter theme. Another fun idea is to nestle them in a bed of shredded colorful paper for a playful centerpiece that’s ready to be devoured.
Make Ahead and Storage
Storing Leftovers
Keep undecorated meringue nests in an airtight container at room temperature for up to 3 days to maintain their crispness. Avoid filling them until just before you’re ready to serve to prevent sogginess.
Freezing
These meringue nests freeze well if stored carefully in a rigid container to protect them from cracking. Freeze undecorated nests for up to a month and thaw at room temperature before filling and decorating.
Reheating
Since meringues are best enjoyed crisp, it’s better not to reheat them once baked. If they soften, a quick 5-10 minute blast in a low oven at 200°F can help refresh the texture, but avoid overheating to prevent browning or melting.
FAQs
Can I make these nests without cocoa powder?
Absolutely! For a classic white meringue nest, simply omit the cocoa powder. The texture and sweetness will remain the same, and you can still decorate with colorful Easter candies for a festive look.
What’s the best way to achieve stiff peaks when beating egg whites?
Ensure your bowl and beaters are clean and free of any grease, and use room temperature egg whites. Adding cream of tartar helps stabilize the whites, and gently increasing the speed while gradually adding sugar will give you strong, glossy peaks.
Can I substitute the whipped cream filling with something else?
Sure! Chocolate ganache is a fantastic alternative if you want something richer. You could also try mascarpone mixed with a bit of powdered sugar and vanilla for a creamier texture.
Is this recipe gluten-free?
Yes, this entire Chocolate Meringue Easter Nests Recipe is naturally gluten-free, making it a perfect dessert choice for those avoiding gluten without sacrificing flavor or fun.
How do I prevent the candy eggs from making the nests soggy?
Place the candy eggs just before serving to keep the meringue crisp. If you fill the nests hours ahead, store the candy eggs separately and add them at the last minute.
Final Thoughts
There’s something truly magical about this Chocolate Meringue Easter Nests Recipe—it’s such a joyful way to celebrate Easter with a dessert that’s as beautiful as it is delicious. Light, chocolatey, and wonderfully festive, these nests will become a treasured treat for your family and friends. Give them a try for your next holiday gathering and watch everyone’s faces light up with delight!
Print
Chocolate Meringue Easter Nests Recipe
- Prep Time: 20 minutes
- Cook Time: 1 hour
- Total Time: 2 hours (including cooling and drying time)
- Yield: 10 nests
- Category: Dessert
- Method: Baking
- Cuisine: American
- Diet: Gluten Free, Vegetarian
Description
Chocolate Meringue Easter Nests are a delicate and festive dessert perfect for spring celebrations. These light and airy cocoa-flavored meringue nests are crisp on the outside and soft inside, filled with whipped cream or chocolate ganache and decorated with colorful candy eggs for a delightful and visually appealing treat.
Ingredients
Meringue
- 4 large egg whites (room temperature)
- 1 cup granulated sugar
- ¼ teaspoon cream of tartar
- 2 tablespoons unsweetened cocoa powder (sifted)
- ½ teaspoon vanilla extract
- Pinch of salt
Filling and Decoration
- 1 cup whipped cream or chocolate ganache
- Candy eggs or chocolate eggs
- Shredded coconut or sprinkles (optional)
Instructions
- Preheat the oven: Preheat your oven to 225°F (about 107°C) and prepare a baking sheet by lining it with parchment paper to prevent sticking.
- Beat the egg whites: In a clean mixing bowl, beat the egg whites with a pinch of salt and cream of tartar on medium speed until soft peaks form. Gradually add the sugar, one tablespoon at a time, while beating on high speed until stiff and glossy peaks develop and the sugar is completely dissolved.
- Incorporate cocoa and vanilla: Gently fold the sifted cocoa powder and vanilla extract into the meringue mixture until just combined, being careful not to deflate the airiness.
- Shape the nests: Using a spoon or piping bag, form 8 to 10 nest shapes on the prepared baking sheet, making sure to leave a slight well in the center of each to hold the filling later.
- Bake the meringues: Place the baking sheet in the oven and bake for 1 hour. After baking, turn off the oven and let the meringues remain inside for an additional hour to ensure they dry out completely and develop the perfect crisp texture.
- Fill and decorate: Once the meringue nests are completely cooled, fill the centers with whipped cream or chocolate ganache. Garnish with candy eggs or chocolate eggs and optionally sprinkle shredded coconut or colorful sprinkles over the top for an extra festive touch.
Notes
- Store undecorated meringue nests in an airtight container at room temperature for up to 3 days to maintain crispness.
- Fill the nests just before serving to avoid moisture softening the meringue.
- For a chocolate ganache filling, use equal parts heavy cream and chopped chocolate, melted and mixed until smooth.
- You can pipe the meringue using a star tip for a more decorative nest shape.
- Ensure egg whites are at room temperature for better volume when whipping.


