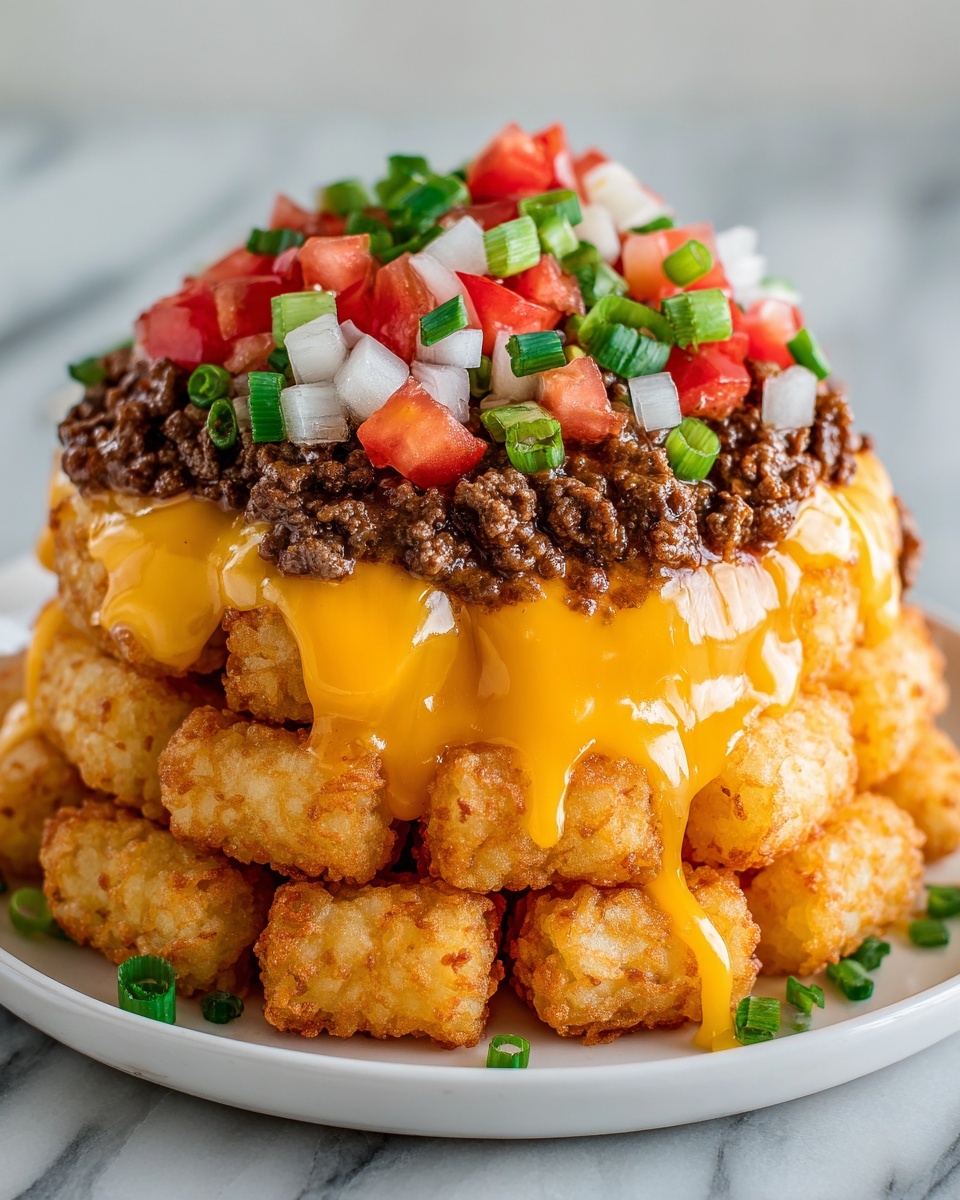
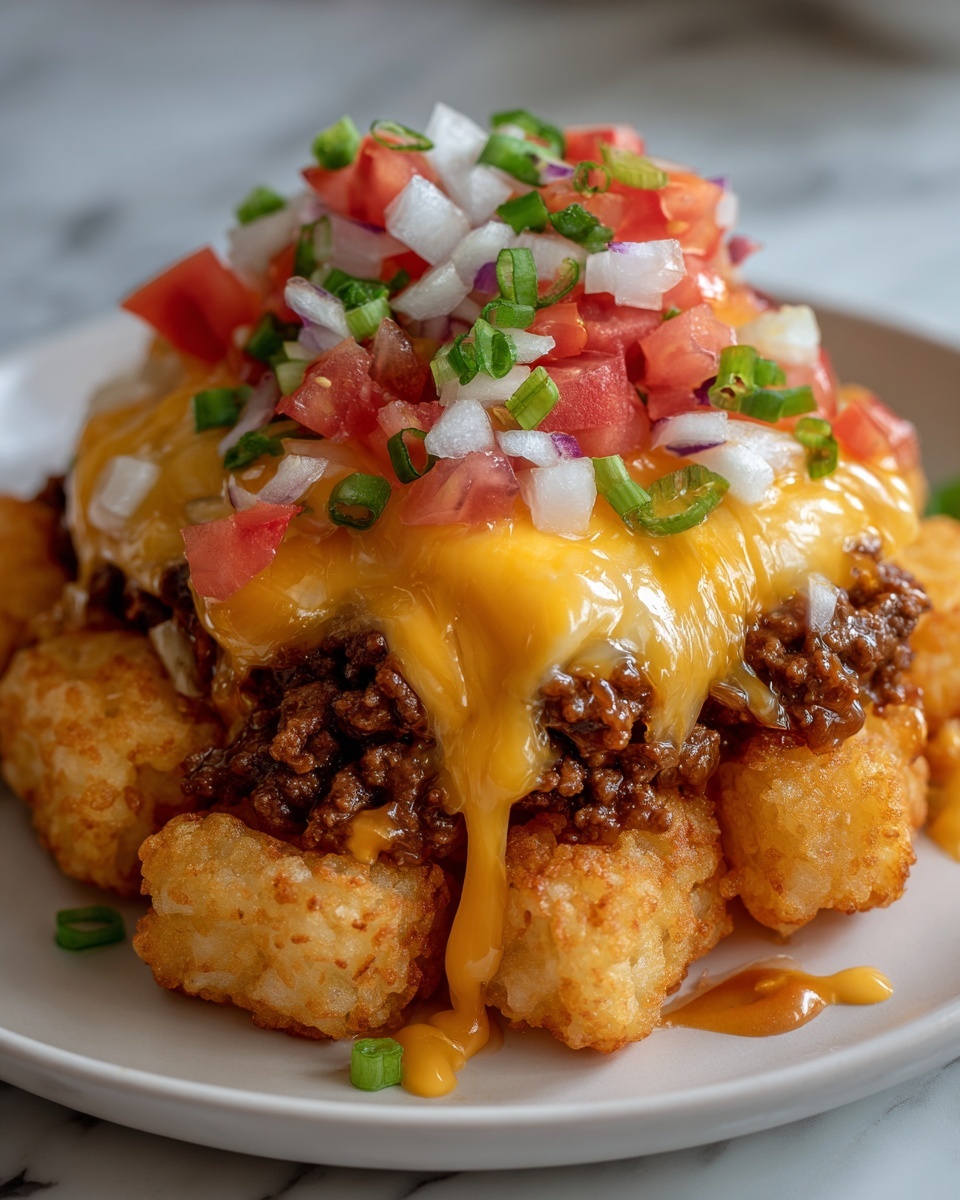
If you’re craving an unforgettable snack that combines the comfort of a classic cheeseburger with the fun and crunch of tater tots, then the Cheeseburger Stuffed Tater Tot Cones with Colossal Cheese Volcano Recipe is about to become your new favorite obsession. Imagine crispy, golden tater tot shells hugging juicy, seasoned ground beef and sweet onions, all topped with a molten cascade of cheddar cheese. This dish is a magical blend of textures and flavors that will excite your taste buds and impress anyone lucky enough to share them with you. Whether it’s game day or just a cozy night in, these cones promise a delicious experience that’s as playful as it is satisfying.
Ingredients You’ll Need
The beauty of this recipe lies in its simplicity and the way each ingredient shines on its own while coming together to create something spectacular. Every element is essential, whether it’s the savory depth of the ground beef or the crispy texture of the tater tots, which act as the perfect vessel. Here’s what you’ll want to gather before diving in:
- 1 lb ground beef: The hearty foundation, bringing juicy flavor and protein to this dish.
- 1 small onion, finely chopped: Adds sweetness and a gentle bite to balance the beef.
- 1 teaspoon garlic powder: A subtle punch of aromatic depth without overwhelming the palate.
- 1 teaspoon smoked paprika: This smoky spice mellows and enhances the meat’s flavor beautifully.
- Salt and pepper to taste: Simple but crucial to season and elevate every bite.
- 2 cups frozen tater tots: The crispy, golden shell that makes the “cone” both fun and deliciously crunchy.
- 2 cups shredded cheddar cheese: The dramatic ‘colossal cheese volcano’ topping that melts into ooey-gooey goodness.
- 1/2 cup pickles, chopped (optional): A bright, tangy crunch that adds freshness if you like a little zip.
- Ketchup and mustard for serving: Classic dipping sauces that bring the cheeseburger vibe to life.
- Cooking spray or oil for greasing: Ensures your cones come out perfectly crispy without sticking.
How to Make Cheeseburger Stuffed Tater Tot Cones with Colossal Cheese Volcano Recipe
Step 1: Prep Your Tater Tot Cones
Start by preheating your oven to a toasty 425°F (220°C). To get that iconic cone shape, grease your cone-shaped mold well, or craft cones using sturdy aluminum foil. Then, gently press frozen tater tots around each cone, making sure they form a tight, even shell that will get beautifully golden and crispy in the oven. The secret here is being gentle but thorough so the tots stick together during baking.
Step 2: Bake the Tater Tot Shells
Pop those prepared cones onto a baking sheet and slide them into the oven. Bake for 25 to 30 minutes, turning them halfway through so each side crisps up perfectly. When they come out, these golden cones should be sturdy enough to hold your filling without falling apart—a crucial step that sets the stage for what’s to come.
Step 3: Cook the Cheeseburger Filling
While your tot cones bake, heat a skillet over medium heat and add the ground beef and chopped onions. Cook until browned and fragrant, breaking the meat up as it cooks. Season with garlic powder, smoked paprika, salt, and pepper to create that deliciously savory cheeseburger flavor. Once cooked, drain any excess fat to keep things neat and ready for stuffing.
Step 4: Assemble the Filled Cones
Carefully remove the tater tot cones from their molds and fill each one generously with your freshly cooked cheeseburger mixture. If you’re a pickle fan, now’s the time to sprinkle in those chopped pickles for an exciting burst of tangy crunch.
Step 5: Create the Colossal Cheese Volcano
Crowning glory: heap a generous mound of shredded cheddar cheese on top of each stuffed cone. This is the ‘colossal cheese volcano’ moment that makes the recipe stand out—trust us, the cheese bubbling and melting over the top is pure magic.
Step 6: Melt the Cheese to Perfection
Return the stuffed cones to the oven for another 5 to 7 minutes, allowing the cheddar to melt into a bubbly, golden eruption. When the cheese is perfectly melted and just starting to brown in spots, your Cheeseburger Stuffed Tater Tot Cones with Colossal Cheese Volcano Recipe are ready to wow.
How to Serve Cheeseburger Stuffed Tater Tot Cones with Colossal Cheese Volcano Recipe

Garnishes
To elevate these cones beyond delicious, add fresh garnishes like chopped green onions, a sprinkle of crispy bacon bits, or even a handful of shredded lettuce on the side for a fresh crunch contrast. These additions add layers of texture and a pop of color that makes the dish irresistibly vibrant.
Side Dishes
Pair your cones with simple, crowd-pleasing sides such as a crisp garden salad, tangy coleslaw, or crunchy dill pickle spears. These sides provide balance and freshness, complementing the richness of the cheesy, meat-filled cones perfectly.
Creative Ways to Present
For parties or family dinners, serve your cones upright in a sturdy container—like a mason jar or custom-made stand—so they don’t tip over, showing off that magnificent cheese volcano. You could also line a tray with parchment paper and have fun arranging them like little edible cones of joy, inviting everyone to dig in.
Make Ahead and Storage
Storing Leftovers
If you find yourself with leftovers (which can happen if you’re generous with the cheese volcano), store them in an airtight container in the fridge for up to 2 days. Keep the cones upright if possible to maintain the shape and minimize sogginess.
Freezing
You can freeze the cheeseburger filling separately in a freezer-safe bag for up to 3 months, but the tater tot cones are best enjoyed fresh or refrigerated because freezing may impact their crispness.
Reheating
Reheat leftovers in an oven or toaster oven at 350°F (175°C) for 10 to 15 minutes to restore crispiness and melt the cheese again. Avoid microwaving if you want to preserve the cones’ delightful crunch and the glorious cheese volcano effect.
FAQs
Can I use ground turkey or chicken instead of beef?
Absolutely! Ground turkey or chicken can be a great leaner alternative and will still taste fantastic when seasoned properly. Just keep an eye on cooking times as leaner meats can dry out faster.
Is there a vegetarian version of this recipe?
Yes! Try substituting the ground beef with a plant-based crumbled burger, cooked mushrooms, or a spiced lentil mixture. The tater tot cones and cheese volcano remain the stars of the show.
Can I prepare these cones for a party ahead of time?
You can assemble the cones and make the filling the day before, then bake and melt the cheese just before serving for the freshest, crispiest results.
What type of cheese works best for the cheese volcano?
Sharp cheddar is ideal for its melting quality and bold flavor, but feel free to experiment with Monterey Jack, Colby, or even a blend of cheeses for unique twists.
How can I make the tater tot cone shells extra crispy?
Ensure you grease the cone molds well and bake at the recommended high temperature, turning midway through. Avoid overcrowding the oven so air circulates freely, producing optimum crispiness.
Final Thoughts
There’s something undeniably joyful about the way the Cheeseburger Stuffed Tater Tot Cones with Colossal Cheese Volcano Recipe brings together playful presentation and bold, comforting flavors. Whether you’re entertaining friends or spoiling your family, this recipe is a guaranteed hit that makes snack time feel like a celebration. Give it a try, and prepare to fall in love bite after cheesy, crunchy bite!
Print
Cheeseburger Stuffed Tater Tot Cones with Colossal Cheese Volcano Recipe
- Prep Time: 15 minutes
- Cook Time: 35 minutes
- Total Time: 50 minutes
- Yield: 6 servings
- Category: Appetizer
- Method: Baking
- Cuisine: American
Description
These Cheeseburger Stuffed Tater Tot Cones with a Colossal Cheese Volcano are a fun and delicious twist on classic cheeseburgers. Crispy baked tater tot shells are filled with seasoned ground beef and onions, topped with melty cheddar cheese for a gooey, irresistible finish. Perfect as a party appetizer or a creative family dinner, served with ketchup and mustard for dipping.
Ingredients
For the Tater Tot Shells
- 2 cups frozen tater tots
- Cooking spray or oil for greasing
For the Cheeseburger Filling
- 1 lb ground beef
- 1 small onion, finely chopped
- 1 teaspoon garlic powder
- 1 teaspoon smoked paprika
- Salt and pepper to taste
- 1/2 cup pickles, chopped (optional)
For Serving
- 2 cups shredded cheddar cheese
- Ketchup for serving
- Mustard for serving
Instructions
- Preheat and Prepare Cones: Preheat your oven to 425°F (220°C). Grease cone-shaped molds or fashion cones out of aluminum foil, ensuring they are sturdy for shaping the tater tot shells.
- Shape Tater Tot Shells: Place frozen tater tots around each cone, pressing gently to create an even shell that fully covers the mold. Take care to form the tater tots tightly for a solid structure.
- Bake Tater Tot Shells: Bake the tater tot cones on a baking sheet for 25-30 minutes until they are golden brown and crispy, turning them halfway through to ensure even cooking on all sides.
- Cook Cheeseburger Filling: While the shells bake, cook the ground beef and finely chopped onion in a skillet over medium heat, stirring occasionally. Season with garlic powder, smoked paprika, salt, and pepper to taste. Once cooked through and browned, drain any excess fat.
- Fill the Tater Tot Cones: Carefully remove the crispy tater tot shells from the oven and gently slide them off the molds. Fill each cone with the cooked cheeseburger mixture. Add chopped pickles if using.
- Add the Cheese Volcano: Generously top each stuffed cone with shredded cheddar cheese to create the cheesy ‘volcano’ effect, making sure the cheese covers the filling completely.
- Melt the Cheese: Return the filled cones to the oven and bake for an additional 5-7 minutes, or until the cheddar cheese is melted, bubbly, and slightly golden on top.
- Serve: Serve the stuffed tater tot cones hot with ketchup and mustard on the side for dipping.
Notes
- Use aluminum foil cones if you don’t have a mold, but be sure they are sturdy to maintain the cone shape.
- Make sure to press the tater tots firmly to avoid gaps and to create a solid shell.
- Feel free to customize the filling by adding diced tomatoes or cooked bacon bits for extra flavor.
- For a spicier version, add a pinch of cayenne pepper or chili powder to the beef mixture.
- Leftovers can be reheated in the oven for best crispiness; avoid microwaving to prevent sogginess.


