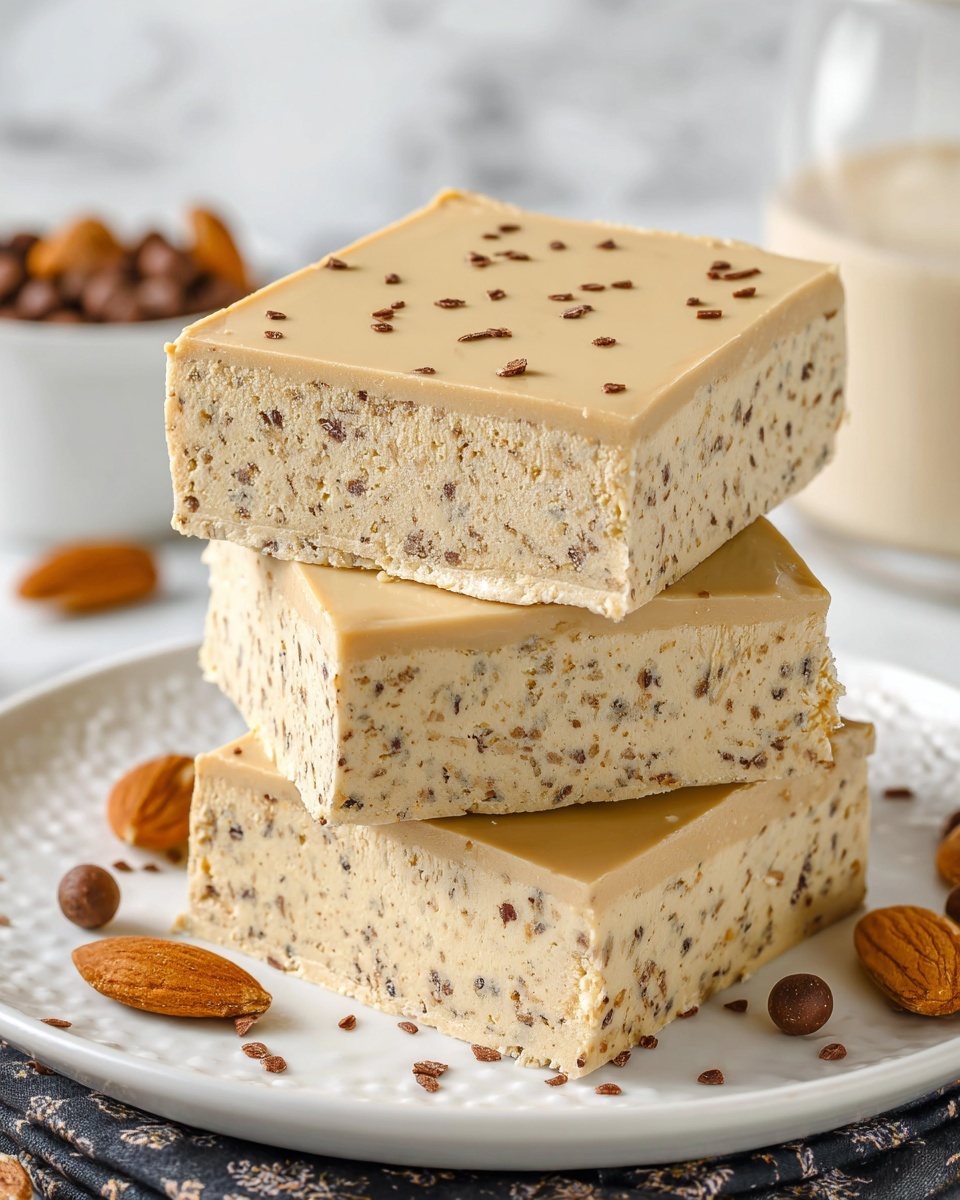
If you are craving a dessert that perfectly blends crunchy, gooey, and chocolatey layers, you are in for a treat with this Butterfinger Caramel Crunch Bars Recipe. These bars combine the irresistible crunch of crushed pretzels, the rich sweetness of caramel, the creamy warmth of peanut butter and chocolate, and the unmistakable snap of Butterfinger candy pieces. Whether you want an impressive treat to bring to a party or just a decadent snack to satisfy your sweet tooth, these bars are guaranteed to hit the spot with every bite bursting with texture and flavor.
Ingredients You’ll Need
Gathering these simple but essential ingredients sets you up for the perfect balance of salty, sweet, creamy, and crunchy that makes this dessert shine. Each component plays a key role in building layers that complement one another beautifully.
- 2 cups crushed pretzels: Adds a salty crunch that forms a sturdy and tasty crust.
- 1 cup unsalted butter (melted): Binds the crust ingredients and adds richness.
- 3/4 cup granulated sugar: Sweetens and helps caramelize the base slightly during baking.
- 1 cup creamy peanut butter: Blends with chocolate for a smooth, nutty top layer.
- 1 (11 oz) bag caramel bits or 1 1/2 cups soft caramels: Creates the gooey, luscious caramel layer.
- 2 tablespoons heavy cream: Adds silkiness to the caramel for perfect spreading consistency.
- 1 1/2 cups semi-sweet chocolate chips: Melts into a rich and decadent topping with the peanut butter.
- 4 Butterfinger candy bars (chopped): The star ingredient that adds signature crispy crunch and flavor on top.
How to Make Butterfinger Caramel Crunch Bars Recipe
Step 1: Prepare the Crunchy Pretzel Crust
Start by preheating your oven to 350°F (175°C) and lining a 9×13-inch baking dish with parchment paper for easy removal. In a medium bowl, mix the crushed pretzels, melted butter, and granulated sugar together until well combined. Press this buttery, salty mixture firmly into the bottom of your pan to create an even crust layer. Bake for exactly 10 minutes to set and slightly caramelize the crust, then remove it to cool just a bit before adding the next layers.
Step 2: Make the Gooey Caramel Layer
While the crust cools, melt the caramel bits and heavy cream together over low heat in a saucepan, stirring occasionally until the mixture is perfectly smooth and pourable. This step is key for getting that rich, silky caramel layer that will soak into the pretzel base just enough to meld all those textures together. Pour the caramel evenly over your baked crust and spread gently to cover every inch.
Step 3: Prepare the Chocolate-Peanut Butter Topping
Next, combine the peanut butter and semi-sweet chocolate chips in a microwave-safe bowl. Heat in 30-second intervals, stirring in between until you achieve a glossy, smooth mixture. This luscious topping brings creamy indulgence and chocolatey goodness that perfectly balances the salty caramel and crunchy base.
Step 4: Assemble and Chill
Pour the peanut butter and chocolate mixture layer over the caramel and spread to cover it entirely. Immediately sprinkle the chopped Butterfinger candy bars evenly over the top and press them down lightly to embed. Refrigerate the bars for at least 2 hours until they set completely and become firm enough to cut into generous pieces.
How to Serve Butterfinger Caramel Crunch Bars Recipe
Garnishes
For an extra touch of flair and flavor, you can dust the top with a sprinkle of flaky sea salt to enhance that salty-sweet contrast or add a drizzle of melted white chocolate for a pretty swirl that invites indulgence. Chopped peanuts or crushed Butterfinger bits also make fantastic crunchy toppings to amp up texture.
Side Dishes
If serving these delightfully rich bars at a party or dessert table, pair them with simple sides like fresh fruit slices or a scoop of vanilla ice cream to balance their decadence. A hot cup of coffee or milk also complements their sweetness perfectly, creating a nostalgic and satisfying snack combo.
Creative Ways to Present
Cut these bars into bite-sized squares for easy finger food or larger rectangles for a more generous dessert portion. You can layer them in pretty glass jars for gifts or package them individually wrapped for on-the-go treats. If you want to get festive, try adding colorful sprinkles on top before chilling or presenting them stacked with parchment paper layers in a decorative box.
Make Ahead and Storage
Storing Leftovers
Leftover Butterfinger Caramel Crunch Bars Recipe bars keep beautifully in an airtight container in the refrigerator for up to 5 days. Keep them chilled to maintain their structure and freshness—bringing them to room temperature for 10-15 minutes before serving ensures the caramel and chocolate soften up perfectly.
Freezing
You can freeze these bars for longer storage by wrapping them tightly in plastic wrap and placing them in a freezer-safe container or zip-top bag. Frozen bars last up to 2 months and can be thawed overnight in the fridge. This makes them a great make-ahead dessert option for busy days or special occasions.
Reheating
Since these bars are best served cold or at room temperature to keep their texture intact, reheating is generally not necessary. However, if you prefer a slightly melted effect, warm a single bar in the microwave for 10-15 seconds on low power, but be careful not to overheat, or the layers may become too gooey and lose their crunch.
FAQs
Can I substitute the pretzel crust with something else?
Absolutely! While the saltiness of pretzels is perfect here, you can substitute crushed graham crackers or cornflakes for a different texture and flavor profile. Each alternative will bring its own delicious twist to the bars.
What is the best way to chop Butterfinger candy bars?
To make chopping easier, place the Butterfinger bars in the freezer for about 10-15 minutes beforehand. This firms them up and allows you to cut them into uniform pieces without too much crumbling.
Can I use chunky peanut butter instead of creamy?
Yes! Chunky peanut butter will add an extra nutty texture to the chocolate topping layer. Just make sure it melts smoothly and blends well with the chocolate chips for even spreading.
Is this recipe suitable for vegetarians?
Yes, this Butterfinger Caramel Crunch Bars Recipe is vegetarian as it contains no meat products. However, always check ingredient labels to confirm for any dietary specifics you may have.
How long do I need to chill the bars before serving?
Refrigerate the bars for at least 2 hours to ensure they set firmly. This chilling time is crucial so the layers hold together and cutting the bars results in clean edges without messy goo.
Final Thoughts
Making the Butterfinger Caramel Crunch Bars Recipe is such a fun and rewarding experience — every layer brings its own delight, and the combination is downright addictive. Whether you’re making these for yourself or sharing with friends and family, they’re sure to become a beloved classic in your dessert rotation. Don’t wait to give these bars a try; your taste buds will thank you for the wonderful mix of crunch, caramel, chocolate, and peanut butter magic!
Print
Butterfinger Caramel Crunch Bars Recipe
- Prep Time: 20 minutes
- Cook Time: 10 minutes
- Total Time: 2 hours 30 minutes
- Yield: 24 bars
- Category: Dessert
- Method: Baking
- Cuisine: American
- Diet: Vegetarian
Description
These Butterfinger Caramel Crunch Bars feature a crunchy pretzel crust layered with smooth caramel and a luscious chocolate-peanut butter topping, finished with chopped Butterfinger candy bars for the perfect sweet and salty treat. Easy to prepare with a quick bake and no-bake layering, these bars make a delicious American dessert perfect for any occasion.
Ingredients
Crust
- 2 cups crushed pretzels
- 1 cup unsalted butter, melted
- 3/4 cup granulated sugar
Caramel Layer
- 1 (11 oz) bag caramel bits or 1 1/2 cups soft caramels
- 2 tablespoons heavy cream
Chocolate-Peanut Butter Layer
- 1 cup creamy peanut butter
- 1 1/2 cups semi-sweet chocolate chips
Topping
- 4 Butterfinger candy bars, chopped
Instructions
- Prepare the crust: Preheat the oven to 350°F (175°C) and line a 9×13-inch baking dish with parchment paper. In a medium bowl, combine crushed pretzels, melted butter, and sugar until evenly mixed. Press this mixture firmly into the bottom of the prepared pan to create an even crust layer.
- Bake the crust: Place the pan in the preheated oven and bake the crust for 10 minutes. Once baked, remove from the oven and allow it to cool slightly while you prepare the next layers.
- Melt the caramel: In a saucepan over low heat, melt the caramel bits together with the heavy cream, stirring continuously until the mixture is smooth and silky.
- Add caramel layer: Pour the melted caramel evenly over the baked pretzel crust and use a spatula to spread it smoothly. Set aside briefly as you prepare the chocolate-peanut butter topping.
- Melt chocolate and peanut butter: In a microwave-safe bowl, combine the peanut butter and semi-sweet chocolate chips. Microwave in 30-second intervals, stirring after each, until the mixture is completely melted and smooth.
- Spread the chocolate-peanut butter topping: Pour the melted mixture evenly over the caramel layer and spread gently with a spatula to cover the surface.
- Add the Butterfinger topping: Sprinkle the chopped Butterfinger candy bars evenly over the chocolate-peanut butter layer. Lightly press the pieces to help them adhere.
- Chill to set: Refrigerate the assembled bars for at least 2 hours, or until fully set and firm enough to slice.
- Serve: Once chilled, remove from the fridge, lift the bars out using the parchment paper, cut into 24 squares or bars, and enjoy.
Notes
- You can substitute graham crackers or crushed cornflakes for pretzels to alter the texture and flavor of the crust.
- Store the bars in an airtight container in the refrigerator for up to 5 days to maintain freshness.
