
“`html
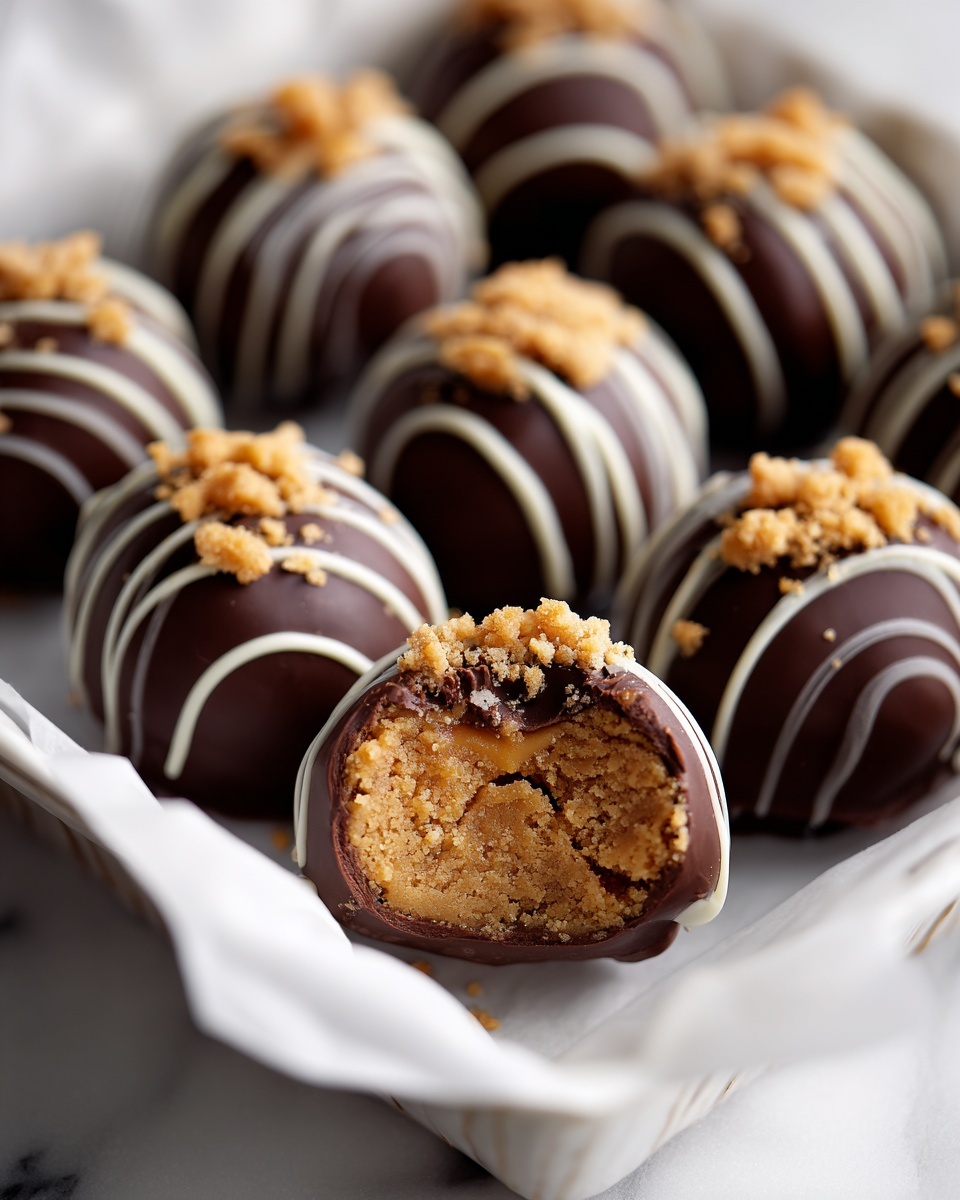
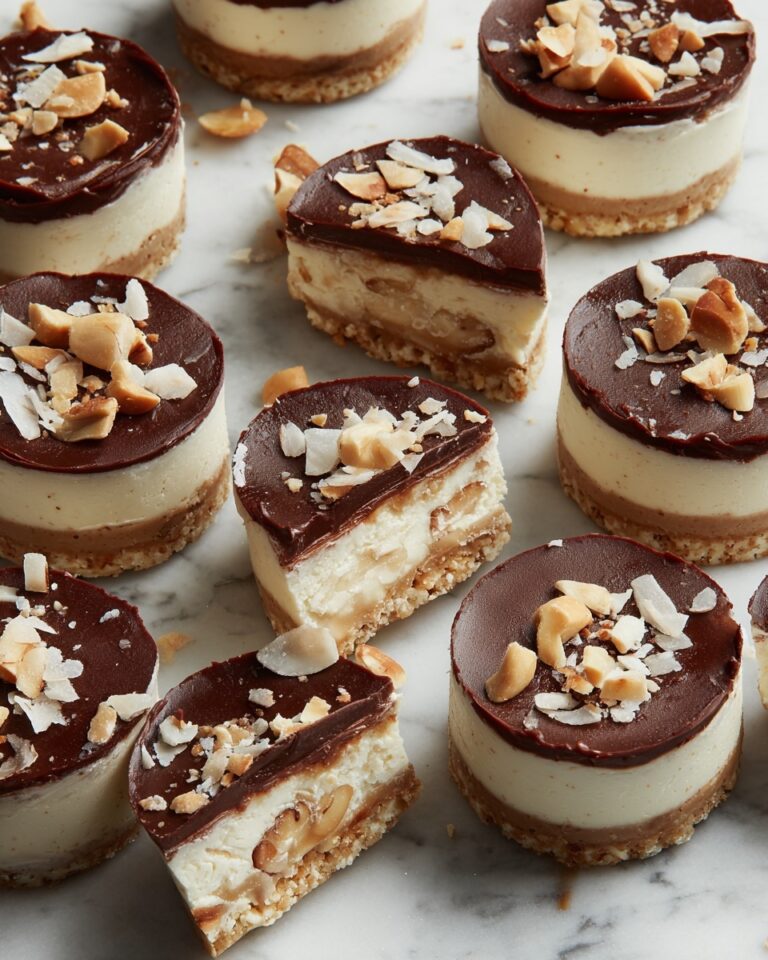
If you have a sweet tooth that craves a perfect blend of crunchy, creamy, and chocolaty delight, this Butterfinger Balls Recipe is just what you’ve been waiting for. These bite-sized treats combine the irresistible crunch of crushed Butterfinger bars with the rich, smooth texture of peanut butter and a luscious chocolate coating, making them an absolute crowd-pleaser for parties, holiday gatherings, or whenever you want a special homemade indulgence. Trust me, once you try these buttery, crunchy balls, they’ll become your go-to recipe for sharing and savoring sweet moments.

Ingredients You’ll Need
These ingredients are wonderfully simple but each plays a crucial role in creating the perfect Butterfinger Balls. From the silky peanut butter that binds everything together to the crunchy Butterfinger bits that add excitement in every bite, every component shines through in the final product.
- Powdered sugar: Provides the ideal sweetness and smooth texture to balance the peanut butter.
- Graham cracker crumbs: Add a subtle golden crunch and a hint of warmth to the mixture.
- Butterfinger bars, crushed: The star ingredient that brings irresistible crunch and that iconic Butterfinger flavor.
- Melted butter: Helps bind the ingredients smoothly and gives a rich, creamy base.
- Crunchy peanut butter: Delivers nutty depth and texture, balancing sweet and savory perfectly.
- Chocolate almond bark or candy coating: Creates the glossy, hard shell that locks in flavor and adds a dazzling finish.
How to Make Butterfinger Balls Recipe
Step 1: Mix the Ingredients
Start by combining your powdered sugar, graham cracker crumbs, crushed Butterfinger bars, melted butter, and crunchy peanut butter in a large bowl. It’s important to mix thoroughly so every delightful bite is bursting with flavor and texture, creating a cohesive but wonderfully crunchy center.
Step 2: Form the Balls
Once your mixture has reached a perfect consistency, roll it into 1-inch balls. This size ensures each morsel is just the right amount of richness without feeling overwhelming. Place these little gems onto a baking sheet lined with parchment paper to keep them from sticking.
Step 3: Chill to Firm Up
Pop the baking sheet into the refrigerator for about 30 minutes. Chilling firms up the buttery mixture, making the balls easier to dip without losing shape. This step also helps the flavors marry beautifully inside each ball.
Step 4: Melt the Chocolate
While the balls chill, melt your chocolate almond bark or preferred candy coating according to the package instructions. Using a smooth, glossy coating is key to achieving that satisfying crunch when you bite into these treats.
Step 5: Dip Each Ball
Carefully dip each chilled ball into the melted chocolate, making sure it’s evenly coated for full coverage. Then place them back on parchment paper to set. This coating seals in all that peanut butter and Butterfinger goodness.
Step 6: Set the Chocolate
Allow your chocolate-coated Butterfinger balls to set completely at room temperature or in the refrigerator. Once hardened, they’re ready to be enjoyed and shared.
How to Serve Butterfinger Balls Recipe
Garnishes
Add a little extra flair by sprinkling crushed Butterfinger pieces or chopped nuts over the chocolate coating before it sets. This adds a beautiful textured finish that also enhances the festive look and extra crunch.
Side Dishes
Butterfinger balls shine as a sweet centerpiece but pair wonderfully with a scoop of vanilla ice cream, a dollop of whipped cream, or a hot cup of coffee. Their richness ideally balances cooler and lighter sides for the perfect dessert experience.
Creative Ways to Present
Serve these indulgent beauties in mini cupcake liners for an elegant presentation or arrange them on a decorative platter dusted with cocoa powder or powdered sugar. You can also thread a few onto skewers for fun party pops that guests will love.
Make Ahead and Storage
Storing Leftovers
You can keep any leftover Butterfinger balls in an airtight container, stored in the refrigerator. They’ll stay fresh and delicious for up to one week, giving you plenty of time to snack and share.
Freezing
If you want to keep these treats for longer, freezing is the perfect option. Arrange the balls in a single layer on a tray to freeze until firm, then transfer them to a sealed freezer bag. They’ll hold great for up to three months.
Reheating
When you’re ready to enjoy frozen Butterfinger balls again, let them thaw overnight in the refrigerator for the best texture. Avoid microwaving to keep the chocolate coating intact and prevent melting or sogginess.
FAQs
Can I use creamy peanut butter instead of crunchy?
Yes, you can swap crunchy peanut butter for creamy if you prefer a smoother texture in your Butterfinger Balls. However, using crunchy peanut butter adds an extra layer of delightful crunch that complements the crushed Butterfingers perfectly.
Is it necessary to use chocolate almond bark?
Chocolate almond bark is easy to melt and set, making it a convenient choice. However, you can absolutely use your favorite chocolate candy coating or high-quality chocolate chips instead, just be sure to temper or melt them carefully to get a smooth coating.
How do I crush the Butterfinger bars without making too much mess?
Place the Butterfinger bars in a sealed plastic bag and use a rolling pin or the bottom of a heavy pan to gently crush them. This keeps your kitchen cleaner and helps you control the size of the pieces.
Can these Butterfinger Balls be made nut-free?
Since peanut butter is a core ingredient, these aren’t naturally nut-free. However, if you need a nut-free version, you might experiment with sunflower seed butter or soy nut butter to maintain the rich texture and flavor.
What’s the best way to make the chocolate coating shiny and smooth?
Tempering the chocolate is key to achieving a glossy and crisp coating. Melting it slowly and stirring consistently prevents it from overheating. Adding a small amount of shortening or coconut oil can also help create a silky finish.
Final Thoughts
The Butterfinger Balls Recipe is one of those magical desserts that combines ease, flavor, and fun all in one bite. Whether you’re making them for a big celebration or a cozy treat at home, they always bring smiles and that “wow” factor. I promise, once you try making these buttery, crunchy, chocolate-covered delights, you’ll find it hard to stop at just one!
“`
Print
Butterfinger Balls Recipe
- Prep Time: 20 minutes
- Cook Time: 0 minutes
- Total Time: 50 minutes
- Yield: 40 servings
- Category: Dessert
- Method: No-Cook
- Cuisine: American
Description
Delicious no-bake Butterfinger Balls combine crushed Butterfinger bars, peanut butter, and graham cracker crumbs, coated in rich chocolate for a crunchy, sweet treat that’s perfect for parties or snack time.
Ingredients
Main Ingredients
- 1 (16-oz) box powdered sugar
- 2½ cups graham cracker crumbs
- 5 (1.9-oz) Butterfinger bars, crushed
- 1¼ cups butter, melted
- 1½ cups crunchy peanut butter
- 1 (24-oz) package chocolate almond bark or your preferred chocolate candy coating
Instructions
- Mix Ingredients: In a large bowl, combine powdered sugar, graham cracker crumbs, crushed Butterfinger bars, melted butter, and crunchy peanut butter. Mix until well combined to form a thick, sticky mixture.
- Form Balls: Roll the mixture into 1-inch balls using your hands, ensuring they are compact and uniform in size. Place the balls on a baking sheet lined with parchment paper.
- Chill: Refrigerate the formed balls for 30 minutes to firm them up, making them easier to dip in chocolate.
- Melt Chocolate: Melt the chocolate almond bark or your preferred chocolate candy coating according to the package instructions, using a microwave or double boiler until smooth.
- Dip Balls: Using a fork or dipping tool, dip each chilled ball into the melted chocolate, coating it evenly. Allow excess chocolate to drip off, then place coated balls onto parchment paper.
- Set Chocolate: Allow the chocolate coating on the balls to set completely at room temperature or chill briefly in the refrigerator before serving.
Notes
- Use crunchy peanut butter for added texture.
- Crush Butterfinger bars finely for easier mixing and smoother texture.
- Store the balls in an airtight container in the refrigerator for up to one week.
- You can substitute chocolate almond bark with high-quality melting chocolate or candy melts.
- For a quicker set, refrigerate the dipped balls after coating.

