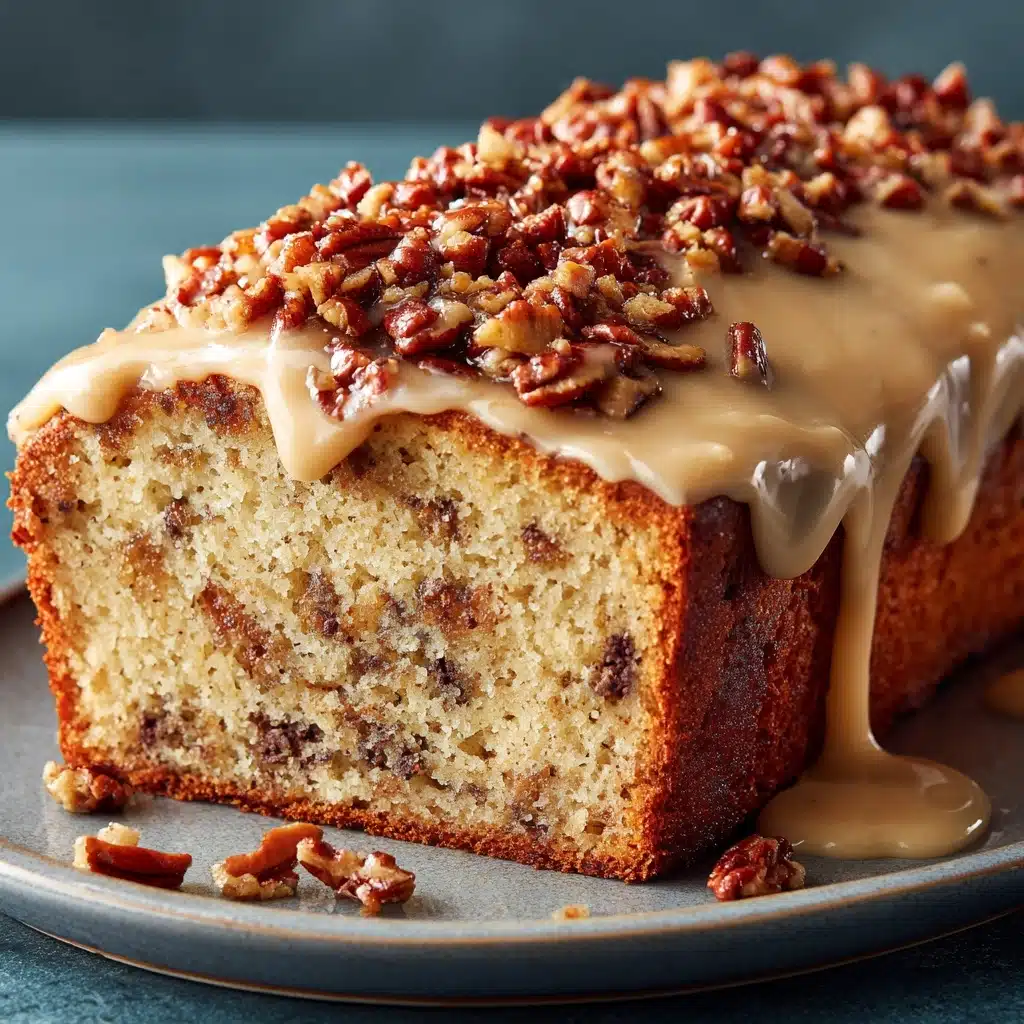
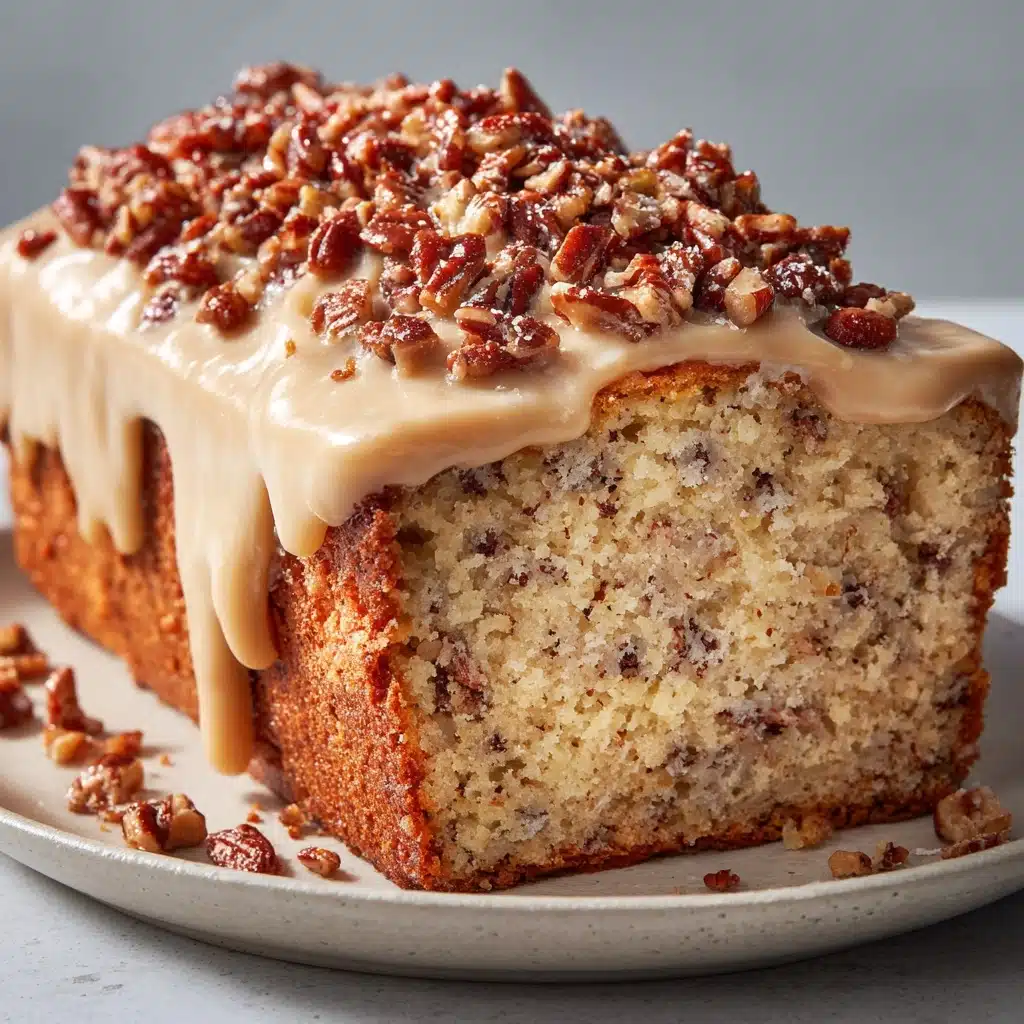
Vintage Ice Cream Bread Recipe
Brace yourself for a baking revelation that tastes every bit as magical as it sounds. The Vintage Ice Cream Bread Recipe takes just two ordinary ingredients and turns them into a thick, moist, wonderful loaf—no yeast, no kneading, and barely any elbow grease. It’s the ultimate treat for anyone who loves a quick, satisfying bake with endless customization. Whether you’re lured in by nostalgia or curiosity, this fun “ice cream for breakfast” hack is about to become a staple in your kitchen!
Ingredients You’ll Need
-
Full-Fat Ice Cream:
- 2 cups full-fat ice cream (any flavor, softened)
Self-Rising Flour:
- 1 1/2 cups self-rising flour
How to Make Vintage Ice Cream Bread Recipe
Step 1: Prepare Your Pan and Preheat
Start by turning on your oven to 350°F so it’s ready the moment your batter is. While you’re waiting, lightly grease a standard 9×5-inch loaf pan or line it with parchment paper for easy, breezy removal after baking. Trust me, this makes cleanup a breeze and preserves every beautiful slice.
Step 2: Combine the Ice Cream and Flour
Scoop your softened full-fat ice cream into a large mixing bowl—pick any flavor your heart desires. Add the self-rising flour directly on top. With a sturdy spatula or wooden spoon, gently stir the mixture just until it comes together into a thick, smooth batter. Don’t be tempted to overmix or your bread may turn out dense; a few lumps are totally fine.
Step 3: Fill the Loaf Pan
Pour the luscious batter into your prepared pan. Use your spatula to smooth the top, encouraging an even rise. If you’re in the mood for adventure, now’s the time to sprinkle in optional mix-ins like mini chocolate chips, toasted nuts, or a ribbon of cinnamon for an extra flavor surprise.
Step 4: Bake Until Perfect
Slide the pan into the oven and bake your Vintage Ice Cream Bread Recipe for 35 to 40 minutes. You’ll know it’s ready when the top is lightly golden and a toothpick poked in the center comes out clean or with just a few moist crumbs. Let the loaf cool in its pan for about 10 minutes—this sets the crumb and makes it simple to release—then transfer to a wire rack to cool completely.
Step 5: Slice and Enjoy
Once your bread is cool, use a sharp bread knife to cut thick or thin slices, depending on your mood. That first bite is always the best—soft, cake-like, subtly sweet, and bound to bring a smile to your face. It’s pure comfort with a quirky story to match!
How to Serve Vintage Ice Cream Bread Recipe
Garnishes
Add a personal touch with a dusting of powdered sugar, a drizzle of simple glaze, or even a dollop of whipped cream. For extra pop, fresh berries or zest from a lemon or orange make each slice feel like something special.
Side Dishes
Pair a slice with your morning coffee or a scoop of actual ice cream for a playful dessert. It’s also delightful alongside tangy yogurt, seasonal fruit, or a flavored latte for an indulgent brunch spread.
Creative Ways to Present
Try toasting slices and spreading them with butter or jam, serving mini cubes on a dessert board, or cutting the loaf into fingers for dunking in chocolate fondue. If you’ve made different flavors, arrange them side by side to show off your Vintage Ice Cream Bread Recipe rainbow!
Make Ahead and Storage
Storing Leftovers
Keep your loaf fresh by storing slices in an airtight container at room temperature for up to 2 days. If your kitchen runs warm, the fridge extends its life slightly and helps lock in that moist crumb.
Freezing
Vintage Ice Cream Bread Recipe freezes like a dream. Simply wrap individual slices or the whole cooled loaf tightly in plastic wrap and then foil. Tuck it in the freezer for up to 3 months. Thaw overnight in the fridge or pop slices straight into the toaster for a warm treat.
Reheating
For the ultimate throwback snack, reheat slices in the microwave for 10-15 seconds or warm gently in the oven at 300°F until just heated through. Toasting is another option for a bit of crunch and extra flavor.
FAQs
Can I use non-dairy or low-fat ice cream for this recipe?
It’s best to stick to full-fat ice cream for the most reliable texture and rise. Some non-dairy or light versions don’t contain enough fat to properly bind and moisten the batter, but if you experiment with brands formulated for baking, you might land on a winner.
What flavors work best in the Vintage Ice Cream Bread Recipe?
Virtually any flavor you adore works here! Classic vanilla, chocolate, and strawberry are foolproof, but you can get creative with seasonal picks like pumpkin, matcha, or pistachio. Just steer clear of flavors packed with gooey swirls or extra-high sugar content, which may alter the bread’s structure.
Do I need to add sugar or eggs?
No extras needed—the ice cream does all the work! It brings sweetness, fat, and egg-like emulsifiers, so the recipe stays deliciously simple. You can always add chocolate chips, nuts, or swirls for extra flair, but the two base ingredients are truly all you need.
Can I double the recipe?
Absolutely! If you’re feeding a crowd or want to gift a loaf, simply double the ingredients and divide between two pans. Just keep an eye on bake time, as a larger batch may take a minute or two longer to cook through.
Is Vintage Ice Cream Bread Recipe suitable for kids to help make?
Yes! With just a bit of stirring and pouring, it’s a fun project for little hands. Let them choose the ice cream flavor and help mix—it’s a fantastic, low-mess introduction to baking together.
Final Thoughts
There’s true magic in how easily this loaf comes together, and every bite brings a taste of retro joy. If you’ve never tried the Vintage Ice Cream Bread Recipe, let this be your sign: give it a whirl, play with your favorite flavors, and create sweet memories—one simple, scrumptious slice at a time.
Print
Vintage Ice Cream Bread Recipe
- Total Time: 45 minutes
- Yield: 1 loaf (about 8 slices) 1x
- Diet: Vegetarian
Description
Indulge in a delightful treat with this Vintage Ice Cream Bread recipe. Using just two simple ingredients, you can create a moist and flavorful loaf that’s perfect for any occasion.
Ingredients
Full-Fat Ice Cream:
- 2 cups full-fat ice cream (any flavor, softened)
Self-Rising Flour:
- 1 1/2 cups self-rising flour
Instructions
- Preheat and Prepare: Preheat the oven to 350°F. Grease a 9×5-inch loaf pan or line with parchment paper.
- Mix Batter: In a large bowl, combine softened ice cream and self-rising flour. Stir until fully mixed.
- Bake: Pour batter into the pan, smooth the top, and bake for 35–40 minutes until a toothpick comes out clean.
- Cool and Slice: Let the bread cool in the pan for 10 minutes, then transfer to a wire rack to cool completely before slicing.
Notes
- Use only full-fat ice cream for the best texture and rise.
- Avoid low-fat or dairy-free varieties unless specified for baking.
- Experiment with different ice cream flavors and add-ins for unique variations.
- Prep Time: 5 minutes
- Cook Time: 40 minutes
- Category: Bread
- Method: Baking
- Cuisine: American
Nutrition
- Serving Size: 1 slice
- Calories: 190
- Sugar: 9g
- Sodium: 230mg
- Fat: 7g
- Saturated Fat: 4g
- Unsaturated Fat: 2g
- Trans Fat: 0g
- Carbohydrates: 28g
- Fiber: 0g
- Protein: 3g
- Cholesterol: 30mg


