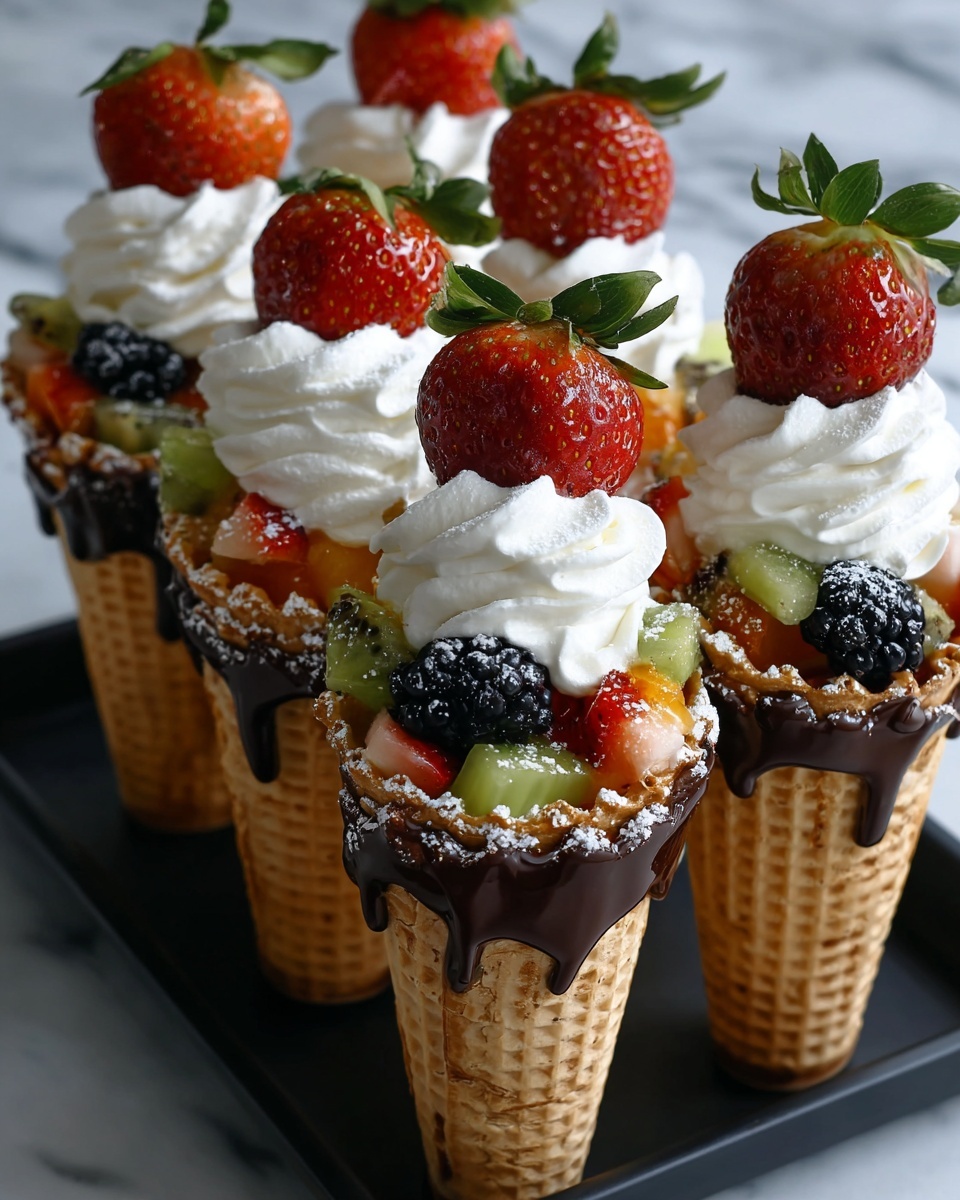
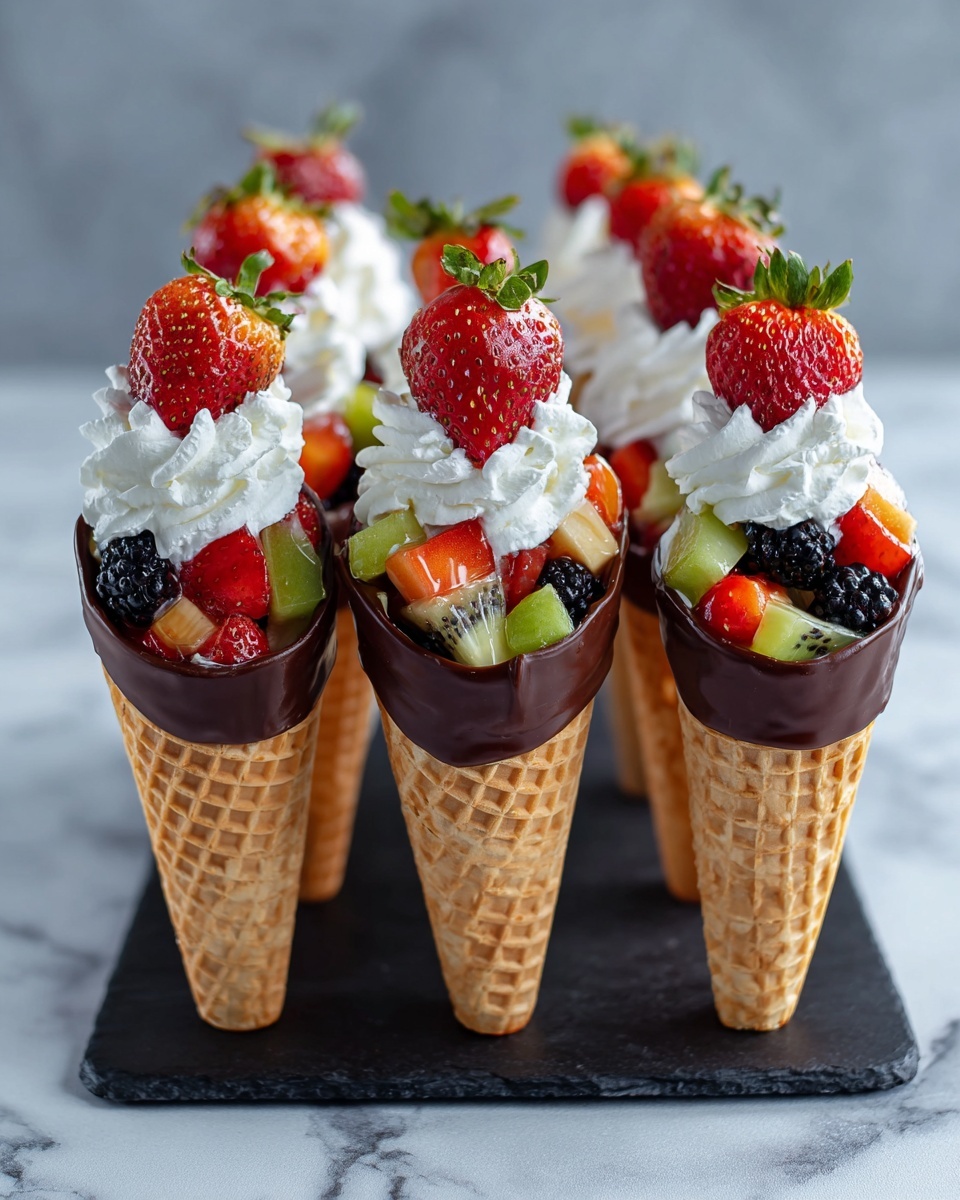
If you’re in the mood for a delightful treat that balances freshness and indulgence, then you absolutely must try this Chocolate Dipped Fruit Filled Cones Recipe. Imagine crisp waffle cones dipped in smooth, glossy chocolate, then packed to the brim with juicy, vibrant fruit bites that burst with natural sweetness. It’s the perfect way to enjoy a refreshing snack or dessert that feels festive, light, and utterly irresistible. Whether you’re serving this at a summer gathering or just want a fun way to enjoy your favorite fruits, these cones deliver a mouthwatering crunch and fruity goodness in every bite.

Ingredients You’ll Need
Gathering a few simple, fresh ingredients is all it takes to create these stunning cones. Each component plays a vital role in crafting the perfect combination of texture, flavor, and color that makes this recipe such a crowd-pleaser.
- 6 waffle cones: Crispy and sturdy enough to hold your fruit without sogging.
- 1 cup semi-sweet chocolate chips: Melts beautifully for dipping and adds sweet richness.
- 1 teaspoon coconut oil: Helps achieve a silky, smooth chocolate dip that sets perfectly.
- 2 cups fresh strawberries (hulled and chopped): Adds juicy sweetness and a touch of tartness.
- 1 cup blueberries: Provides bursts of antioxidant-rich flavor and color.
- 1 cup kiwi (peeled and diced): Brings a tangy and vibrant green pop to the mix.
- 1 cup pineapple chunks: Delivers tropical sweetness and juiciness.
- 1 banana (sliced): Offers creamy texture and mellow fruitiness.
- 2 tablespoons honey or maple syrup (optional): Adds a gentle natural sweetener to unify the fruit flavors.
- 2 tablespoons shredded coconut or crushed nuts (optional, for garnish): Adds an extra textural and visual contrast for the chocolate rim.
How to Make Chocolate Dipped Fruit Filled Cones Recipe
Step 1: Melt the Chocolate
Start by placing your semi-sweet chocolate chips and coconut oil in a microwave-safe bowl. Heat them in 30-second bursts, stirring well after each interval, until the mixture is completely smooth and silky. This gentle process ensures the chocolate stays glossy and perfect for dipping.
Step 2: Dip the Waffle Cones
Next, take each waffle cone and carefully dip the rim into the melted chocolate. Allow any excess chocolate to drip off before rolling the wet rim in shredded coconut or crushed nuts if you’re using them. This step not only amps up the flavor but adds a stunning decorative edge.
Step 3: Chill to Set
Stand the chocolate-dipped cones upright in a glass or muffin tin. Pop them into the refrigerator for 10 to 15 minutes so the chocolate can harden and form that perfect, crisp shell. This helps keep the cones crunchy once filled.
Step 4: Prepare the Fruit Filling
While the chocolate sets, combine the strawberries, blueberries, kiwi, pineapple, and banana in a large bowl. If you like your fruit a bit sweeter, drizzle on some honey or maple syrup and gently toss everything together to coat the fruit evenly. This fresh mix is bursting with flavor and ready to fill your cones.
Step 5: Fill and Serve
Just before serving, spoon the vibrant fruit mixture into each cone, filling them generously without packing too tightly. The key here is to keep the cones crisp by filling them last minute. Serve immediately and watch as everyone delights in this luscious, fun-to-eat treat.
How to Serve Chocolate Dipped Fruit Filled Cones Recipe
Garnishes
Enhance your presentation with a sprinkle of shredded coconut or a handful of crushed nuts around the chocolate rim for extra texture and inviting aroma. A fresh mint leaf tucked on top will also add a lovely pop of color and a refreshing twist that pairs wonderfully with the fruit.
Side Dishes
This recipe shines as a light dessert or snack on its own but pairs beautifully with creamy vanilla yogurt or a scoop of your favorite sorbet to create a more indulgent experience. A crisp glass of sparkling water or a fresh lemonade also balances the sweetness and makes for a perfectly refreshing combo.
Creative Ways to Present
For special occasions, try serving these cones in individual holders or decorative glasses filled with sugar or granulated salt to keep them upright. You can also use smaller cones for bite-sized appetizers at parties or layer the fruit mixture with dollops of whipped cream inside the cones for a decadent twist.
Make Ahead and Storage
Storing Leftovers
If you happen to have any leftover fruit filling, store it in an airtight container in the refrigerator for up to 2 days. Avoid storing filled cones as the moisture will soften the crisp waffle, leading to a soggy texture.
Freezing
This particular Chocolate Dipped Fruit Filled Cones Recipe is best enjoyed fresh, so freezing isn’t recommended. Freezing will cause the fruit to lose its fresh texture and the cone to become limp once thawed.
Reheating
Reheating is unnecessary for this recipe, since it’s designed to be served fresh and cool. If you want to enjoy the cones with melty chocolate again, briefly microwave the leftover chocolate for a few seconds and dip new cones if desired.
FAQs
Can I use different fruits in this recipe?
Absolutely! Feel free to swap in seasonal fruits like mango, raspberries, blackberries, or peaches depending on what’s fresh and available. Just keep the size bite-friendly to fit comfortably in the cones.
Is this recipe suitable for vegans?
Yes, you can easily make a vegan version by using dairy-free chocolate chips and opting for maple syrup instead of honey in the fruit mixture.
How far ahead can I prepare this recipe?
The chocolate-dipped cones can be made a day ahead and stored in an airtight container at room temperature, but fill the cones with fruit just before serving to keep them crisp.
Can I use store-bought chocolate bars instead of chips?
Definitely! Chop the chocolate bar into small pieces and melt with the coconut oil just the same, making sure to stir frequently for a smooth dip.
What if I don’t have coconut oil—can I substitute it?
You can substitute coconut oil with a neutral vegetable oil or butter, but coconut oil helps the chocolate harden nicely and adds a subtle flavor that complements the fruit beautifully.
Final Thoughts
If you’re looking for a fun, fresh, and impressive treat, you really can’t go wrong with this Chocolate Dipped Fruit Filled Cones Recipe. It’s simple to make, wonderfully versatile, and always a crowd-pleaser. Whether for a sunny day picnic or an easy dessert to share with friends, these cones bring smiles and a burst of natural sweetness wrapped in crispy, chocolaty perfection. Give it a try—you’ll be amazed at how quickly these cones disappear!
Print
Chocolate Dipped Fruit Filled Cones Recipe
- Prep Time: 20 minutes
- Cook Time: 0 minutes
- Total Time: 20 minutes
- Yield: 6 servings
- Category: Snack, Dessert
- Method: No-Cook
- Cuisine: American
- Diet: Vegetarian
Description
Delight in these Chocolate Dipped Fruit Filled Cones, a refreshing and colorful no-bake dessert perfect for summer or any light snack occasion. Crisp waffle cones are dipped in rich semi-sweet chocolate and garnished with shredded coconut or crushed nuts, then filled with a vibrant mix of fresh strawberries, blueberries, kiwi, pineapple, and banana. Lightly sweetened with honey or maple syrup, this treat combines healthy fruit with indulgent chocolate, making it an ideal kid-friendly and vegetarian dessert that’s as fun to make as it is to eat.
Ingredients
Chocolate Dip
- 1 cup semi-sweet chocolate chips
- 1 teaspoon coconut oil
- 2 tablespoons shredded coconut or crushed nuts (optional, for garnish)
Fruit Filling
- 6 waffle cones
- 2 cups fresh strawberries, hulled and chopped
- 1 cup blueberries
- 1 cup kiwi, peeled and diced
- 1 cup pineapple chunks
- 1 banana, sliced
- 2 tablespoons honey or maple syrup (optional)
Instructions
- Prepare the Chocolate Dip: In a microwave-safe bowl, combine the semi-sweet chocolate chips and coconut oil. Heat in 30-second intervals, stirring after each, until the mixture is fully melted and smooth.
- Dip the Cone Rims: Dip the rims of each waffle cone into the melted chocolate, allowing any excess to drip off. For added texture and flavor, roll the chocolate-coated rims in shredded coconut or crushed nuts if desired.
- Set the Chocolate: Place the dipped cones upright in a glass or muffin tin and refrigerate for 10 to 15 minutes or until the chocolate has fully set and hardened.
- Prepare the Fruit Filling: In a large mixing bowl, combine the chopped strawberries, blueberries, kiwi, pineapple chunks, and banana slices. Drizzle with honey or maple syrup if using, and gently toss to combine all the fruits evenly.
- Fill the Cones: Just before serving, spoon the mixed fruit gently into each waffle cone to ensure they remain crisp and fresh.
- Serve: Serve the cones immediately and enjoy this refreshing, chocolaty fruit treat.
Notes
- To make vegan, substitute dairy-free chocolate chips and use maple syrup instead of honey.
- These cones are best served fresh; fill them just before eating to keep the cones crisp.
- You can customize the fruit mix by using any seasonal fruits you prefer or have on hand.

