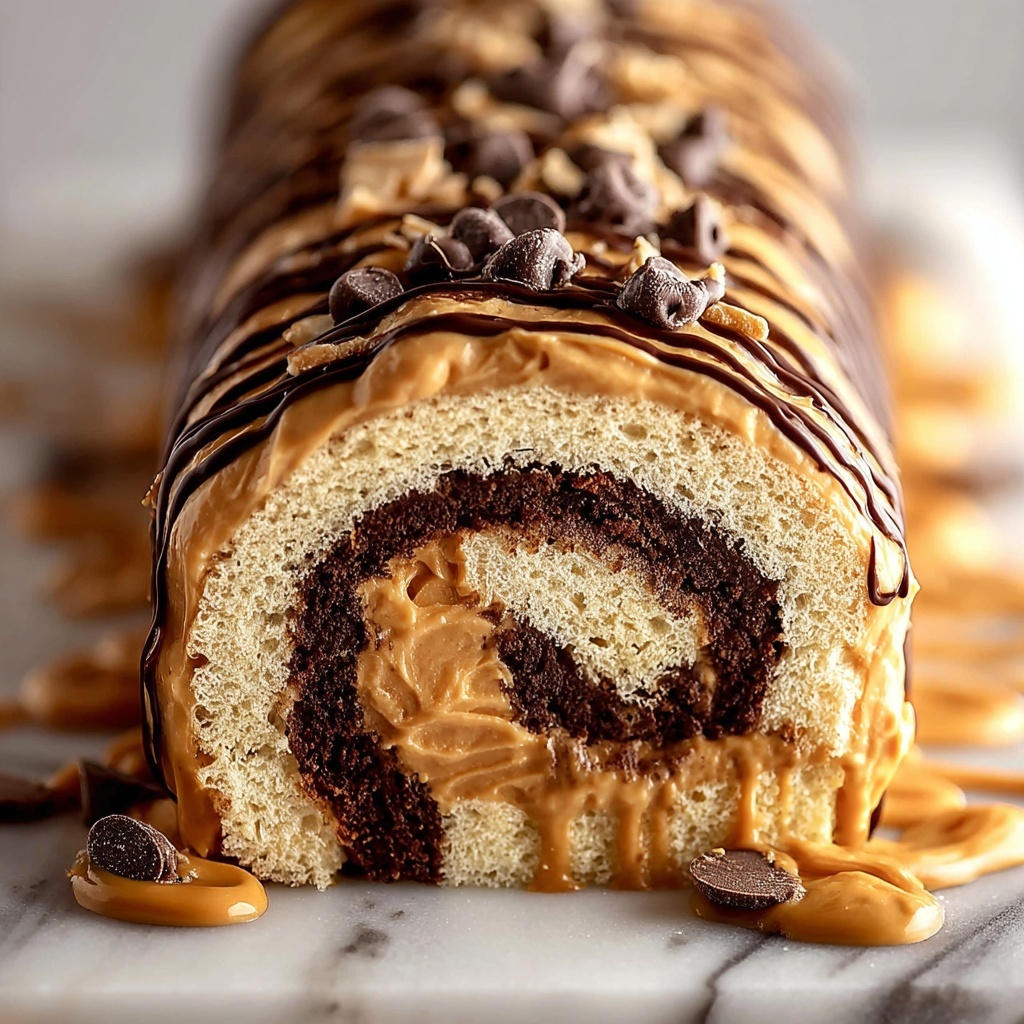
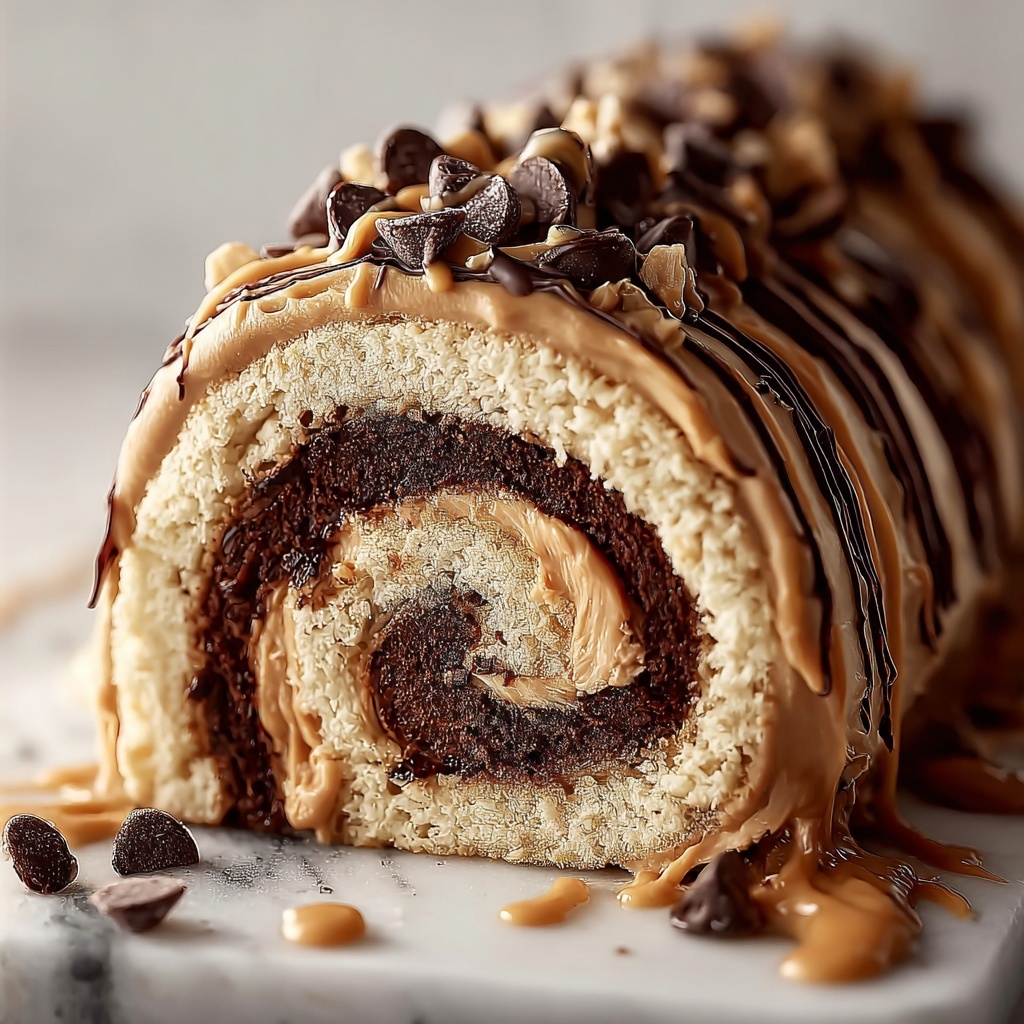
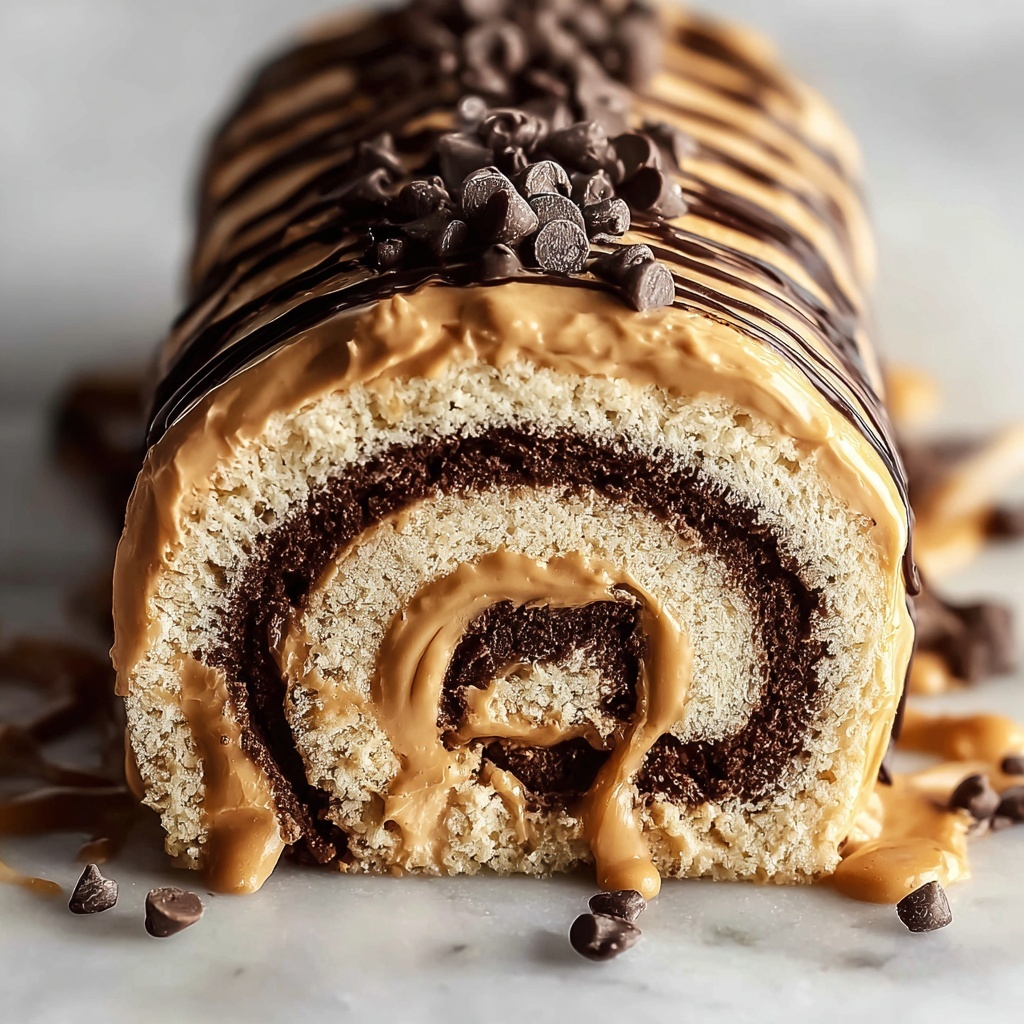
If you have a serious sweet tooth and a love for rich, indulgent flavors, then you absolutely must try the Chocolate Peanut Butter Dream Roll Recipe. This luscious dessert combines the moist decadence of chocolate cake with the creamy, dreamy swirl of peanut butter and whipped topping, all studded with crunchy chunks of Reese’s peanut butter cups. It’s like a party in every bite, perfect for sharing with friends or treating yourself after a long day. The magic of this roll lies in its perfect balance of flavors and textures, wrapped up in a visually stunning spiral that makes every slice a delightful surprise.
Ingredients You’ll Need
These simple, everyday ingredients come together effortlessly to create a dessert that’s anything but ordinary. Each component plays a crucial role — the chocolate cake mix provides a tender, chocolaty base, the creamy peanut butter adds richness and smoothness, and the whipped topping lightens the whole creation with a fluffy texture. Don’t forget those chopped Reese’s cups; they inject that extra peanut butter and chocolate goodness that makes this roll truly unforgettable.
- Chocolate cake mix: Use your favorite box mix for a reliably rich and moist cake base.
- Ingredients listed on the box: Typically eggs, water, and oil — these bring the cake mix to life.
- Creamy peanut butter: This adds a luscious, nutty flavor and creamy texture essential to the filling.
- Whipped topping: Choose whipped cream or a non-dairy alternative to keep the filling light and airy.
- Chopped Reese’s peanut butter cups: These give delightful bursts of texture and a perfect peanut butter-chocolate combo.
- Extra whipped topping: For garnishing, to create a beautiful, inviting finish.
- Extra chopped Reese’s peanut butter cups: Sprinkled on top to complete the look and add crunch.
How to Make Chocolate Peanut Butter Dream Roll Recipe
Step 1: Prepare Your Pan and Batter
First things first, preheat your oven to the temperature recommended on your cake mix box — usually 350°F (175°C). Line a 10×15-inch jelly roll pan with parchment paper and lightly grease it. This step ensures that your cake won’t stick and will come out perfectly shaped for rolling. Next, prepare your chocolate cake batter according to the box instructions. Pour it into the pan, spreading evenly so it cooks uniformly.
Step 2: Bake the Cake Just Right
Bake the cake for about 12 to 15 minutes. Keep an eye on it — you want it to be set but still soft and springy to the touch. Overbaking can cause cracking when you roll it, and that’s the last thing we want in this dreamy dessert. The goal here is a flexible cake that you can gently roll without stress.
Step 3: Roll the Cake While Warm
This is a bit of a delicate step, but so important! While the cake is still warm, use the parchment paper to carefully lift and roll it from the short end into a log. Rolling it warm helps the cake “remember” its shape and prevents cracks later. Let the rolled cake cool completely—you want that shape locked in before moving on.
Step 4: Make the Peanut Butter Filling
While the cake cools, mix together the creamy peanut butter and whipped topping in a bowl. Stir until everything is smooth and fluffy, creating a light yet rich filling that balances perfectly with the chocolate cake’s depth.
Step 5: Assemble the Roll
Once cooled, gently unroll the cake and spread the peanut butter filling evenly over the surface. Then sprinkle the chopped Reese’s peanut butter cups generously on top for that signature crunch and flavor punch.
Step 6: Re-Roll and Chill
Carefully re-roll the cake without the parchment paper, keeping it snug but gentle to avoid cracking. Place it seam-side down on your serving plate for a neat presentation. Refrigerate for at least one hour to let the roll set beautifully before serving.
Step 7: Add the Finishing Touches
Just before serving, top the roll with extra whipped topping and sprinkle with more chopped Reese’s cups. This adds a lovely visual appeal and an extra hit of flavor that will have everyone asking for seconds.
How to Serve Chocolate Peanut Butter Dream Roll Recipe
Garnishes
Don’t underestimate the power of presentation. A generous swirl of whipped topping on each slice, sprinkled with chopped Reese’s peanut butter cups, adds both charm and texture. You can also drizzle a little chocolate syrup or dust with cocoa powder for that elegant finish.
Side Dishes
This dessert pairs beautifully with fresh berries or a simple scoop of vanilla ice cream to brighten the rich flavors. If you want to keep it extra indulgent, a cup of cold milk or a bold coffee complements the peanut butter and chocolate notes perfectly.
Creative Ways to Present
For a fun twist, try slicing the roll into bite-sized pinwheels and arranging them on a platter for a party-ready display. You could also serve individual slices with a drizzle of caramel sauce or a sprinkle of sea salt to elevate the flavor profile even more.
Make Ahead and Storage
Storing Leftovers
After serving, wrap any leftover Chocolate Peanut Butter Dream Roll tightly in plastic wrap or store it in an airtight container in the refrigerator. It will stay fresh and delicious for up to three days, making it an easy treat to enjoy later.
Freezing
You can freeze slices or the whole roll by wrapping it securely in plastic wrap and aluminum foil to prevent freezer burn. It freezes beautifully for up to two months. Just thaw in the refrigerator overnight before enjoying.
Reheating
This dessert is best enjoyed chilled, but if you prefer, you can let slices come to room temperature for 20 minutes before serving. Avoid microwaving as the whipped filling can lose its texture and the cake may dry out.
FAQs
Can I make this dessert dairy-free?
Absolutely! Use a non-dairy whipped topping and make sure your peanut butter and chocolate cake mix are free from dairy ingredients. There are plenty of great vegan alternatives that work wonderfully in this recipe.
What’s the best way to prevent the cake from cracking when rolling?
Rolling the cake while it’s still warm and using parchment paper to guide the roll helps tremendously. Also, don’t overbake the cake; keep it soft and pliable for easy handling.
Can I use homemade chocolate cake instead of a box mix?
Definitely, a homemade chocolate cake with a thin, flat layer will work just as well. Just be sure it’s moist and flexible enough to roll without cracking.
How do I adjust the recipe for fewer servings?
You can easily halve the ingredients and use a smaller pan. Keep the baking time slightly shorter and watch closely to avoid overbaking.
Is there a way to make this dessert less sweet?
If you prefer less sweetness, choose a cake mix that isn’t overly sugary, and opt for natural peanut butter instead of the sweeter varieties. Reducing the amount of chopped peanut butter cups in the filling can also help balance sweetness.
Final Thoughts
The Chocolate Peanut Butter Dream Roll Recipe is truly a crowd-pleaser that’s simple enough for any home baker yet impressive enough for special occasions. Every slice offers a perfect marriage of fluffy cake, creamy peanut butter, and crunchy chocolate candies that simply melts in your mouth. I can’t wait for you to try this recipe and share the joy it brings — happy baking, and even happier eating!
Print
Chocolate Peanut Butter Dream Roll Recipe
- Prep Time: 30 minutes
- Cook Time: 15 minutes
- Total Time: 1 hour 45 minutes
- Yield: 10 servings
- Category: Dessert
- Method: Baking
- Cuisine: American
Description
Indulge in this decadent Chocolate Peanut Butter Dream Roll featuring a moist chocolate cake wrapped around a creamy peanut butter and whipped topping filling, studded with chopped Reese’s peanut butter cups for a perfect balance of rich flavors and textures. This impressive yet easy-to-make dessert is perfect for gatherings or a special treat.
Ingredients
Cake
- 1 box chocolate cake mix
- Ingredients listed on the box (usually eggs, water, and oil)
Filling
- 1 cup creamy peanut butter
- 2 cups whipped topping (such as whipped cream or whipped non-dairy topping)
- 1 cup chopped Reese’s peanut butter cups
Garnish
- Extra whipped topping (for garnish)
- Extra chopped Reese’s peanut butter cups (for garnish)
Instructions
- Preheat and prepare pan: Preheat oven to 350°F (175°C) or the temperature directed on the cake mix box. Line a 10×15-inch jelly roll pan with parchment paper and lightly grease it to prevent sticking.
- Make cake batter: Prepare the chocolate cake mix according to package instructions, usually combining eggs, water, and oil. Pour the batter evenly into the prepared jelly roll pan.
- Bake cake: Bake for 12–15 minutes until the cake is set but still soft. Do not overbake to avoid cracking when rolling.
- Roll warm cake: While still warm, lift the cake with the parchment paper and gently roll it from the short end into a log. Allow it to cool completely while rolled to hold its shape.
- Prepare filling: In a mixing bowl, combine the creamy peanut butter and whipped topping. Mix until smooth and fluffy for an even, creamy filling.
- Unroll and fill cake: Carefully unroll the cooled cake. Spread the peanut butter and whipped topping mixture evenly over the cake surface. Sprinkle chopped Reese’s peanut butter cups evenly on top.
- Reroll cake: Gently re-roll the cake without the parchment paper, keeping it tight but handling carefully to prevent cracks. Place the roll seam-side down on a serving plate.
- Chill and garnish: Refrigerate the assembled roll for at least one hour to let it set. Before serving, top with extra whipped topping and sprinkle with additional chopped Reese’s peanut butter cups for garnish.
Notes
- Be careful not to overbake the cake to prevent cracking during rolling.
- Rolling the cake while warm helps it maintain shape without breaking.
- Use chilled whipped topping for best texture in filling and garnish.
- Ensure the roll is tight but gentle to keep the layers distinct and prevent splitting.
- This dessert is best served chilled and can be stored covered in the refrigerator for up to 3 days.


