
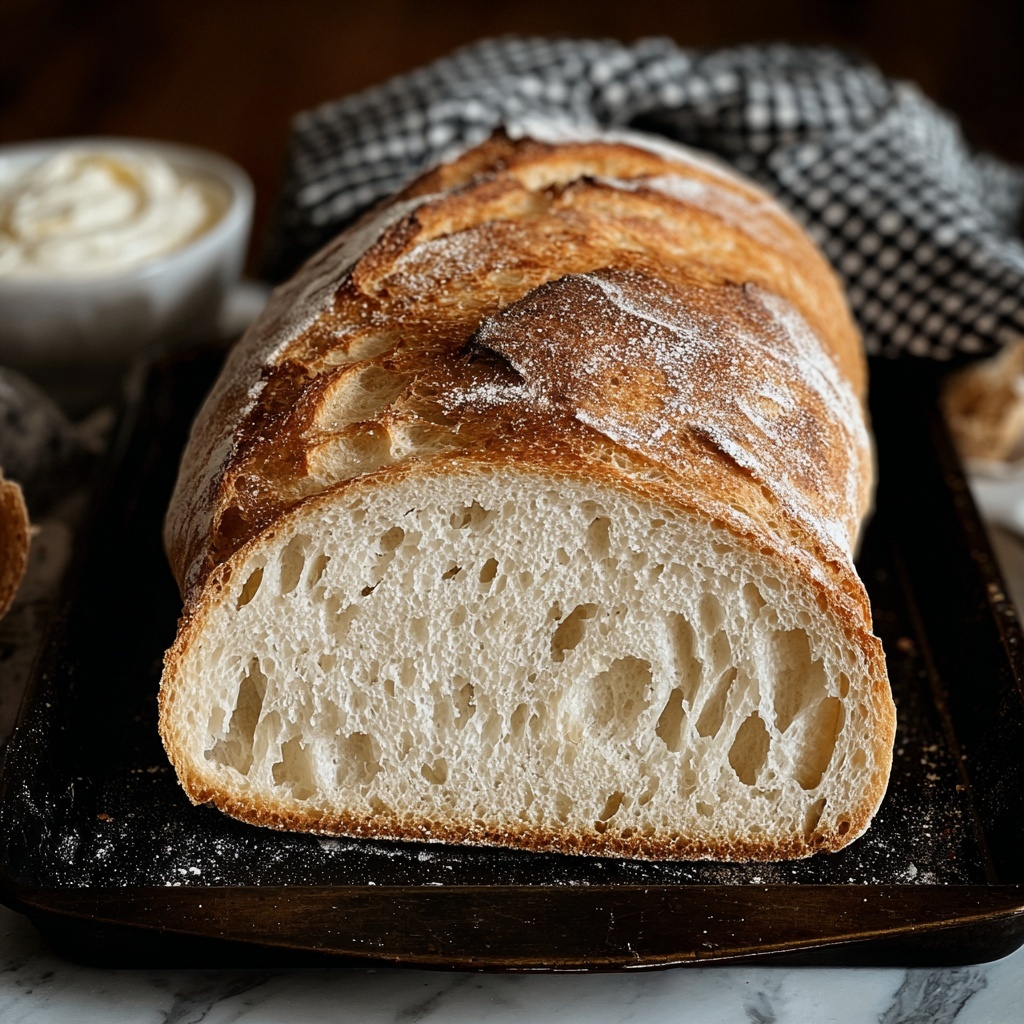
If you’ve ever dreamed of baking the perfect sandwich loaf right at home, this Soft Sourdough Sandwich Bread Recipe is going to become your new best friend. It’s got that wonderful light, tender crumb you crave in a sandwich bread but layered with the subtle tang and depth only sourdough can bring. Whether you’re making classic PB&Js, hearty deli stacks, or avocado toasts, this bread delivers softness and flavor in every bite. Plus, it’s made with simple, wholesome ingredients you likely already have, making it approachable for both novice and seasoned bakers alike.
Ingredients You’ll Need
Gathering the right ingredients is crucial for baking bread that’s soft, flavorful, and perfectly textured. Each item plays a key role, from the natural levain power of sourdough starter to the subtle sweetness of honey that boosts fermentation and browning.
- Sourdough starter: This acts as the natural yeast giving your bread its signature tang and lift.
- Warm water: Helps activate the starter and yeast for a lively dough.
- Olive oil or melted butter: Adds moisture and richness, ensuring softness.
- Honey or maple syrup: A natural sweetener that feeds the yeast and enhances crust color.
- All-purpose or bread flour: The foundation of your dough; bread flour gives more chew, all-purpose is softer.
- Salt: Essential for flavor balance and controlling fermentation.
- Active dry yeast (optional): Speeds up the rise if you’re short on time but not required.
- Milk (for brushing): Creates a golden, tender crust with a lovely sheen.
How to Make Soft Sourdough Sandwich Bread Recipe
Step 1: Mix the starter, water, and sweetener
Begin by combining the warm water with your sourdough starter and honey (or maple syrup) in a large bowl. This mixture wakes up the starter, providing the natural yeast with energy to get your bread going. Stir well to make sure everything melds together beautifully.
Step 2: Add fats and salt
Add olive oil or melted butter and salt into the mix. The fat adds softness and moisture, which is essential for that tender crumb. Salt not only flavors your bread, but also regulates yeast activity, so don’t skip or reduce it too much.
Step 3: Incorporate the flour gradually
Adding the flour bit by bit to your wet ingredients helps you control the dough’s consistency. Stir after each cup until the dough forms a shaggy mass that just comes together. This step is crucial for building structure.
Step 4: Add yeast if using
If you’re opting for a quicker rise, sprinkle in a teaspoon of active dry yeast now. This is totally optional—traditional sourdough purists might skip it, but the yeast gives the dough a little boost and reduces waiting time.
Step 5: Knead the dough
Turn your dough out onto a lightly floured surface and knead it for about 8 minutes. You’re aiming for a smooth, elastic texture—a tactile sign that the gluten has developed properly, which will give your bread a perfect chew.
Step 6: First rise
Place your dough in a greased bowl, cover with a damp cloth, and let it rise for 4 to 6 hours at room temperature. This long, slow fermentation builds flavor and texture. If you want to be patient and get an even richer taste, refrigerate the dough overnight for a slow rise.
Step 7: Prepare for baking
When your dough has roughly doubled in size, preheat your oven to 375°F (190°C) and grease a loaf pan. Knead the dough gently to deflate it just a bit, shape it into a classic loaf, and set it snugly in your pan.
Step 8: Second rise
Let the shaped dough rise again for 30 to 60 minutes. It’s ready when it puffs above the rim of the loaf pan. This second rise ensures the bread will be soft and airy once baked.
Step 9: Brush with milk and bake
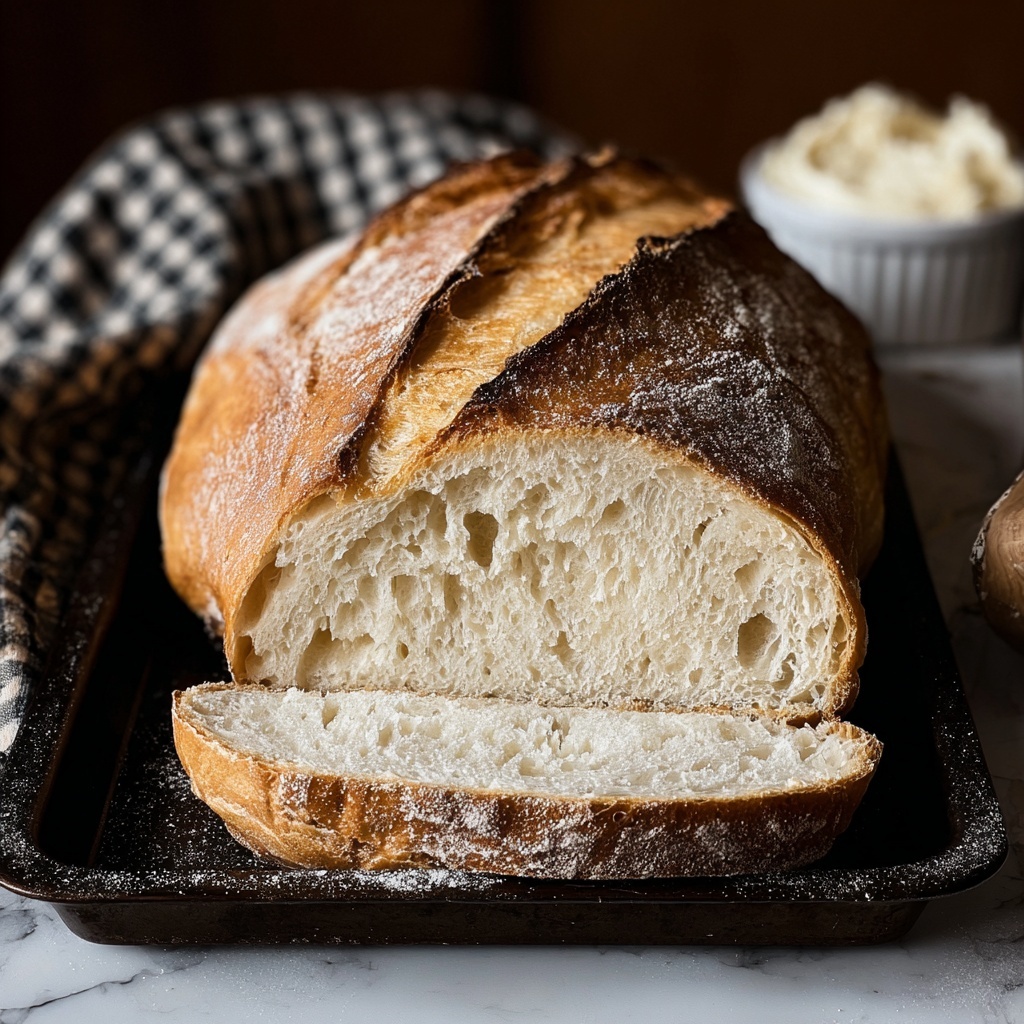
Brushing the loaf generously with milk before it goes into the oven promotes a beautiful golden color and adds a subtle tenderness to the crust. Bake for 30 to 35 minutes until it turns golden brown and a toothpick inserted into the center comes out clean.
Step 10: Cooling
Once out of the oven, let your bread rest for 10 minutes in the pan to settle. Then transfer it onto a wire rack to cool completely. This step is key to finishing the loaf’s texture and making slicing a dream.
How to Serve Soft Sourdough Sandwich Bread Recipe
Garnishes
A simple brush of melted butter or a sprinkle of sea salt on warm slices can elevate the eating experience. Fresh herbs like rosemary or thyme spread with soft butter also pair wonderfully and bring an aromatic twist to your slices.
Side Dishes
This bread shines alongside soups, salads, or a hearty charcuterie board. It’s tender enough for classic sandwich fillings but also sturdy enough to enjoy with dips, making it ultra-versatile in your meals.
Creative Ways to Present
Take your Soft Sourdough Sandwich Bread Recipe to brunch by making open-faced toasts topped with colorful veggies, smashed avocado, or smoked salmon. Or, transform slices into croutons for a crunchy salad topping. The possibilities are endless and delicious!
Make Ahead and Storage
Storing Leftovers
Wrap cooled bread tightly in plastic wrap or store in an airtight container at room temperature for up to 3 days to keep it soft and fresh. Avoid refrigerating as it can dry out the loaf faster.
Freezing
If you want to savor your Soft Sourdough Sandwich Bread Recipe later, slice it before freezing. Store slices in a sealed freezer bag for up to 3 months. This way, you can toast slices straight from the freezer without losing any of that homemade charm.
Reheating
For the best texture and aroma, reheat your bread slices in a toaster or under a broiler for a minute or two. This revives the softness inside while crisping the crust just right.
FAQs
Do I have to use sourdough starter? Can I use commercial yeast instead?
While this recipe shines with the flavor and unique texture from sourdough starter, you can omit the starter and use commercial yeast alone. However, you’ll lose the distinctive tanginess and complex flavor that makes this bread special.
Why is my bread dense after baking?
Dense bread usually means the dough didn’t rise enough or wasn’t kneaded properly. Make sure your starter is active, give the dough enough time to rise fully, and knead until elastic. Also, avoid adding too much flour which can make the dough heavy.
Can I make this bread gluten-free?
Traditional sourdough bread requires wheat flour for its gluten structure. To make a gluten-free version, you’d need a specialized gluten-free flour blend and different handling techniques, so this recipe isn’t suitable as-is for gluten-free baking.
What’s the purpose of brushing milk on top before baking?
Brushing milk creates a soft, golden crust and adds a slight sheen, enhancing the bread’s appearance and tenderness. You could also experiment with egg wash or water, but milk gives the nicest balance for this recipe.
How long can I keep the dough in the fridge?
You can refrigerate the dough for up to 24 hours to slow down fermentation. This slow rise builds flavor and gives you flexibility in baking time. Just bring the dough back to room temperature before shaping and the second rise.
Final Thoughts
There’s something truly magical about pulling a warm loaf of Soft Sourdough Sandwich Bread Recipe straight from your own oven. The wonderful combination of softness, subtle tang, and golden crust makes it a crowd-pleaser at any meal. Trust me, once you try baking this bread yourself, it won’t just be a recipe—it’ll be a cherished part of your baking repertoire. So, get your flour out, feed your starter, and enjoy the process of making sandwich bread that’s as delightful as it is satisfying!
Print
Soft Sourdough Sandwich Bread Recipe
- Prep Time: 20 minutes
- Cook Time: 35 minutes
- Total Time: 5 hours 55 minutes
- Yield: 12 slices
- Category: Bread
- Method: Baking
- Cuisine: American
- Diet: Vegetarian
Description
This Soft Sourdough Sandwich Bread recipe delivers a tender, moist loaf perfect for all your sandwich needs. Using a sourdough starter combined with optional yeast, this bread achieves a beautiful rise, a slightly tangy flavor, and a golden crust. Ideal for beginners and seasoned bakers alike, it requires minimal ingredients and yields 12 hearty slices after slow fermentation for rich taste and texture.
Ingredients
Wet Ingredients
- 1 cup sourdough starter (fed or unfed)
- 1 cup warm water
- 2 tablespoons olive oil or melted butter
- 1 tablespoon honey or maple syrup
- 1 tablespoon milk (for brushing the top)
Dry Ingredients
- 3 cups all-purpose flour (or bread flour)
- 1 teaspoon salt
- 1 teaspoon active dry yeast (optional for quicker rise)
Instructions
- Combine Wet Ingredients: In a large bowl, mix the warm water, honey or maple syrup, and sourdough starter until well blended to create the base of the dough.
- Add Oil and Salt: Stir in the olive oil or melted butter and salt, ensuring these ingredients are evenly distributed throughout the mixture.
- Incorporate Flour: Gradually add the flour, one cup at a time, stirring after each addition until a sticky dough begins to form.
- Add Yeast (Optional): If you want a faster rise time, incorporate the active dry yeast now and mix thoroughly.
- Knead the Dough: Transfer the dough onto a lightly floured surface and knead for about 8 minutes until it becomes smooth and elastic.
- First Rise: Place the kneaded dough into a greased bowl, cover it with a damp cloth, and let it rise for 4 to 6 hours at room temperature, or refrigerate overnight for a slower fermentation that enhances flavor.
- Prepare for Baking: Preheat your oven to 375°F (190°C) and grease a loaf pan in preparation for baking.
- Shape and Second Rise: Punch down the dough to release air, shape it into a loaf, place it in the prepared pan, and allow it to rise again for 30 to 60 minutes until it surpasses the pan’s rim.
- Apply Milk Wash: Brush the top of the risen dough with milk to encourage a golden and slightly glossy crust.
- Bake the Bread: Bake the loaf in the preheated oven for 30 to 35 minutes until the crust turns golden brown and a toothpick inserted in the center comes out clean.
- Cool the Bread: Let the bread cool in the pan for 10 minutes before transferring it to a wire rack to cool completely, ensuring the crumb sets perfectly.
Notes
- For enhanced sourdough flavor, allow the dough to ferment overnight in the refrigerator during the first rise.
- Adding yeast is optional but helps the bread rise faster; without it, be prepared for a longer fermentation period.
- You can substitute all-purpose flour with bread flour for a chewier texture and better rise.
- Brush the top with melted butter after baking for an extra rich crust instead of milk if desired.
- Use a sharp serrated knife for slicing the bread to maintain even, clean slices.


