
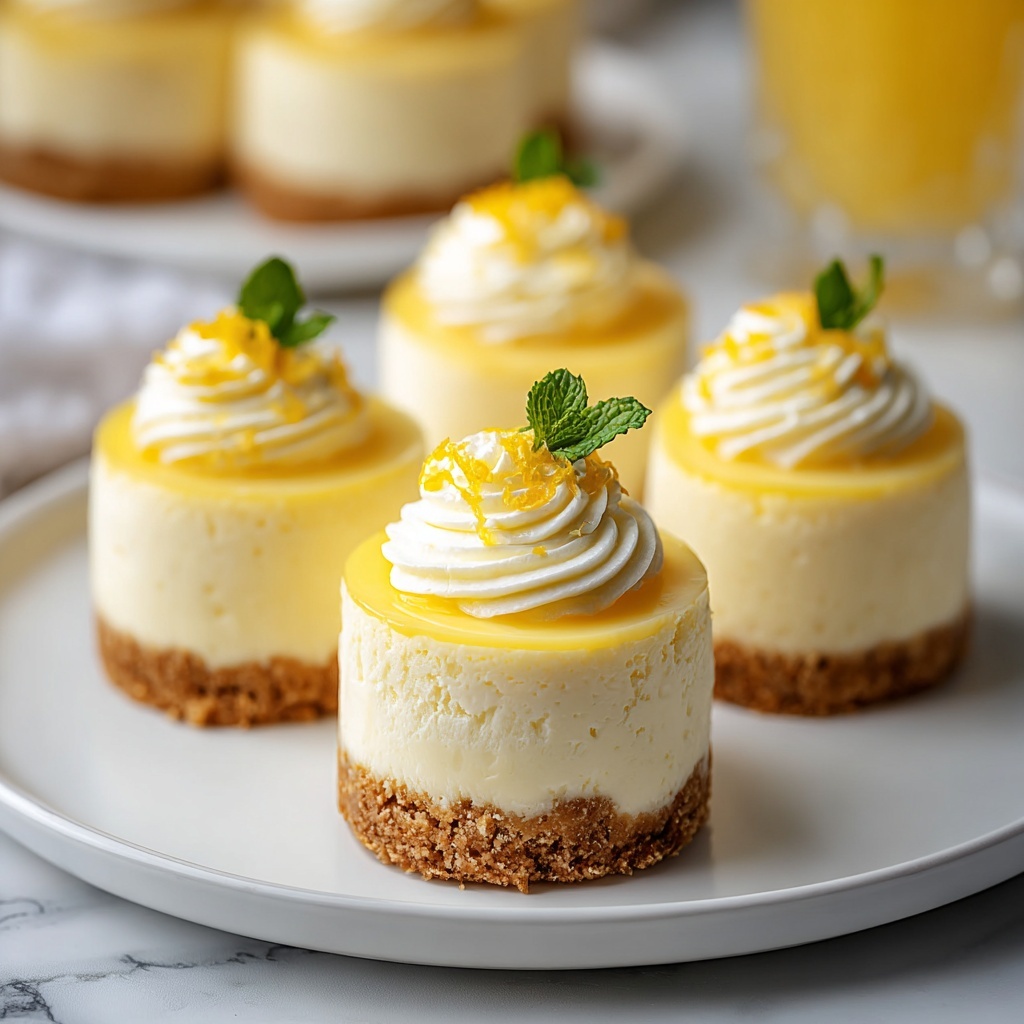
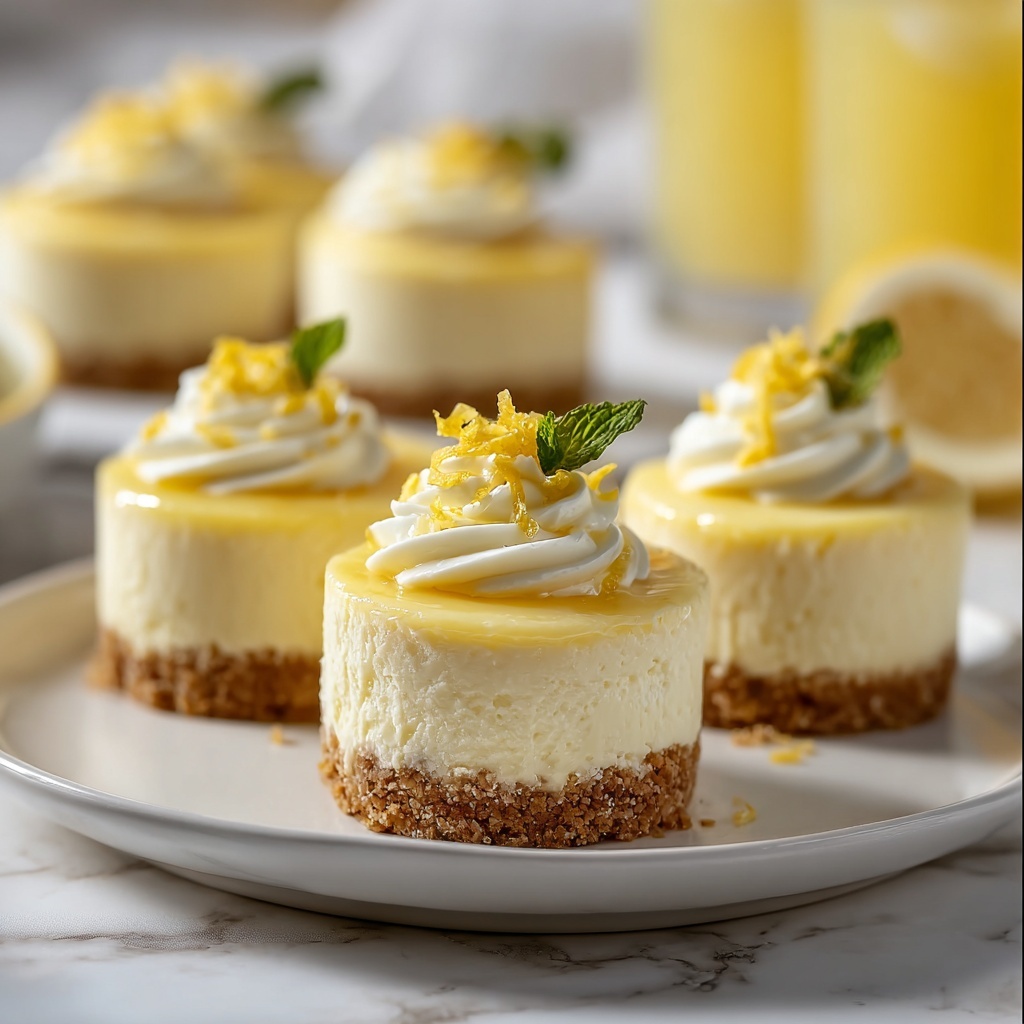
There is something undeniably delightful about a perfectly tangy yet creamy dessert, and this Mini Lemon Cheesecakes Recipe captures that magic in every bite. These little cheesecakes balance the richness of cream cheese with the bright zing of fresh lemon, all nestled on a buttery graham cracker crust. Whether you’re serving them at a summer gathering, a cozy afternoon tea, or just treating yourself, these mini treats are sure to bring a smile to everyone’s face. Plus, they’re just the right size for indulgence without overdoing it!
Ingredients You’ll Need
Getting the ingredients right is the secret to making these Mini Lemon Cheesecakes a total hit. Each one plays a crucial role, from the crunch of the crust to the smooth, luscious filling that bursts with citrusy goodness.
- Graham cracker crumbs: Provide a sweet, crunchy base that perfectly complements the creamy filling.
- Granulated sugar: Sweetens both the crust and the cheesecake filling just right.
- Cinnamon (optional): Adds a warm, subtle spice to the crust, elevating its flavor.
- Melted butter: Binds the crust ingredients together and gives it a rich, golden finish.
- Cream cheese (softened): The star ingredient; it forms the rich and creamy body of the cheesecake.
- Eggs: Help set the cheesecake filling and provide structure.
- Sour cream: Adds a bit of tang and keeps the texture silky.
- Heavy cream: Contributes to the luxurious creaminess of the filling.
- Fresh lemon zest and juice: These bring that vibrant, zesty brightness that defines the recipe.
- Vanilla extract: Rounds out the flavors with a sweet, mellow undertone.
- Salt: Enhances all the other flavors, balancing sweetness and acidity.
How to Make Mini Lemon Cheesecakes Recipe
Step 1: Prepare the crust
Start by preheating your oven to 325°F (163°C) and lining a 12-cup muffin tin with cupcake liners or silicone cups. This setup makes it easy to create perfectly sized cheesecakes without fuss. Combine the graham cracker crumbs, granulated sugar, and optional cinnamon in a small bowl—this mix forms the delicious base.
Step 2: Form and bake the crust
Mix the melted butter into the dry ingredients until every crumb is coated with buttery goodness. Then spoon about a tablespoon of this mixture into each muffin cup, pressing down firmly to create an even crust layer. A quick 8-minute bake will set the crust nicely so it holds together beautifully when sliced.
Step 3: Make the cheesecake filling
While your crusts cool, it’s time to whip up the filling. Using an electric mixer, beat the softened cream cheese and sugar until smooth and fluffy—this is where that creamy texture begins. Add eggs one at a time, beating well each time to keep the mixture silky without lumps.
Step 4: Add the flavor boosts
Now stir in the sour cream, heavy cream, lemon zest, lemon juice, vanilla extract, and a pinch of salt. These ingredients bring those signature bright, creamy, and aromatic notes that make this Mini Lemon Cheesecakes Recipe a standout.
Step 5: Assemble and bake
Spoon the luscious cheesecake filling over your slightly cooled crusts, leaving a bit of space so the batter doesn’t spill over while baking. Smooth the tops gently for a pretty, polished look. Bake for 18-20 minutes, watching for centers that are set but still slightly jiggly, which means they’ll be perfectly creamy once chilled.
Step 6: Cool and chill
Let the mini cheesecakes cool in the tin for about 10 minutes to settle, then transfer to a wire rack so they can come to room temperature. Most importantly, chill them in the fridge for at least 2 hours before serving—this step is absolutely essential for that firm yet creamy texture everyone loves.
How to Serve Mini Lemon Cheesecakes Recipe
Garnishes
Adding the right garnish can elevate these mini lemon cheesecakes from lovely to show-stopping. Fresh lemon slices or curls of lemon zest bring a burst of color and reinforce that irresistible citrus flavor. A dollop of whipped cream or a sprinkle of crushed graham crackers adds visual appeal and a touch of extra texture that your guests will adore.
Side Dishes
These mini cheesecakes shine on their own but pair beautifully with simple sides like a bowl of fresh berries or a light fruit compote. The natural sweetness and acidity of fruits like raspberries, strawberries, or blueberries complement the zesty filling and give the dessert a refreshing balance.
Creative Ways to Present
For a fun twist, try serving these cheesecakes on a decorative tray lined with parchment and dotted with edible flowers or mint leaves for an elegant touch. You can also create mini dessert platters with a mix of these cheesecakes alongside bite-sized cookies or lemon bars to keep the citrus theme going strong.
Make Ahead and Storage
Storing Leftovers
Once your Mini Lemon Cheesecakes are chilled, cover them tightly with plastic wrap or place them in an airtight container. Stored in the refrigerator, they will stay fresh and creamy for up to 4 days, making them a perfect treat to enjoy over several days.
Freezing
If you want to make these ahead of time or have extras, freezing is a great option. Place the cheesecakes on a baking sheet and freeze until solid, then transfer to a freezer bag or airtight container. They can be frozen for up to 2 months without losing their wonderful flavor or texture.
Reheating
When you’re ready to enjoy frozen Mini Lemon Cheesecakes, simply thaw them overnight in the fridge. Because these are best served chilled, there’s no need to reheat. Just garnish creatively and serve cold for that perfect creamy and tangy bite every time.
FAQs
Can I use a different type of crust for this recipe?
Absolutely! While graham cracker crusts are classic and delicious, you could experiment with crushed digestive biscuits, shortbread cookies, or even nut-based crusts to customize the flavor and texture to your liking.
Is it necessary to use fresh lemon juice and zest?
For the best bright, fresh flavor, using freshly grated lemon zest and freshly squeezed lemon juice is highly recommended. Bottled lemon juice tends to be less vibrant and can alter the overall taste of your Mini Lemon Cheesecakes.
Can I make these Mini Lemon Cheesecakes gluten-free?
Yes! Simply swap the graham cracker crumbs for gluten-free alternatives, ensuring they are suitable for your dietary needs. Many stores offer gluten-free crumbs that work perfectly as a crust base.
How do I know when the cheesecakes are done baking?
The centers should look set but still have a slight jiggle when you gently shake the pan. This means the filling is cooked through but will remain creamy after chilling, which is exactly what you want for these mini treats.
What if I don’t have a muffin tin? Can I use another baking dish?
A muffin tin is ideal for perfect individual servings, but if you don’t have one, a small baking dish or mini springform pans can work. Just adjust the baking time accordingly and keep a close eye on the texture to ensure they set properly.
Final Thoughts
I can’t recommend this Mini Lemon Cheesecakes Recipe enough—it hits every note from tart to sweet and creamy with such graceful simplicity. Once you’ve whipped up a batch, you’ll find yourself reaching for these delightful little bites again and again. Treat yourself and your loved ones to this refreshing, bite-sized indulgence that’s perfect anytime you crave a burst of lemony bliss.
Print
Mini Lemon Cheesecakes Recipe
- Prep Time: 20 minutes
- Cook Time: 28 minutes
- Total Time: 2 hours 48 minutes
- Yield: 12 mini cheesecakes
- Category: Dessert
- Method: Baking
- Cuisine: American
- Diet: Vegetarian
Description
These Mini Lemon Cheesecakes are a delightful and tangy treat with a buttery graham cracker crust and a creamy lemon-infused filling. Perfectly portioned in cupcake liners, they make for an easy-to-serve dessert ideal for gatherings or a refreshing snack. The recipe combines zesty lemon juice and zest with smooth cream cheese and a hint of vanilla, baked to a delicate, slightly jiggly consistency.
Ingredients
Crust
- 1 ½ cups graham cracker crumbs
- 1/4 cup granulated sugar
- 1/2 teaspoon cinnamon (optional)
- 1/4 cup melted butter
Filling
- 16 oz (2 packages) cream cheese, softened
- 1/2 cup granulated sugar
- 2 large eggs
- 1/4 cup sour cream
- 1/4 cup heavy cream
- Zest of one large lemon
- 2 tablespoons fresh lemon juice
- 1 teaspoon vanilla extract
- A pinch of salt
Instructions
- Prepare Oven and Muffin Tin: Preheat your oven to 325°F (163°C). Line a 12-cup muffin tin with paper cupcake liners or silicone muffin cups to prevent sticking and make removal easy.
- Make the Crust Mixture: In a small bowl, combine graham cracker crumbs, granulated sugar, and optional cinnamon. Stir thoroughly to mix the dry ingredients evenly.
- Form the Crust: Mix the melted butter into the dry mixture until all crumbs are coated. Divide about 1 tablespoon of this mixture into each muffin cup. Press down firmly to create an even, compact crust layer.
- Bake Crust: Bake the crusts for 8 minutes in the preheated oven. Remove and allow them to cool slightly while preparing the filling.
- Beat Cream Cheese and Sugar: Using an electric mixer, beat the softened cream cheese and 1/2 cup granulated sugar together until smooth and fluffy, about 2-3 minutes, to ensure a creamy base.
- Add Eggs: Add eggs one at a time, beating well after each addition to fully incorporate and achieve a smooth batter.
- Incorporate Remaining Ingredients: Stir in sour cream, heavy cream, lemon zest, lemon juice, vanilla extract, and a pinch of salt. Beat until all ingredients are fully combined and smooth.
- Fill Muffin Cups: Spoon the cheesecake filling evenly over the cooled crusts, leaving a little space at the top to prevent overflow while baking.
- Smooth Filling: Use a spatula or spoon to smooth out the tops of each cheesecake for an even appearance.
- Bake Cheesecakes: Bake for 18-20 minutes until the centers are set but still slightly jiggly, indicating creamy texture without overbaking.
- Cool Cheesecakes: Let cheesecakes cool in the muffin tin for 10 minutes to stabilize, then transfer them to a wire rack to cool completely at room temperature.
- Chill Before Serving: Refrigerate the mini cheesecakes for at least 2 hours to allow them to set fully and develop their flavors before serving.
Notes
- For best results, use cream cheese at room temperature to avoid lumps in the batter.
- The cinnamon in the crust is optional but adds a warm subtle spice that complements the lemon.
- Chilling the cheesecakes helps them firm up and improves slicing or serving without crumbling.
- These mini cheesecakes can be stored in the refrigerator for up to 3 days.
- Allow cheesecakes to come to room temperature for about 10 minutes before serving for optimal texture and flavor.
