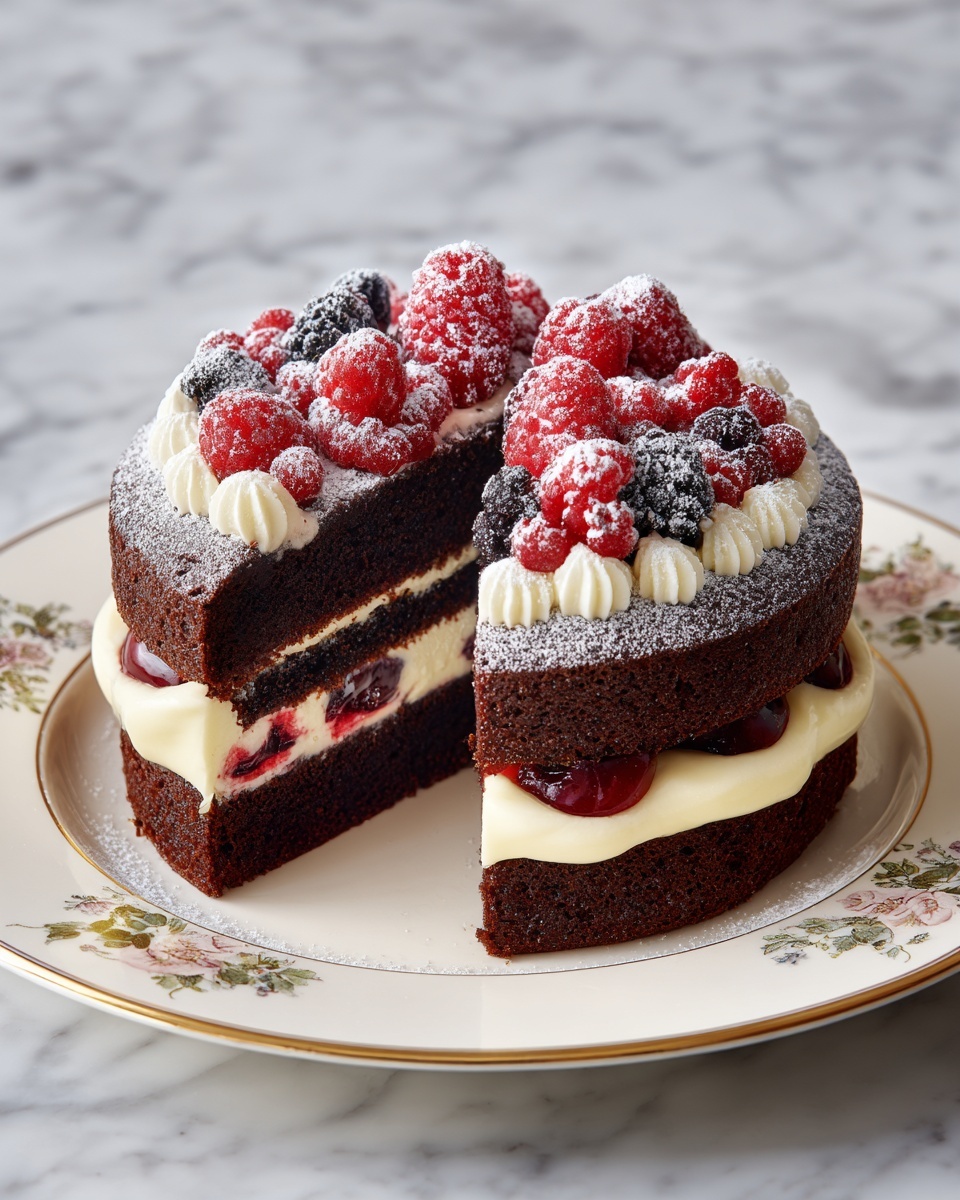
If you’ve ever wanted to bring a touch of Eastern European charm and rich indulgence to your dessert table, this Russian Cake Recipe is an absolute must-try. This layered delight marries tender, softly baked cake with luscious fruit preserves, crunchy nuts, and a sweet glaze, making every bite a celebration of textures and flavors. It’s a simple recipe that cleverly uses leftover cake crumbs combined with jam and nuts, turning humble ingredients into an irresistible treat that feels both nostalgic and festive. Whether you’re looking to impress guests or enjoy a cozy slice with your afternoon tea, this Russian Cake Recipe delivers warmth and joy from the very first bite.
Ingredients You’ll Need
Though this Russian Cake Recipe seems fancy, it really only calls for straightforward, everyday ingredients that come together beautifully to create a stunning dessert. Each item is chosen for its essential role, whether adding moistness, sweetness, or a bit of crunch.
- 1 ½ cups all-purpose flour: Forms the tender base of the cake, giving it structure without heaviness.
- 1 cup granulated sugar: Sweetens the cake and helps create that delightful light texture when creamed with butter.
- ½ cup unsalted butter (softened): Adds richness and moisture, making every bite melt-in-your-mouth.
- 3 large eggs: Bind the ingredients and give the cake its fluffy rise.
- 1 teaspoon vanilla extract: Brings warm, aromatic depth to the flavor.
- 1 teaspoon baking powder: Ensures the cake layers rise just right, light and airy.
- ½ cup milk: Adds moisture and helps the batter come together smoothly.
- ¼ teaspoon salt: Balances sweetness and enhances the other flavors beautifully.
- ½ cup fruit preserves or jam (apricot, raspberry, or cherry): The fruity heart of the cake, creating layers of luscious flavor.
- ¼ cup dark rum (optional): A boozy touch to brush onto the cake layers, adding complexity and moistness.
- 1 cup cake or cookie crumbs: Made from the trimmed cake tops or leftover cake—this is where resourcefulness meets flavor!
- 1 cup chopped nuts (walnuts or almonds): Adds crunch and a nutty aroma that play wonderfully against the sweet jam.
- 1 cup mixed dried fruits (optional): For an extra burst of chewiness and color.
- 1 cup powdered sugar: The base for the glossy glaze topping.
- 2–3 tablespoons milk or lemon juice: Mixed into the powdered sugar to create a smooth icing for drizzling.
How to Make Russian Cake Recipe
Step 1: Prepare Your Batter
Begin by preheating your oven to 350°F (175°C) and preparing two 8-inch cake pans by greasing and flouring them well—this ensures your cake will release easily after baking. Next, mix your dry ingredients—flour, baking powder, and salt—in a medium bowl to get that evenly distributed leavening. In a separate large bowl, cream the softened butter and sugar together until light and fluffy; this is the secret to a tender crumb. Then, add your eggs one by one, making sure each is fully incorporated before the next. Stir in your vanilla extract for that lovely fragrance. Gradually add your dry ingredients in batches, alternating with milk, starting and ending with the flour mixture. This mixing technique helps keep the batter light and prevents it from becoming tough.
Step 2: Bake the Cake Layers
Divide the batter evenly between your two prepared pans and pop them into the oven. Bake for about 25 to 30 minutes or until a toothpick inserted in the center comes out clean. Once baked, allow the cakes to cool in their pans for about 10 minutes before turning them out onto wire racks to completely cool. This resting time is essential for the cake to firm up and become easier to handle for the next steps.
Step 3: Level and Crumble Cake Tops
After the cakes have thoroughly cooled, carefully slice off any domed tops to create even layers—the perfect canvas for assembly. Don’t toss those cake trimmings! Crumble them finely to use as crumbs later in our Russian Cake Recipe. This resourceful step captures the essence of the traditional recipe, reducing waste and packing extra flavor.
Step 4: Assemble the Layers
Place one cake layer on your serving plate and, if using, brush it lightly with dark rum for a subtle boozy note. Spread a generous layer of your chosen fruit preserves over the top, then sprinkle with a mixture of the cake crumbs, chopped nuts, and dried fruits if you’re adding them. This combo creates a wonderful texture and bright flavor contrast. Repeat this process with the second cake layer, building height and decadence.
Step 5: Glaze and Finish
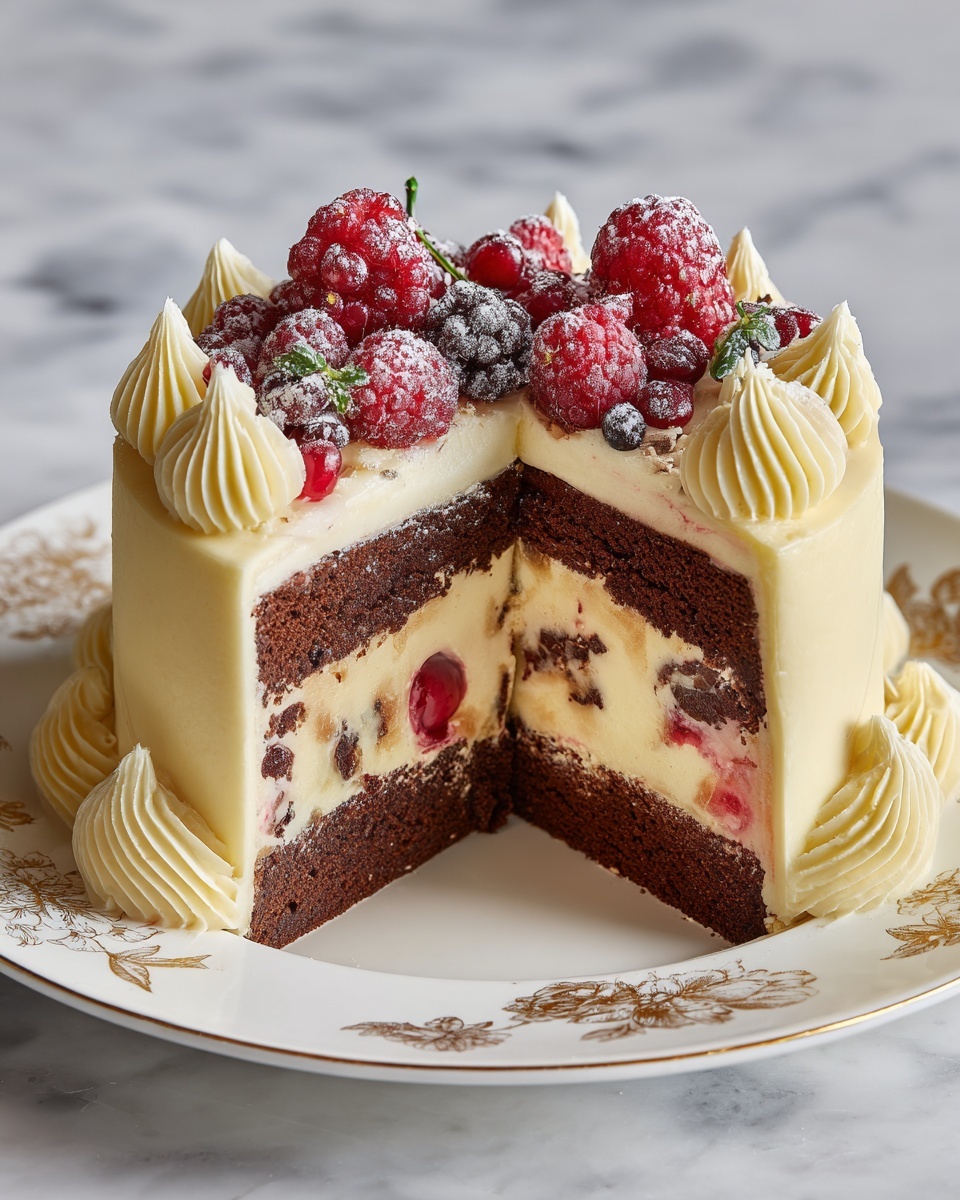
In a small bowl, whisk powdered sugar with enough milk or lemon juice to create a smooth, pourable glaze. Drizzle this glossy topping over the fully stacked cake, letting it cascade down the sides for that homemade charm. Allow the glaze to set before serving. This finishing touch brings a lovely sweetness and a pretty shine to your Russian Cake Recipe, making it as stunning as it is delicious.
How to Serve Russian Cake Recipe
Garnishes
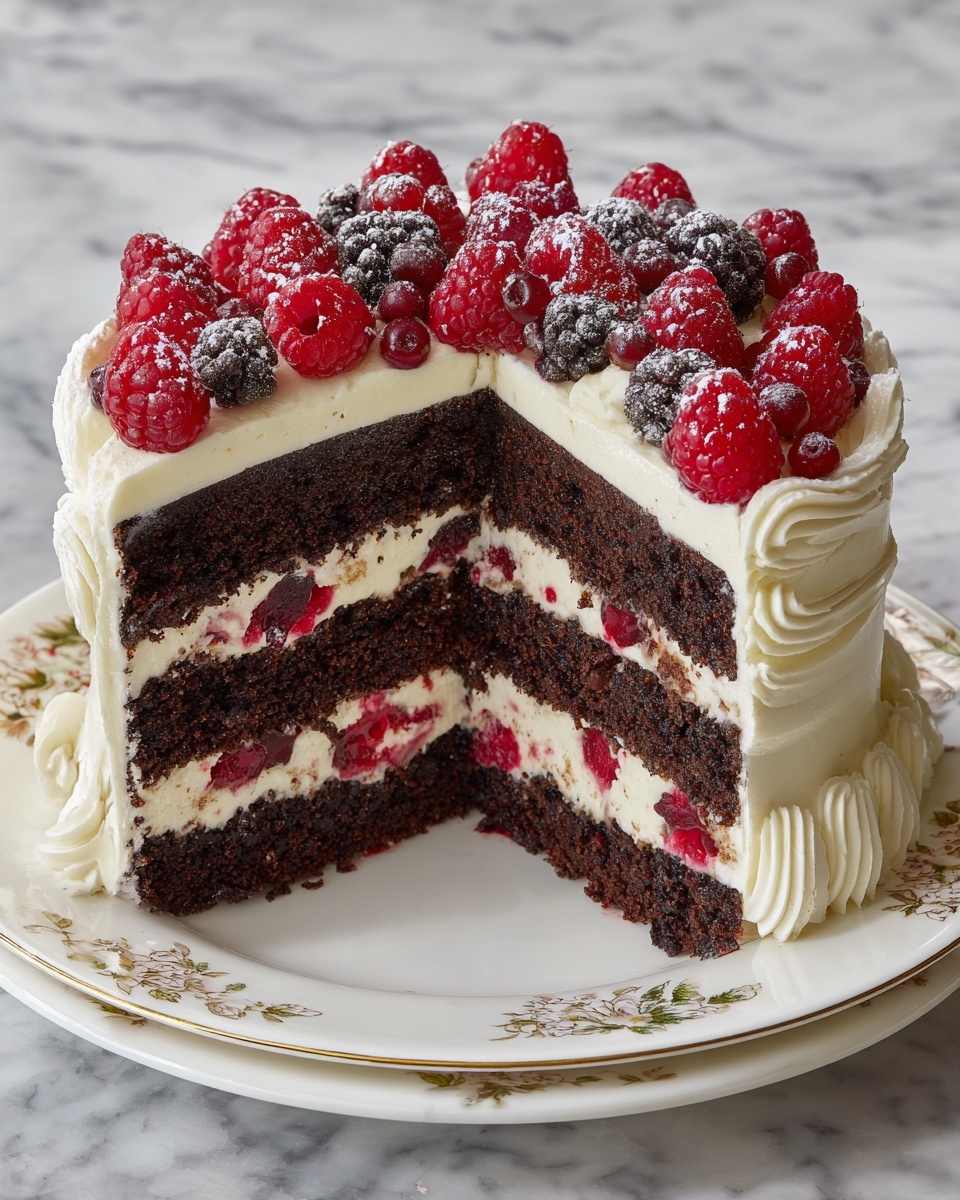
To take your Russian Cake Recipe to the next level, consider topping it with a few extra chopped nuts or a sprinkle of dried fruit to add eye-catching color and texture contrast. Fresh berries also pair beautifully, lending a juicy brightness that balances the sweetness. A light dusting of powdered sugar just before serving adds an elegant snowy effect that looks effortlessly pretty.
Side Dishes
This cake shines as a dessert but also pairs wonderfully with complementary sides. Serve it alongside a dollop of lightly whipped cream or a scoop of vanilla ice cream to enhance the richness. A warm cup of black tea or bold coffee completes the experience perfectly, highlighting the cake’s subtle nutty and fruity tones.
Creative Ways to Present
For an inviting presentation, try layering your Russian Cake Recipe on a beautiful cake stand or rustic wooden board to emphasize its homestyle roots. Slice it into small, manageable pieces for casual gatherings or arrange slices in a circle with fresh fruit in the center for a stunning centerpiece. Adding edible flowers or mint leaves elevates the look instantly, making it a show-stopping dessert for any occasion.
Make Ahead and Storage
Storing Leftovers
Leftover slices of Russian Cake Recipe keep wonderfully in an airtight container in the refrigerator for up to 3 days. Store the cake in a single layer to avoid squishing the delicate layers and topping. Bringing it to room temperature before serving helps restore its moist texture and flavor.
Freezing
You can freeze this cake, but to maintain its textures, wrap individual slices tightly in plastic wrap and place them in a freezer-safe container. Frozen slices keep well for up to 2 months. Thaw overnight in the fridge and allow them to reach room temperature before enjoying to best preserve the flavors and texture of this classic Russian Cake Recipe.
Reheating
This cake is best served at room temperature, but if you prefer a warm slice, heat it gently in the microwave for 10-15 seconds. Avoid overheating, which can dry out the cake or melt the glaze. Enjoying it slightly warmed can bring out the nutty aroma and soften the jam layers for a cozy treat.
FAQs
What makes this a traditional Russian Cake Recipe?
This cake draws inspiration from classic Russian desserts that use simple ingredients like leftover cake scraps, jams, and nuts to create rich, layered confections. Its roots in making the most of available items reflect the resourcefulness of Eastern European home baking traditions.
Can I use other types of jam in this cake?
Absolutely! Apricot, raspberry, and cherry jam are traditional choices, but feel free to experiment with your favorites. Just keep in mind that sweeter or more tart jams can change the overall flavor profile slightly, which can be exciting to explore.
Is the dark rum necessary?
The rum is optional but highly recommended if you want to add that authentic depth and moistness to the cake. If you prefer to avoid alcohol, you can substitute with a splash of fruit juice or simply omit it without compromising the recipe.
Can I make this cake gluten-free?
To make the Russian Cake Recipe gluten-free, substitute the all-purpose flour with a gluten-free blend that suits baking. Just ensure the blend contains a binding agent like xanthan gum to help with texture.
How can I make the glaze thicker or thinner?
Adjust the glaze consistency by adding powdered sugar to thicken or a bit more milk or lemon juice to thin it out. A thicker glaze will hold its shape better, while a thinner one will drizzle beautifully over the cake’s edges.
Final Thoughts
This Russian Cake Recipe is a true delight, blending simple ingredients into an enchanting dessert that feels like a warm hug from the past. The layers of jam, nuts, and cake crumbs create a tapestry of flavors and textures that invite you to savor each bite slowly. I encourage you to give this recipe a try—not only is it delicious, but it’s also a wonderful way to celebrate resourcefulness and tradition with every slice.
Print
Russian Cake Recipe
- Prep Time: 25 minutes
- Cook Time: 30 minutes
- Total Time: 1 hour
- Yield: 10 servings
- Category: Dessert
- Method: Baking
- Cuisine: Russian
- Diet: Vegetarian
Description
Russian Cake is a traditional Eastern European dessert made by layering fluffy cake rounds with fruit preserves, nuts, dried fruits, and a sweet glaze. Originally designed as a way to use leftover cake scraps creatively, it’s rich, flavorful, and perfect for celebrations or a special treat.
Ingredients
For the Cake:
- 1 ½ cups all-purpose flour
- 1 cup granulated sugar
- ½ cup unsalted butter, softened
- 3 large eggs
- 1 teaspoon vanilla extract
- 1 teaspoon baking powder
- ½ cup milk
- ¼ teaspoon salt
For the Filling and Topping:
- ½ cup fruit preserves or jam (apricot, raspberry, or cherry)
- ¼ cup dark rum (optional, for brushing layers)
- 1 cup cake or cookie crumbs (from leftover cake or cookies)
- 1 cup chopped nuts (such as walnuts or almonds)
- 1 cup mixed dried fruits (optional)
- 1 cup powdered sugar
- 2–3 tablespoons milk or lemon juice (for icing)
Instructions
- Prepare the Cake Batter: Preheat your oven to 350°F (175°C). Grease and flour two 8-inch round cake pans to prevent sticking. In a medium bowl, whisk together the flour, baking powder, and salt to combine the dry ingredients thoroughly. In a large bowl, beat the softened butter and granulated sugar until the mixture is light and fluffy, which will help create a tender cake texture. Add eggs one at a time, beating well after each addition to incorporate air evenly. Stir in the vanilla extract for flavor.
- Mix and Bake: Add the dry ingredients in batches to the butter mixture, alternating with the milk, beginning and ending with the flour mixture. Mix the batter just until combined to avoid overworking which could toughen the cake. Divide the batter evenly between the two prepared pans. Bake in the preheated oven for 25–30 minutes, or until a toothpick inserted in the center comes out clean. Let the cakes cool in the pans for 10 minutes, then carefully remove and transfer to wire racks to cool completely.
- Prepare the Layers: Once completely cooled, slice off the rounded tops of each cake layer to create a flat, even surface. Save these trimmed cake scraps and crumble them finely to use later for texture in the filling. Place one cake layer on a serving plate and optionally brush lightly with dark rum to add moisture and flavor. Spread a generous layer of your chosen fruit preserves over the cake.
- Assemble the Filling: Sprinkle a mixture of the cake crumbs, chopped nuts, and dried fruits evenly over the jam-covered cake. Repeat the layering process with the second cake layer: brush with rum, add jam, and top with the crumb, nut, and fruit mixture to create a beautifully textured and flavorful cake.
- Make and Add the Glaze: In a small bowl, whisk together the powdered sugar and enough milk or lemon juice until the glaze is smooth and pourable. Drizzle this sweet glaze over the top of the assembled cake. Allow the glaze to set fully before slicing and serving to ensure clean cuts and a polished presentation.
Notes
- This cake is traditionally made using leftover cake scraps, jams, and nuts, making it a wonderful way to reduce food waste while enjoying a delicious dessert.
- You can substitute sponge cake or pound cake as the base if you prefer a different texture or flavor profile.
- Dark rum in the layers is optional but adds a rich aroma and depth to the flavor.
- Adjust the icing consistency with milk or lemon juice to your preference for sweetness and tang.
- Store leftovers covered in the refrigerator to keep the cake moist and fresh.


