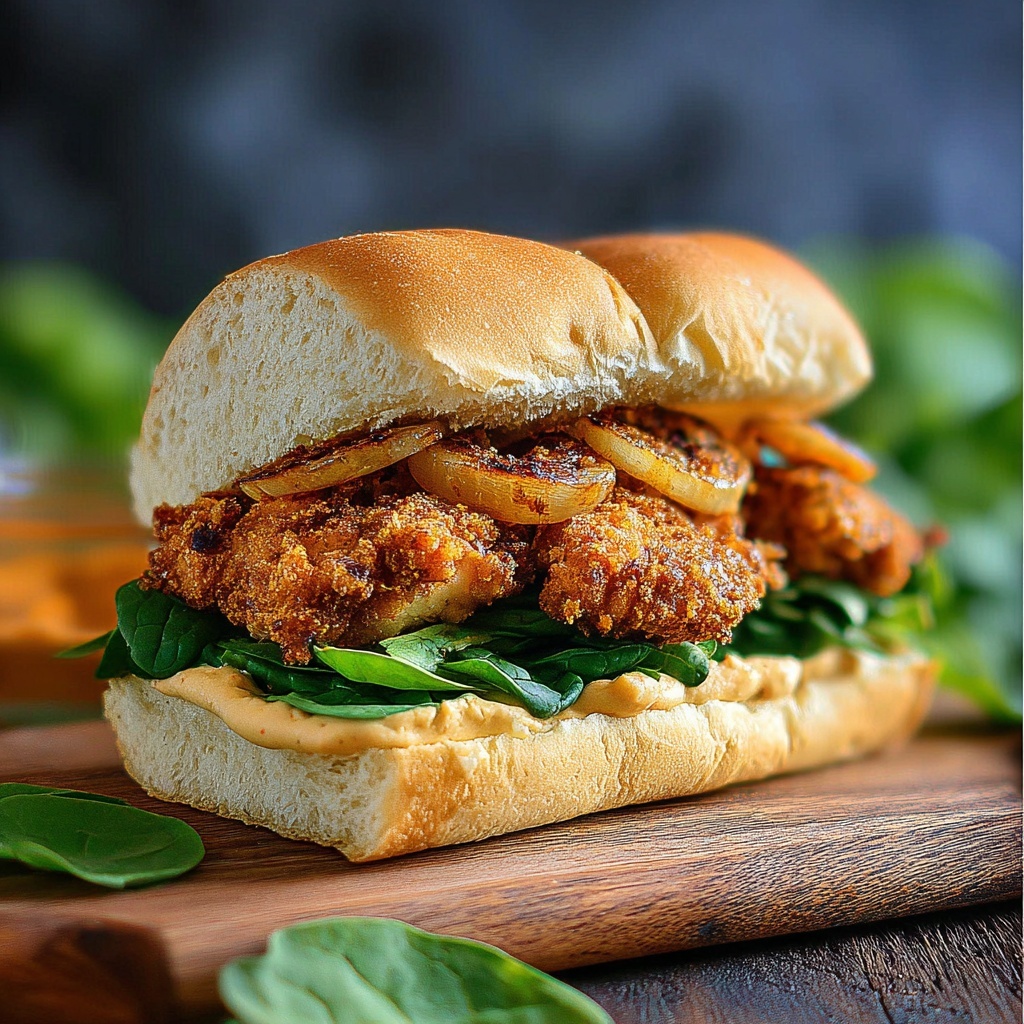
If you’re craving something that takes your lunch or casual dinner up a notch, this Crispy Chicken Caesar Sandwich: A Delicious Twist on a Classic Favorite Recipe will totally satisfy that craving and then some. Imagine biting into golden, crunchy chicken coated with seasoning that dances on your taste buds, paired with crisp romaine lettuce and a luscious Caesar dressing that brings everything together. All of this magic happens between your choice of bread, making each mouthful a perfect blend of texture and flavor. It’s familiar, yet exciting—a true crowd-pleaser ready for your kitchen.
Ingredients You’ll Need
Each ingredient in this recipe plays an essential role in balancing taste, texture, and color. From the crispy coating on the chicken to the creamy Caesar dressing, this straightforward list packs a punch that anyone can master.
- Chicken breasts: Choose fresh, boneless, skinless chicken breasts for tender, juicy meat inside your sandwich.
- Breadcrumbs: For that signature crispy crunch, panko breadcrumbs work best and stay light.
- Eggs: Used to bind the coating to the chicken and help achieve golden perfection.
- Parmesan cheese: Adds a savory depth to the coating mixture, boosting flavor complexity.
- Garlic powder: A subtle aromatic that enhances the chicken’s savory profile.
- Romaine lettuce: Fresh and crunchy, it adds a refreshing contrast and classic Caesar element.
- Caesar dressing: Creamy, tangy, and full of umami—the heart of the sandwich’s familiar taste.
- Bread of choice: Whether it’s a soft ciabatta, toasted sourdough, or a crusty baguette, the bread holds your masterpiece together.
- Olive oil: For frying the chicken to a golden crisp without greasiness.
How to Make Crispy Chicken Caesar Sandwich: A Delicious Twist on a Classic Favorite Recipe
Step 1: Prepare the Chicken
Start by trimming the chicken breasts and pounding them to an even thickness—this ensures they cook evenly. Season them lightly with salt and pepper to build a flavorful base.
Step 2: Create the Crispy Coating
In one bowl, whisk the eggs to create the binding agent. In another, mix the panko breadcrumbs with grated Parmesan and garlic powder. Dip each chicken breast first into the eggs, then generously coat it with the breadcrumb mixture, pressing gently to help it stick well.
Step 3: Cook the Chicken
Heat olive oil in a skillet over medium heat. Carefully add the coated chicken breasts and cook for about 4-5 minutes on each side until they are golden brown and cooked through. The outside should be satisfyingly crisp while the inside remains juicy.
Step 4: Assemble the Sandwich
Slice your bread and toast it lightly if desired. Spread a good amount of Caesar dressing on the bread, layer on fresh romaine leaves, and place the crispy chicken on top. Close the sandwich and get ready to enjoy a bite bursting with texture and flavor.
How to Serve Crispy Chicken Caesar Sandwich: A Delicious Twist on a Classic Favorite Recipe
Garnishes
Adding a sprinkle of shaved Parmesan or a few fresh cracked peppercorns on top can elevate your sandwich presentation and introduce subtle bursts of flavor with each bite. A lemon wedge on the side works wonderfully to brighten up the whole dish.
Side Dishes
Pair this sandwich with sweet potato fries for a touch of sweetness and a healthy crunch, or opt for a crisp, tangy coleslaw to cut through the richness. Either choice complements the sandwich without overpowering it.
Creative Ways to Present
Try stacking your Crispy Chicken Caesar Sandwich with bacon strips or sliced avocado for a decadent upgrade. You could even turn it into a wrap by swapping the bread for a large tortilla to make it portable yet just as tasty.
Make Ahead and Storage
Storing Leftovers
If you have any leftovers, wrap the sandwich tightly in foil or use an airtight container. Store in the fridge for up to two days to maintain freshness and avoid sogginess.
Freezing
While the sandwich is best enjoyed fresh, you can freeze the cooked chicken separately by wrapping it well and placing it in a freezer-safe bag. Use within one month for best flavor, and defrost overnight in the fridge before reheating.
Reheating
To bring leftover chicken back to life, reheat in a hot skillet or oven at 350°F for about 10 minutes. This method will help the coating stay crispy rather than mushy. Assemble the sandwich fresh after reheating the chicken.
FAQs
Can I use chicken thighs instead of breasts?
Absolutely! Chicken thighs offer more juiciness and flavor, and work beautifully with this recipe. Just adjust cooking time slightly as thighs can be thicker or smaller.
Is there a vegetarian version of this sandwich?
You can substitute the chicken with a crispy fried halloumi or a well-seasoned and breaded portobello mushroom to keep that satisfying texture and flavor.
What kind of bread is best?
Choose a bread with a sturdy crumb and a nice crust so it holds up to the juicy chicken and creamy dressing without becoming soggy. Ciabatta, sourdough, or French baguette work great.
How do I make homemade Caesar dressing?
Classic Caesar dressing typically involves anchovy paste, garlic, Dijon mustard, lemon juice, mayonnaise or egg yolk, Parmesan cheese, and olive oil. Whisked together until creamy, it’s well worth making from scratch.
Can I bake the chicken instead of frying?
Definitely! Baking at 425°F on a wire rack set over a baking sheet helps the chicken stay crispy. Bake for about 20-25 minutes or until cooked through and golden.
Final Thoughts
I truly hope you give this Crispy Chicken Caesar Sandwich: A Delicious Twist on a Classic Favorite Recipe a spot in your meal rotation. It’s an upbeat spin on a beloved classic that delivers all the comforting flavors and exciting textures you want from a great sandwich. Whether you’re feeding the family or impressing friends, this recipe is a guaranteed hit. Now, go ahead and make some delicious memories!
Print
Crispy Chicken Caesar Sandwich: A Delicious Twist on a Classic Favorite Recipe
- Prep Time: 15 minutes
- Cook Time: 15 minutes
- Total Time: 30 minutes
- Yield: 3 servings
- Category: Sandwich
- Method: Frying
- Cuisine: American
Description
The Crispy Chicken Caesar Sandwich is a delicious twist on the classic Caesar salad, featuring golden, crunchy breaded chicken cutlets, fresh romaine lettuce, and creamy Caesar dressing all nestled between your favorite sandwich bread. This recipe delivers a perfect balance of crisp textures and rich flavors, ideal for a satisfying lunch or casual meal that will impress guests and family alike.
Ingredients
For the Chicken
- 3 boneless, skinless chicken breasts
- 1 cup all-purpose flour
- 2 large eggs, beaten
- 1 cup panko breadcrumbs
- 1/2 cup grated Parmesan cheese
- 1 teaspoon garlic powder
- 1 teaspoon paprika
- Salt and black pepper to taste
- Vegetable oil for frying
For the Sandwich Assembly
- 3 sandwich rolls or slices of your favorite bread
- 1 cup fresh romaine lettuce, washed and chopped
- 1/2 cup Caesar dressing
- Optional: sliced avocado, crispy bacon, additional grated Parmesan cheese
Instructions
- Prepare the Chicken: Pound the chicken breasts to an even thickness for uniform cooking. Season with salt, pepper, garlic powder, and paprika. Set up a breading station with flour in one bowl, beaten eggs in a second bowl, and a mixture of panko breadcrumbs and Parmesan cheese in a third.
- Bread the Chicken: Dredge each chicken breast first in flour, shaking off excess, then dip into the eggs, and finally coat evenly with the breadcrumb and cheese mixture.
- Fry the Chicken: Heat vegetable oil in a large skillet over medium heat. Once hot, carefully fry the breaded chicken breasts for about 4-5 minutes per side or until golden brown and cooked through. Drain on a paper towel-lined plate.
- Assemble the Sandwich: Lightly toast the sandwich rolls or bread slices. Spread Caesar dressing evenly on the bottom half, then layer chopped romaine lettuce and the crispy chicken cutlet. Add optional toppings like sliced avocado, crispy bacon, and extra Parmesan cheese if desired. Top with the other half of the bread.
- Serve and Enjoy: Serve the sandwich immediately with sides such as sweet potato fries or coleslaw for a complete meal.
Notes
- Ensure the oil is hot enough before frying to achieve a crispy crust without absorbing excess oil.
- For a lighter version, you can bake the breaded chicken breasts at 400°F for 20-25 minutes instead of frying.
- Feel free to use gluten-free breadcrumbs and flour if you need a gluten-free version.
- Adding toppings like crispy bacon or avocado adds extra flavor and texture variations.
- Leftover chicken makes great additions to salads or wraps the next day.


