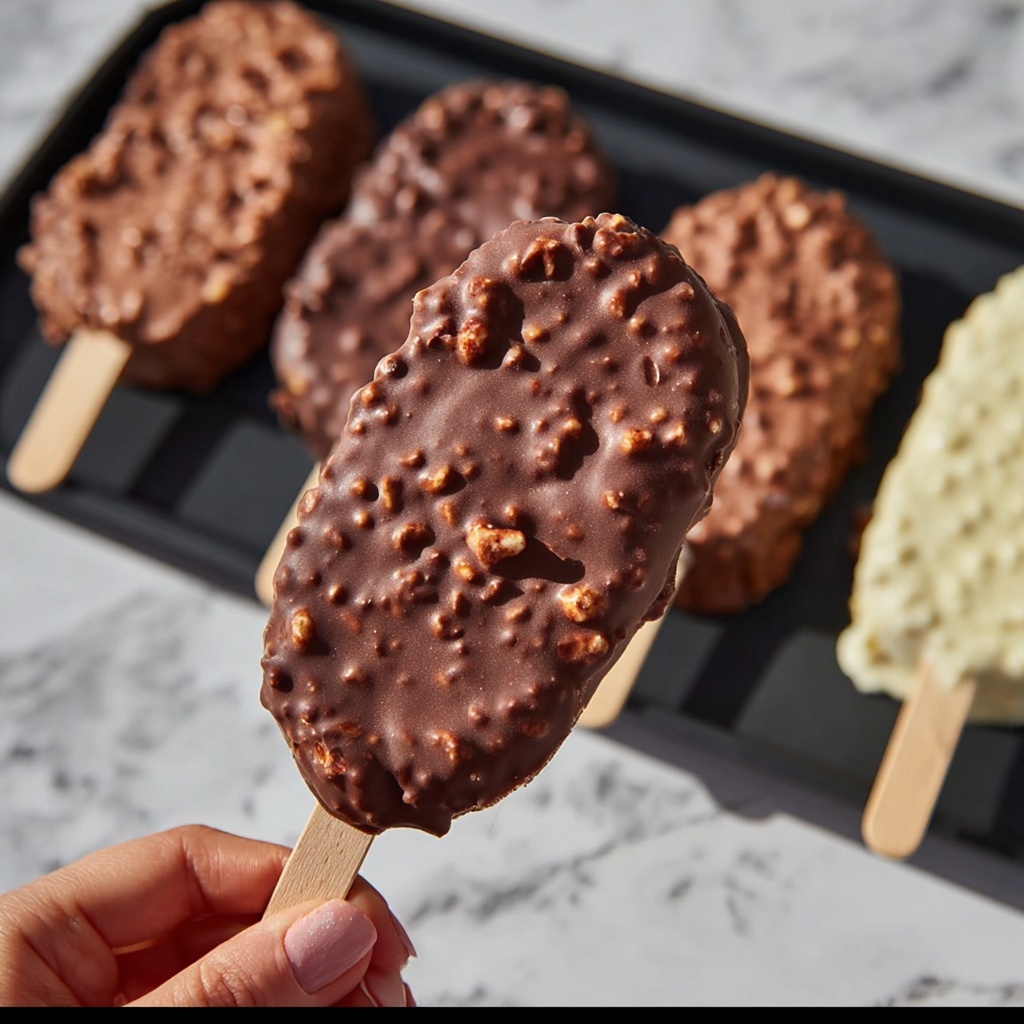
If you have a weakness for creamy, dreamy frozen treats, then this Chocolate Ice Cream Bars Recipe is about to become your new best friend. Imagine rich, velvety chocolate ice cream coated in a perfectly crisp shell of dark chocolate, with the option to add a delightful crunch from nuts or sprinkles. It’s an irresistible dessert that screams indulgence and is incredibly satisfying to make at home, especially when the temperature rises and you crave something cool and comforting. This recipe brings together simple ingredients with a touch of elegance, delivering a sweet treat that’s sure to impress family and friends alike.
Ingredients You’ll Need
Gathering the right ingredients is easier than you think, and each one is essential for creating the ideal flavor, texture, and look of these Chocolate Ice Cream Bars. From the creamy base to the rich chocolate coating, here’s what you’ll need:
- 2 cups heavy whipping cream: This adds the luscious creaminess that makes the ice cream so smooth and rich.
- 1 cup whole milk: Balances the cream for a perfect texture without being too heavy.
- 3/4 cup granulated sugar: Sweetens the mixture just right to let the chocolate shine.
- 1/4 cup unsweetened cocoa powder: Gives the base a deep chocolate flavor and lovely color.
- 4 ounces semi-sweet chocolate, finely chopped: Melts into the mixture, making it intensely chocolatey.
- 1 teaspoon pure vanilla extract: Enhances all the chocolate flavors with a warm, inviting note.
- 1/8 teaspoon salt: A pinch helps bring out sweetness and chocolate depth.
- 8 wooden popsicle sticks: Essential for easy handling and that classic ice cream bar feel.
- 2 cups semi-sweet or dark chocolate chips for coating: Creates a crisp, glossy shell when melted.
- 2 tablespoons coconut oil: Helps the coating harden smoothly and adds shine.
- Optional 1/2 cup chopped nuts or sprinkles for topping: Adds fun texture and extra flavor.
How to Make Chocolate Ice Cream Bars Recipe
Step 1: Whisk the Creamy Chocolate Mixture
Start by heating your heavy cream, whole milk, sugar, cocoa powder, and salt over medium heat in a saucepan. Use a whisk to combine everything until the sugar completely dissolves and the mixture is hot but not boiling. This careful heating is crucial because it allows the cocoa and sugar to fully infuse the cream, creating that rich chocolate foundation.
Step 2: Melt in Chocolate and Add Vanilla
Once your base is heated, remove the pan from the stove and stir in the finely chopped semi-sweet chocolate. Continue stirring until it’s completely melted and your mixture becomes smooth and glossy. Then, stir in the vanilla extract to give the ice cream a warm, inviting aroma that perfectly balances the intense chocolate.
Step 3: Cool and Freeze
Allow the chocolate mixture to cool to room temperature before pouring it into popsicle molds. Insert the wooden sticks, making sure they’re centered for easy dipping later on. Pop your molds into the freezer for at least 6 hours, or until the bars are completely firm. Patience here pays off — you want the perfect frozen texture!
Step 4: Prepare the Chocolate Coating
When your ice cream bars are firm, melt the chocolate chips and coconut oil together in a microwave-safe bowl. Heat in 30-second intervals, stirring well after each until the mixture is silky smooth. The coconut oil is the secret to that shiny, crisp shell when the coating hardens.
Step 5: Dip and Decorate
Carefully remove each bar from its mold and dip it into the melted chocolate, letting the excess drip off to avoid a thick coating. If you’re feeling playful, immediately sprinkle chopped nuts or colorful sprinkles on top for extra crunch and visual appeal. Place the dipped bars on a parchment-lined baking sheet and return them to the freezer for about 10 minutes to set the chocolate shell perfectly.
How to Serve Chocolate Ice Cream Bars Recipe
Garnishes
While these bars are stunning on their own, a few simple garnishes can elevate their presentation. Try sprinkling a pinch of sea salt on the chocolate shell before it hardens — it beautifully contrasts with the sweetness. Alternatively, finely crushed cookies or a dusting of cocoa powder can add an elegant touch that complements the chocolate flavors perfectly.
Side Dishes
If you’re serving the bars as part of a dessert spread, pair them with fresh berries for a burst of freshness or a drizzle of raspberry sauce for tartness that cuts through the richness. A light mint leaf can add a herbaceous note that makes every bite feel like a special occasion.
Creative Ways to Present
For parties or gatherings, arrange your Chocolate Ice Cream Bars in a pretty glass or bowl filled with ice to keep them chilled and eye-catching. Wrap individual bars in decorative parchment paper or small cellophane bags tied with a ribbon — they make fantastic homemade gifts! You could also drizzle extra melted white chocolate over the bars to create pretty patterns that wow your guests.
Make Ahead and Storage
Storing Leftovers
Keep any leftover chocolate ice cream bars in an airtight container in the freezer. This protects them from freezer burn and helps maintain their creamy texture and crisp chocolate coating. They will stay delicious for up to two weeks, so you can enjoy them whenever a chocolate craving strikes.
Freezing
The freezing process is key in this Chocolate Ice Cream Bars Recipe. Make sure your freezer is set to an ideal temperature (0°F or -18°C) and allow enough time for the bars to freeze thoroughly. Individually wrapping each bar in plastic wrap before placing them in a container can prevent them from sticking together and protect the quality.
Reheating
While these bars are designed to be enjoyed cold, if you want to soften the chocolate coating slightly, leave the bars at room temperature for 5 minutes before serving. Avoid microwaving, as it can melt the ice cream and ruin the texture.
FAQs
Can I use low-fat milk instead of whole milk?
While you can substitute low-fat milk, it will affect the richness and creaminess of the ice cream bars. Whole milk helps create that indulgent, smooth texture that’s signature to this recipe.
What alternatives exist for the semi-sweet chocolate?
You can use dark chocolate with a high cocoa percentage for a more intense flavor or milk chocolate if you prefer a sweeter, milder coating. Just keep in mind that the texture and taste will vary slightly.
Can I make these bars dairy-free?
Absolutely! Substitute the heavy cream and whole milk with coconut cream and your favorite dairy-free milk, such as almond or oat milk. For the coating, make sure to use dairy-free chocolate chips.
How do I prevent the chocolate coating from cracking?
Melting the chocolate with coconut oil helps create a smooth, flexible coating less prone to cracking. Also, make sure the ice cream bars are fully frozen before dipping and place them back into a cold freezer immediately after.
Can I add mix-ins to the ice cream base?
While this recipe is designed for a smooth chocolate frozen treat, gently folding in small chunks of nuts or candies before freezing can add a nice surprise. Just be careful not to disrupt the pouring and freezing process too much.
Final Thoughts
This Chocolate Ice Cream Bars Recipe is a delightful way to bring homemade magic to your dessert routine, whether you’re entertaining guests or just treating yourself. The combination of rich chocolate ice cream and a crisp coating is endlessly satisfying, and the process is surprisingly simple. Trust me, once you make these bars, you’ll wonder why you ever bought frozen treats from the store. So grab your ingredients, get dipping, and enjoy every luscious bite of this chocolatey joy!
Print
Chocolate Ice Cream Bars Recipe
- Prep Time: 20 minutes
- Cook Time: 10 minutes
- Total Time: 6 hours 30 minutes
- Yield: 8 bars
- Category: Dessert
- Method: Freezing
- Cuisine: American
- Diet: Vegetarian
Description
These homemade Chocolate Ice Cream Bars are a delicious frozen treat perfect for summer. Made with creamy heavy cream, rich cocoa, and dipped in a glossy chocolate coating, they offer a delightful balance of smooth ice cream and crunchy chocolate shell. Customize them with nuts or sprinkles for added texture and flavor.
Ingredients
Ice Cream Base
- 2 cups heavy whipping cream
- 1 cup whole milk
- 3/4 cup granulated sugar
- 1/4 cup unsweetened cocoa powder
- 4 ounces semi-sweet chocolate, finely chopped
- 1 teaspoon pure vanilla extract
- 1/8 teaspoon salt
- 8 wooden popsicle sticks
Chocolate Coating
- 2 cups semi-sweet or dark chocolate chips
- 2 tablespoons coconut oil
- Optional: 1/2 cup chopped nuts or sprinkles for topping
Instructions
- Prepare Ice Cream Mixture: In a saucepan over medium heat, whisk together the heavy cream, whole milk, granulated sugar, unsweetened cocoa powder, and salt until the sugar dissolves and the mixture is hot but not boiling.
- Melt Chocolate: Remove the saucepan from heat and stir in the finely chopped semi-sweet chocolate until completely melted and the mixture is smooth.
- Add Vanilla and Cool: Stir in the vanilla extract and allow the mixture to cool to room temperature.
- Freeze in Molds: Pour the cooled mixture into popsicle molds and insert wooden sticks. Freeze for at least 6 hours or until completely firm.
- Prepare Chocolate Coating: Melt the chocolate chips and coconut oil together in a microwave-safe bowl using 30-second intervals, stirring between intervals until smooth and glossy.
- Coat the Ice Cream Bars: Remove ice cream bars from the molds and quickly dip each bar into the melted chocolate, letting excess drip off.
- Add Toppings: Immediately sprinkle chopped nuts or sprinkles on the coated bars if using.
- Set Chocolate: Place the coated bars on a parchment-lined baking sheet and return them to the freezer for 10 minutes to allow the chocolate to set before serving.
Notes
- For a richer flavor, use dark cocoa powder instead of unsweetened cocoa powder.
- Substitute dairy-free milk and coconut cream to make a dairy-free version.
- Store the bars in an airtight container in the freezer for up to 2 weeks to maintain freshness.

