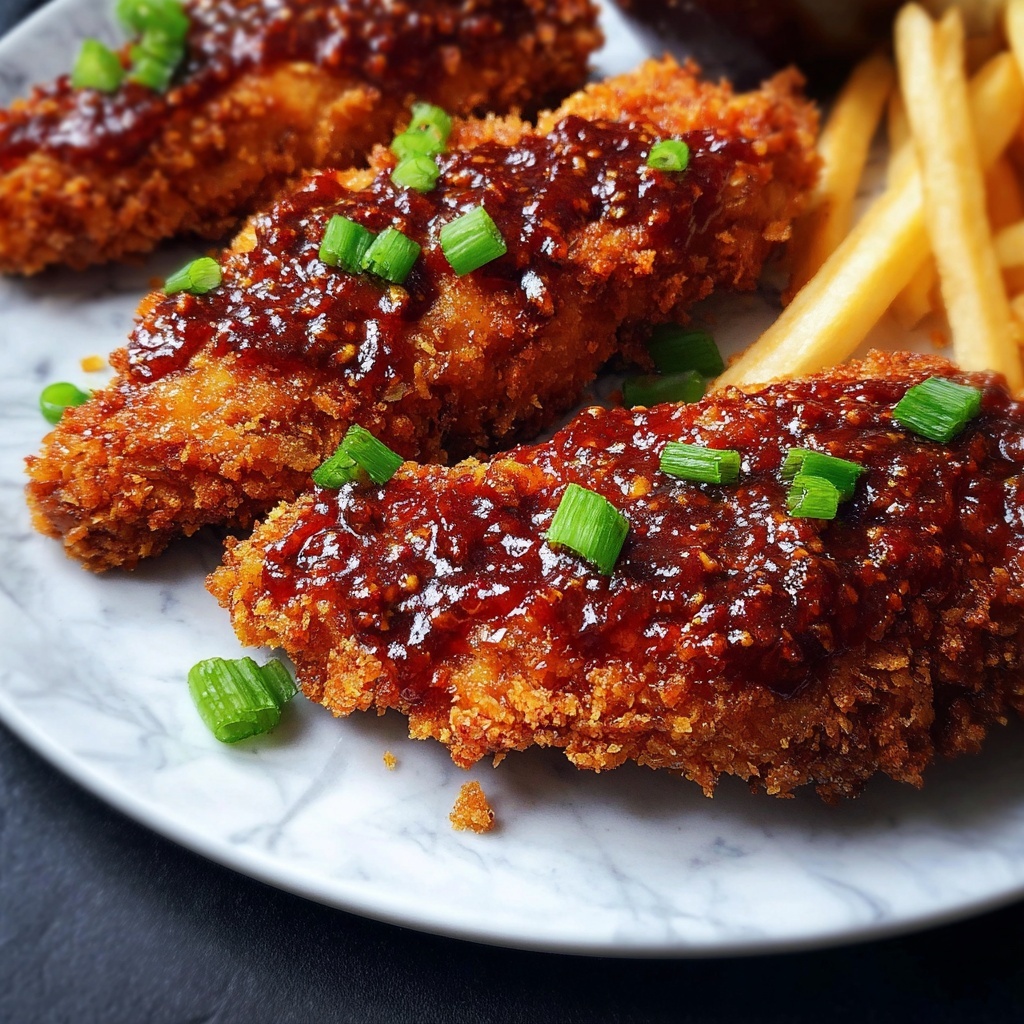
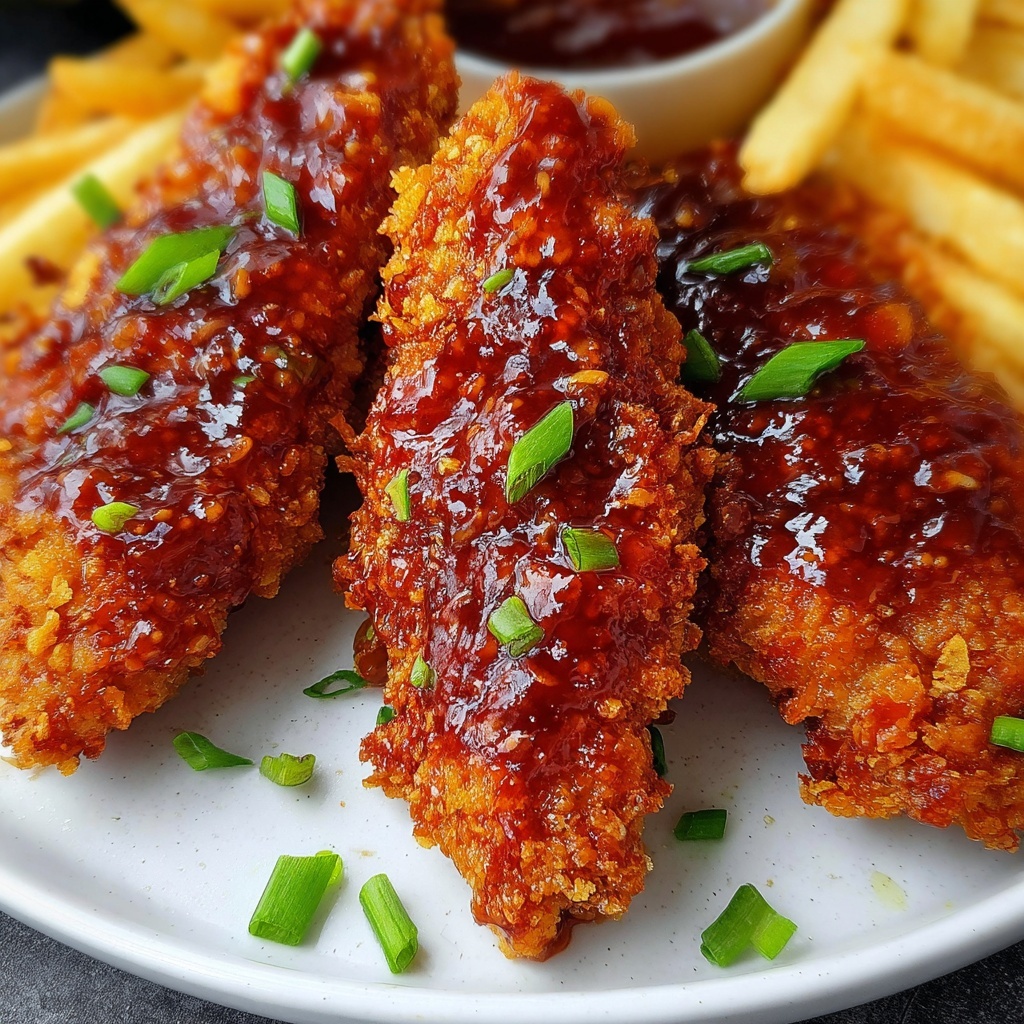
If you love tender, juicy chicken with a perfectly crispy coating and a sweet, buttery glaze, then you are going to fall head over heels for this Crispy Honey Butter Chicken Tenders Recipe. It combines the satisfying crunch of panko-coated chicken with the irresistible richness of honey butter, creating a dish that’s both comforting and exciting. Whether you’re whipping up a quick weeknight meal or entertaining guests, this recipe guarantees smiles all around and plates wiped clean!
Ingredients You’ll Need
This Crispy Honey Butter Chicken Tenders Recipe calls for simple, everyday ingredients that each play a crucial role. From the flour and spices that build the flavorful crust, to the honey butter mixture that seals in moistness with just the right amount of sweetness, every component works harmoniously to deliver that unforgettable taste and texture.
- 1 1/2 pounds chicken tenders: The star of the dish, providing tender, juicy bites that cook quickly and evenly.
- 1 cup all-purpose flour: Helps create a light coating that the flavors cling to and crisp up beautifully.
- 1 teaspoon salt: Enhances overall flavor and balances the sweetness.
- 1/2 teaspoon black pepper: Adds a subtle kick and depth to the seasoning.
- 1/2 teaspoon paprika: Brings a smoky warmth and lovely color to the crust.
- 1/2 teaspoon garlic powder: Infuses a mild, savory undertone for complexity.
- 2 large eggs, beaten: Acts as the perfect binder for the panko, ensuring a crisp exterior.
- 1 cup panko breadcrumbs: Delivers that signature crunch that makes these tenders so addictive.
- 4 tablespoons unsalted butter: The base for the luscious honey butter glaze, adding richness.
- 3 tablespoons honey: Sweetens and caramelizes beautifully when brushed onto the chicken.
- 1 tablespoon olive oil: Helps balance the butter and keeps the coating crispy during baking.
How to Make Crispy Honey Butter Chicken Tenders Recipe
Step 1: Prepare Your Oven and Coating Stations
Preheat your oven to 400°F and line a baking sheet with parchment paper to prevent sticking and make cleanup a breeze. Set out three shallow bowls: one mixing the flour with salt, black pepper, paprika, and garlic powder; one with beaten eggs; and the last with panko breadcrumbs. This setup makes the breading process efficient and keeps your coating ultra crispy.
Step 2: Bread the Chicken Tenders
Take each chicken tender and first dredge it in the seasoned flour, ensuring an even coat that locks in moisture. Next, dip the tenders into the beaten eggs, which acts like glue for the breadcrumbs. Finally, press the chicken gently but firmly into the panko breadcrumbs, making sure the surface is completely covered. Arrange each breaded tender on your prepared baking sheet for easy access when baking.
Step 3: Create the Honey Butter Glaze
In a small saucepan over low heat, melt the unsalted butter slowly to avoid burning. Stir in the honey and olive oil until the mixture is smooth and glossy. This honey butter glaze will melt into the chicken while baking, creating that beautiful sweet and savory finish that elevates this dish to another level.
Step 4: Bake and Glaze the Chicken
Brush half of your honey butter mixture onto the chicken tenders before popping them into the oven. Bake for 15 to 18 minutes, flipping the tenders halfway through and brushing with the remaining honey butter. This ensures each side gets that irresistible golden brown color and sticky glaze. The chicken should be cooked through and crispy by the time it’s finished.
How to Serve Crispy Honey Butter Chicken Tenders Recipe

Garnishes
To enhance both flavor and presentation, try sprinkling freshly chopped parsley or chives over the tenders. A light dusting of cracked black pepper or a few sesame seeds can add an extra touch of flair and texture. Garnishes not only brighten the plate but also add fresh aroma and subtle contrast to the rich honey butter coating.
Side Dishes
These chicken tenders are incredibly versatile when it comes to sides. Creamy mashed potatoes or crispy fries make excellent companions, as do roasted seasonal vegetables like carrots or green beans. For a lighter option, a crisp garden salad with a tangy vinaigrette cuts through the richness and balances the meal perfectly.
Creative Ways to Present
If you’re serving these at a casual party or family gathering, consider offering a trio of dipping sauces alongside—ranch, spicy aioli, and honey mustard each complement the flavors beautifully. Presenting the tenders piled on a rustic wooden board with colorful dishes of sauce encourages sharing and makes the experience more fun and interactive.
Make Ahead and Storage
Storing Leftovers
Place any leftover chicken tenders in an airtight container and refrigerate. They will stay delicious for up to two days. To keep that signature crispiness intact, make sure the container is well-sealed but avoid stacking the tenders too tightly together.
Freezing
This Crispy Honey Butter Chicken Tenders Recipe is freezer-friendly. After baking and cooling, freeze the tenders in a single layer on a baking sheet, then transfer them to a freezer-safe bag or container. When stored properly, they freeze well for up to one month and are great for quick, tasty meals later.
Reheating
To reheat, avoid the microwave if you want to keep the tenders crispy. Instead, warm them in a preheated oven at 350°F for about 10 minutes, or until heated through. You can also refresh the honey butter glaze with a quick brush during reheating for that just-made flavor.
FAQs
Can I use chicken breasts instead of tenders?
Absolutely! Just slice the chicken breasts into tender-sized strips and follow the same breading and baking process. Cooking time may vary slightly depending on thickness—just ensure the chicken reaches an internal temperature of 165°F.
Is it possible to make this recipe gluten-free?
Yes! Swap the all-purpose flour for a gluten-free flour blend and use gluten-free panko breadcrumbs. This way, you can still enjoy the crispy texture without compromising dietary needs.
Can I make these in an air fryer?
You certainly can! Air frying will yield an extra crispy exterior. Preheat the air fryer to 400°F and cook the breaded tenders in a single layer for about 10-12 minutes, flipping halfway through. Remember to brush or spray some honey butter for that signature flavor.
How do I prevent the coating from falling off?
The key is the three-step breading process: seasoned flour, egg wash, then panko. Pressing the breadcrumbs firmly onto the chicken helps them adhere better. Also, flipping gently during baking minimizes the risk of the coating coming loose.
Can I adjust the sweetness of the honey butter?
Of course! If you prefer it less sweet, reduce the honey to 2 tablespoons or add a pinch of salt to balance it. For an even richer flavor, a touch of cinnamon or a drizzle of maple syrup can add an exciting twist.
Final Thoughts
Now that you have this Crispy Honey Butter Chicken Tenders Recipe in your culinary arsenal, I promise it will become a go-to for gatherings, weeknight dinners, and everything in between. The harmony of sweet honey butter and crunchy panko coating turns simple chicken tenders into something truly special. Give it a try, share it with loved ones, and watch it disappear from the plate in no time!
Print
Crispy Honey Butter Chicken Tenders Recipe
- Prep Time: 15 minutes
- Cook Time: 18 minutes
- Total Time: 33 minutes
- Yield: 4 servings
- Category: Main Course
- Method: Baking
- Cuisine: American
Description
These Crispy Honey Butter Chicken Tenders are a perfect blend of sweet and savory flavors with a deliciously crunchy coating. Baked to golden perfection and brushed with a luscious honey butter glaze, they make an easy and crowd-pleasing main course that’s ideal for family dinners or casual gatherings.
Ingredients
Chicken and Breading
- 1 1/2 pounds chicken tenders
- 1 cup all-purpose flour
- 1 teaspoon salt
- 1/2 teaspoon black pepper
- 1/2 teaspoon paprika
- 1/2 teaspoon garlic powder
- 2 large eggs, beaten
- 1 cup panko breadcrumbs
Honey Butter Glaze
- 4 tablespoons unsalted butter
- 3 tablespoons honey
- 1 tablespoon olive oil
Instructions
- Prepare Oven and Breading Stations: Preheat the oven to 400°F (200°C) and line a baking sheet with parchment paper to prevent sticking. In a shallow bowl, mix together flour, salt, black pepper, paprika, and garlic powder to create the seasoned flour. Place the beaten eggs in a separate bowl and the panko breadcrumbs in another bowl, setting up a dredging station for breading the chicken tenders.
- Bread the Chicken Tenders: Take each chicken tender and first coat it thoroughly in the seasoned flour mixture, shaking off any excess. Then dip it into the beaten eggs ensuring it is fully coated. Finally, press the chicken into the panko breadcrumbs, making sure the coating sticks well. This triple-dip method ensures a crispy, flavorful crust.
- Arrange on Baking Sheet: Lay the breaded chicken tenders evenly spaced on the prepared baking sheet. This allows hot air to circulate around each tender, ensuring even baking and crispiness.
- Make Honey Butter Mixture: In a small saucepan, melt the unsalted butter over low heat. Stir in the honey and olive oil until smoothly combined to create a glossy honey butter glaze. Remove from heat to prevent burning.
- Brush and Bake: Generously brush half of the honey butter mixture over the chicken tenders before placing them in the oven. Bake for 15 to 18 minutes, flipping the chicken halfway through the baking time. When flipping, brush the remaining honey butter on the other side to infuse maximum flavor and enhance browning.
- Finish and Serve: Once the chicken tenders are cooked through and golden brown, remove them from the oven. For extra crispiness, optionally broil for 1–2 minutes, watching carefully to avoid burning. Serve immediately while hot and juicy.
Notes
- For extra crispiness, broil the tenders for 1–2 minutes at the end of baking, watching carefully to avoid burning.
- These chicken tenders pair perfectly with a side of fresh vegetables, fries, or a light salad for a balanced meal.
- Leftover chicken tenders can be stored in an airtight container in the refrigerator for up to 2 days and reheated in the oven to retain crispiness.


