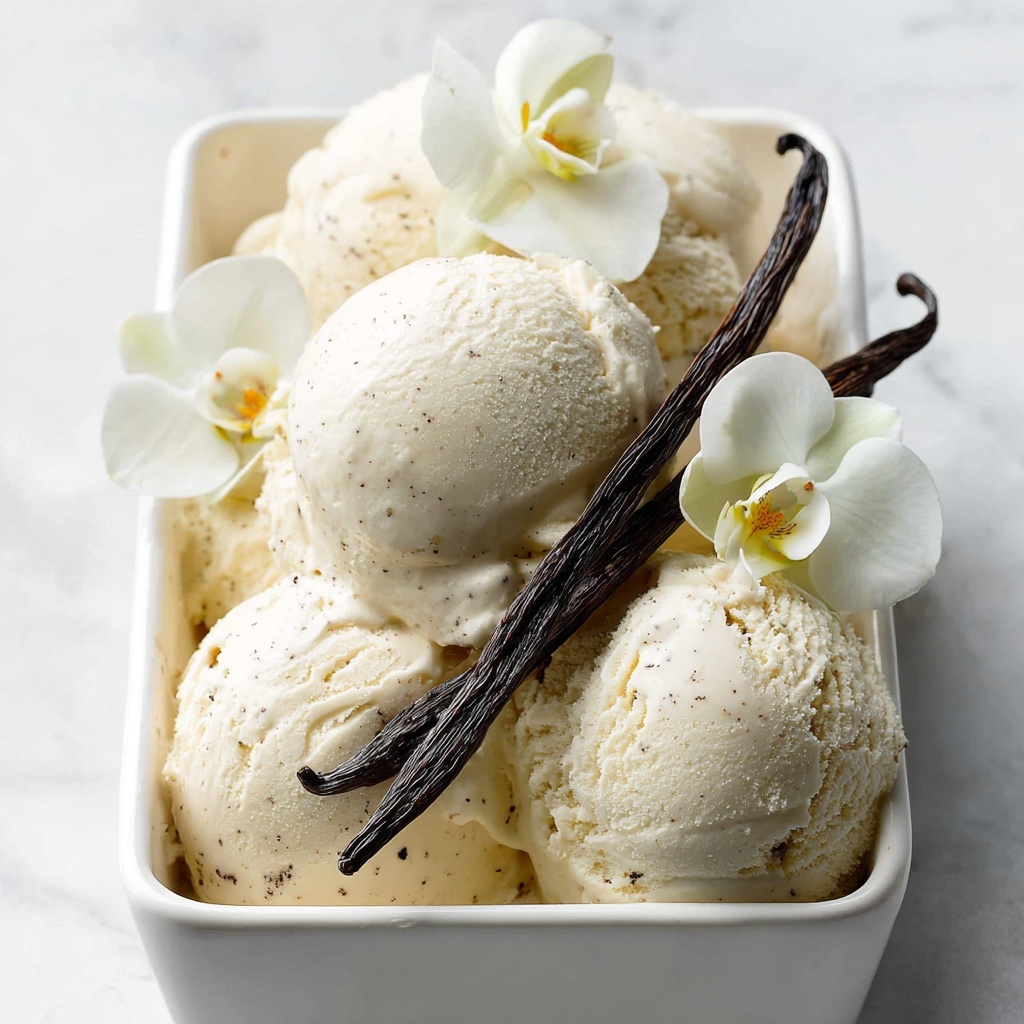
If you have been searching for a delightful, indulgent treat that’s both satisfying and allergy-friendly, the Creamy Vegan Vanilla Ice Cream (Nut Free & GF) Recipe is here to become your new go-to. This luscious ice cream captures the essence of classic vanilla, while keeping things completely plant-based and free from nuts and gluten. Imagine a scoop of silky smooth, perfectly sweetened vanilla ice cream that melts in your mouth, made with ingredients you can actually pronounce and trust. It’s rich yet light, comforting yet refreshing—a dessert that truly welcomes everyone to enjoy.
Ingredients You’ll Need
The magic of this ice cream starts with a handful of straightforward ingredients that each play a crucial role in delivering creamy texture, smooth consistency, and that classic vanilla flavor. Every item is chosen not just for taste but for how it harmonizes to ensure a perfect nut-free and gluten-free vegan treat.
- Soy milk (520 ml): A neutral, creamy base that creates a perfect dairy-free canvas for the ice cream.
- Granulated sugar (100 g): Sweetness that blends seamlessly without overpowering the delicate flavors.
- Cornstarch (45 g): Thickens the mixture into a custard-like base, key for achieving that creamy texture.
- Vanilla pod (1): Fresh vanilla seeds give a fragrant, authentic aroma and depth of flavor you can’t get from extracts alone.
- Sea salt (¼ teaspoon): Enhances the sweetness and balances the flavors beautifully.
- Vegan condensed milk (200 g): Adds rich sweetness while boosting creaminess naturally without dairy.
- Chilled full-fat canned coconut milk (200 g): The thickest part from the can lends luscious body and softness.
- Vanilla extract (1 tablespoon): Gives a final punch of pure vanilla for depth and smoothness.
How to Make Creamy Vegan Vanilla Ice Cream (Nut Free & GF) Recipe
Step 1: Prep the Ice Cream Bowl
Start by freezing the bowl of your ice cream machine at least 12 to 24 hours ahead of time. A thoroughly chilled bowl is essential for an even, smooth freeze and creamy texture later on.
Step 2: Create the Vanilla Custard Base
In a medium saucepan, whisk together soy milk, sugar, and cornstarch until perfectly smooth to avoid lumps. Slice the vanilla pod lengthwise, scraping out the tiny fragrant seeds and dropping both seeds and pod into the saucepan. Heat the mixture on medium and bring it to a gentle simmer.
Step 3: Cook the Custard
Once simmering, whisk continuously for about 5 minutes, alternating between a whisk and a spatula to prevent sticking. As the cornstarch activates, you’ll notice the mixture thickening beautifully into a custard. When thickened, remove from heat and carefully fish out the vanilla pod. Stir in the sea salt for flavor balance.
Step 4: Cool the Custard
Cover the custard with clingfilm pressed right onto the surface to prevent a skin from forming. Let it cool at room temperature for 10 minutes, then refrigerate until completely chilled—about an hour. This slow cooling is crucial for texture and flavor development.
Step 5: Mix the Ice Cream Base
In a large bowl, blend the vegan condensed milk, the thick part of your chilled canned coconut milk, and vanilla extract with an electric whisk until creamy. Then add the chilled vanilla custard and whisk again until the entire mixture is smooth and well combined.
Step 6: Churn the Ice Cream
Pour the combined mixture into your ice cream machine and churn according to the manufacturer’s guidelines. Typically, this takes between 30 to 40 minutes, turning your mixture into a soft, creamy gelato-like consistency.
Step 7: Freeze to Set
Transfer the churned ice cream to a loaf pan or airtight container, smoothing the top. Cover with a lid or plastic wrap and place in the freezer for at least 2 hours to firm up further for perfect scooping consistency.
How to Serve Creamy Vegan Vanilla Ice Cream (Nut Free & GF) Recipe
Garnishes
Keep it simple and elegant with fresh berries or a sprinkle of cinnamon on top to complement the pure vanilla flavor. For a bit of crunch, try toasted coconut flakes or small pieces of fruit leather for an unexpected twist without adding nuts or gluten.
Side Dishes
This ice cream pairs wonderfully with warm vegan brownies, a freshly baked berry crumble, or even a cozy bowl of spiced apple compote. The contrast of warm with cold intensifies the dessert experience, making every spoonful feel special.
Creative Ways to Present
For a fun dessert, serve the creaminess inside vegan waffle cones or atop dairy-free pancakes. Layer scoops with vegan chocolate sauce in parfait glasses for a show-stopping presentation that’s perfect for gatherings or celebrations.
Make Ahead and Storage
Storing Leftovers
Store any leftover ice cream in an airtight container in the freezer to maintain its texture and flavor. This creaminess stays wonderful for up to 2 months when properly sealed and frozen.
Freezing
If you’re making this ahead for a party or family gathering, freeze the ice cream for a minimum of 2 hours followed by storage in a tightly closed container. Avoid frequent thawing and refreezing, which can cause ice crystals and gritty texture.
Reheating
This ice cream is best enjoyed cold and fresh from the freezer. Before serving, allow it to sit at room temperature for about 15 minutes; this softens it just enough for easy scooping without losing that creamy integrity.
FAQs
Can I substitute soy milk for another plant milk?
Absolutely! While soy milk provides great creaminess and protein, you can experiment with oat milk or pea milk, which also work well in this recipe, although texture and flavor may differ slightly.
Is this ice cream truly nut-free?
Yes! This recipe uses no nuts at all, making it safe for those with nut allergies, while still delivering creamy richness using coconut milk and vegan condensed milk.
What can I use instead of cornstarch?
Arrowroot starch is a fantastic substitute that offers a similarly smooth thickening effect without changing the flavor profile.
How long does the ice cream last in the freezer?
If stored in an airtight container and kept frozen consistently, your ice cream will stay fresh and delicious for up to 2 months.
Can I make this recipe without an ice cream machine?
You can try freezing the mixture in a shallow container and stirring vigorously every 30 minutes to break up ice crystals, but the texture won’t be quite as smooth and creamy as machine-churned ice cream.
Final Thoughts
There is nothing quite like the joy of crafting your very own luscious plant-based dessert, and this Creamy Vegan Vanilla Ice Cream (Nut Free & GF) Recipe delivers on every front. It’s wonderfully straightforward, utterly delicious, and elegantly allergen-friendly—offering something both comforting and fresh for anyone craving a scoop or two. So why not dive into this delightful recipe and treat yourself to a vegan vanilla dream made easy at home?
Print
Creamy Vegan Vanilla Ice Cream (Nut Free & GF) Recipe
- Prep Time: 20 minutes (plus 12-24 hours freezing of ice cream bowl and 1 hour custard chilling)
- Cook Time: 5 minutes simmering + 30-40 minutes churning
- Total Time: Approximately 4 hours (including chilling and freezing times)
- Yield: 8 servings
- Category: Dessert
- Method: Stovetop
- Cuisine: Vegan
- Diet: Gluten Free
Description
This creamy vegan vanilla ice cream is a rich, dairy-free dessert that’s both nut-free and gluten-free. Made with soy milk, vegan condensed milk, and coconut cream, it offers a smooth, luscious texture with the classic vanilla flavor. Perfect for those seeking a plant-based treat that doesn’t compromise on creaminess or taste.
Ingredients
Custard Base
- 520 ml soy milk
- 100 g granulated sugar
- 45 g cornstarch (or arrowroot starch)
- 1 vanilla pod
- ¼ teaspoon sea salt
Ice Cream Mixture
- 200 g vegan condensed milk
- 200 g chilled full-fat canned coconut milk (thick part from top of the can only, or coconut cream)
- 1 tablespoon vanilla extract
Instructions
- Freeze the ice cream bowl: Place the ice cream machine’s bowl in the freezer at least 12-24 hours before starting to ensure it’s properly chilled for churning.
- Prepare the custard base: In a saucepan, whisk together soy milk, sugar, and cornstarch thoroughly to eliminate any lumps. Cut the vanilla pod down the middle and scrape out the seeds, then add both seeds and pod to the pan. Heat the mixture on medium until it reaches a gentle simmer.
- Cook the custard: Simmer the mixture for 5 minutes, whisking continuously and alternating with a rubber spatula to prevent sticking. Once thickened due to the cornstarch cooking, remove from heat. Carefully take out the vanilla pod and stir in sea salt.
- Cool the custard: Cover the saucepan with clingfilm to prevent skin formation and let cool at room temperature for 10 minutes. Then transfer the custard to the fridge and chill fully for about an hour.
- Combine ice cream mixture: In a large bowl, use an electric whisk to beat vegan condensed milk, thick coconut milk, and vanilla extract until creamy. Add the chilled custard and whisk again for another minute to ensure everything is well combined.
- Churn the ice cream: Pour the mixture into the pre-frozen ice cream machine bowl and churn according to the manufacturer’s instructions, usually about 30-40 minutes, until the ice cream reaches a soft-serve consistency.
- Freeze to set: Transfer the churned ice cream into a loaf pan, cover with a lid or plastic wrap, and freeze for a minimum of 2 hours to firm up.
- Storage and serving: Store the ice cream in an airtight container in the freezer for up to 2 months. Before serving, remove it from the freezer about 15 minutes ahead to soften slightly. Use a hot wet scoop to serve easily.
Notes
- Use soy milk for a smooth base; other plant milks may affect texture.
- Granulated sugar sweetens the custard and helps with texture.
- Cornstarch or arrowroot starch acts as a thickener for the custard base.
- Chilled coconut milk or coconut cream adds richness and creaminess to the ice cream.
- Freezing the ice cream machine bowl ahead of time is essential for proper churning.
- This recipe yields a nut-free and gluten-free vegan ice cream, suitable for those with these dietary restrictions.


