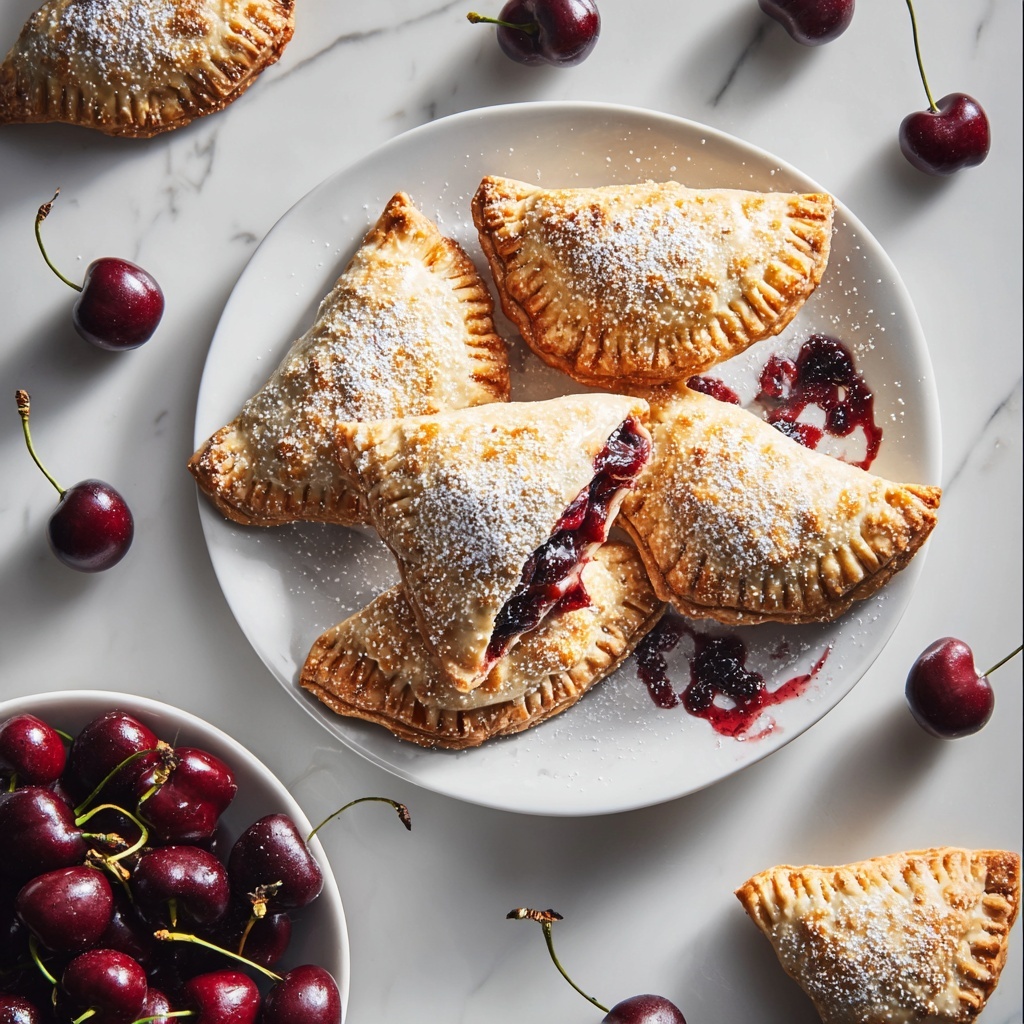
If you have a soft spot for little treats that pack a punch of fruity sweetness wrapped in flaky, buttery crusts, then this Cherry Hand Pies Recipe is going to steal your heart. These charming little pies are bursting with luscious cherry filling, perfectly thickened and sweetened, all encased in golden pockets you can hold in your hand. Whether you’re looking for a fun dessert to share with friends or a cozy snack to indulge in with your favorite cup of tea, these Cherry Hand Pies bring warmth, nostalgia, and pure joy to every bite.
Ingredients You’ll Need
Keeping the ingredients simple lets each element shine—the flaky crust, the juicy cherries, and the sweet glaze all work together to make these pies unforgettable. Here’s what you need to make these delightful hand pies.
- 2 pie crusts (store-bought or homemade): The foundation for a flaky, buttery outer shell that’s easy to work with and bakes beautifully.
- 2 tablespoons butter: Adds richness to the cherry filling and helps meld flavors perfectly.
- 2 cups fresh cherries, pitted and sliced: The star of the show, these bring bright, tart sweetness and vibrant color.
- ¼ cup granulated sugar: Balances the tartness of cherries with just the right touch of sweetness.
- 2 tablespoons cornstarch: Thickens the cherry filling so it sets beautifully without becoming runny.
- Pinch of salt: Enhances all the flavors and keeps the filling from tasting flat.
- 1 egg: Used in the egg wash to give the crust a shiny, golden finish.
- 1 tablespoon milk: Mixed with the egg to create a perfect glaze for the crust.
- 2 cups sifted confectioners’ sugar: The base for the sweet glaze that adds a delicate finishing touch.
- 2–3 tablespoons milk: Adjusted to create the ideal glaze consistency for drizzling.
- ½ teaspoon almond extract: Adds a subtle, nutty aroma that pairs beautifully with cherry flavor.
How to Make Cherry Hand Pies Recipe
Step 1: Prepare the Cherry Filling
Start by melting the butter in a saucepan over medium heat. Once melted, stir in the pitted and sliced cherries, sugar, cornstarch, and a pinch of salt. Cook this mixture gently, stirring often, until it thickens and begins to bubble—this ensures that luscious filling has that perfect, jam-like consistency. After cooking, set it aside to cool completely, which usually takes about 30 minutes. This step is key because hot filling can make your crust soggy.
Step 2: Preheat Oven and Prepare Baking Sheets
While the filling cools, preheat your oven to 400°F (200°C) and line your baking sheets with parchment paper. This simple step ensures that your hand pies bake evenly and don’t stick, making cleanup a breeze.
Step 3: Roll Out and Cut the Dough
Take your pie crusts and roll them out on a lightly floured surface until smooth. Using a 3½-inch round cutter (or a glass), cut out circles for your pies. Don’t worry if there are scraps; just gather, reroll, and cut more circles until all dough is used. This is one of those hands-on, fun moments of baking that makes the whole process feel so rewarding.
Step 4: Assemble the Hand Pies
Place half of the dough rounds on your prepared baking sheets. Spoon about 2 tablespoons of the cooled cherry filling onto the center of each circle, being careful not to overfill. Then, lay the remaining dough circles on top and press the edges together firmly using a fork to seal each pie. This crimping isn’t just pretty—it locks in all that delicious filling, so it doesn’t escape during baking.
Step 5: Apply Egg Wash
Whisk together the egg and milk to make an egg wash. Brush this mixture generously over every hand pie. This little touch gives your pies that irresistible golden color and a slight shine once baked, making them look as amazing as they taste.
Step 6: Bake to Perfection
Bake the pies in your preheated oven for about 30 minutes, or until they’re beautifully golden brown and the filling is bubbling inside. Once out of the oven, let them cool on a wire rack for 25 to 30 minutes so the filling sets nicely and you avoid burning your fingers when you take the first bite!
Step 7: Prepare and Drizzle the Glaze
Finally, whisk together the sifted confectioners’ sugar, milk, and almond extract until smooth. Drizzle this delicate glaze over the cooled hand pies for a sweet finishing touch that adds a lovely hint of almond and an elegant appearance.
How to Serve Cherry Hand Pies Recipe
Garnishes
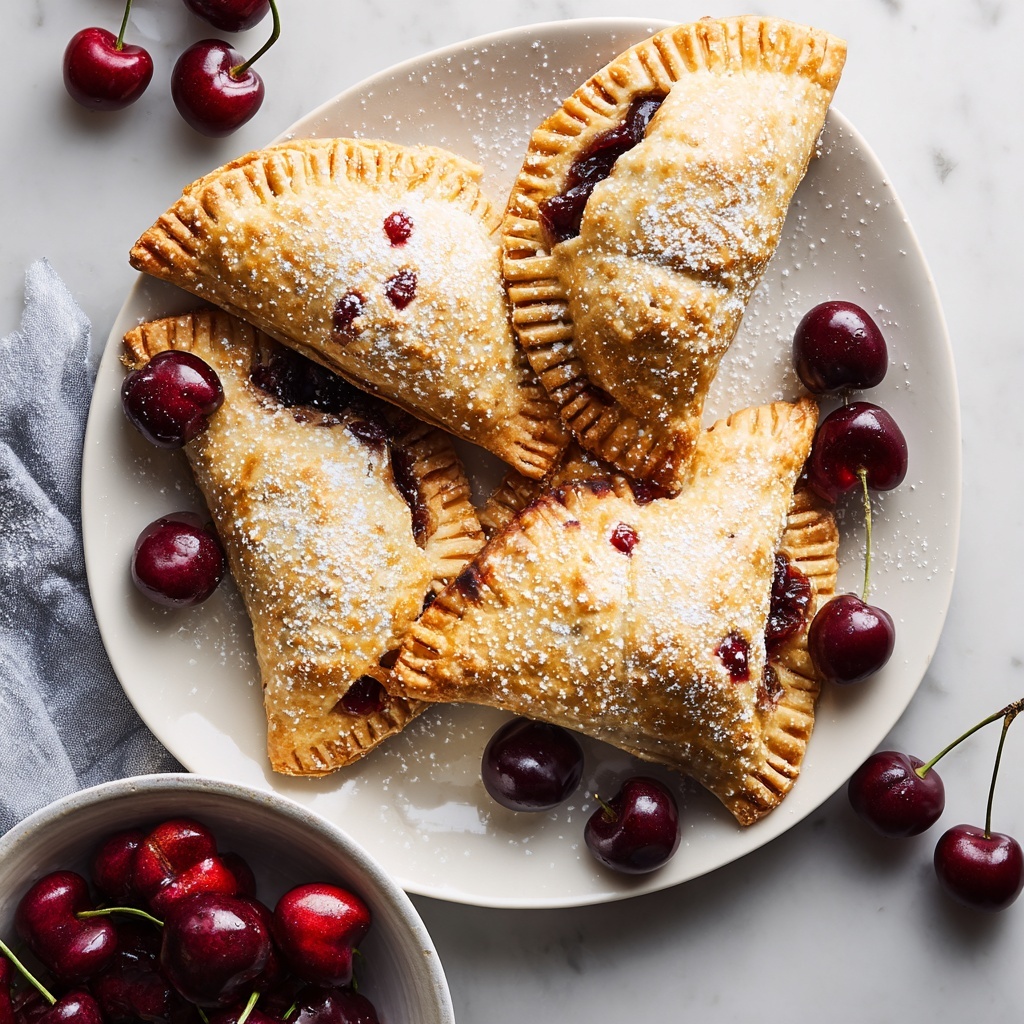
A dusting of powdered sugar or a few fresh cherries on the side can elevate the look of your hand pies instantly. You can also sprinkle a pinch of finely chopped toasted almonds for some delightful crunch and extra almond flavor that complements the glaze beautifully.
Side Dishes
These hand pies pair wonderfully with a scoop of vanilla ice cream or a dollop of freshly whipped cream. If you want to keep things simple, a hot cup of tea or coffee brings out the luscious cherry flavor even more, turning snack time into a cozy little celebration.
Creative Ways to Present
Arrange your hand pies on a rustic wooden board lined with parchment for a charming picnic vibe. For a party, serve them alongside small bowls of clotted cream, mascarpone, or even a tangy cream cheese spread so everyone can customize their bites. You can even package individual pies in cute boxes for a delightful gift that friends and family will rave about.
Make Ahead and Storage
Storing Leftovers
Cherry Hand Pies are best enjoyed fresh, but they keep well too! Store any leftovers in an airtight container at room temperature for up to two days. The crust will stay tender while the filling remains flavorful, making it easy to grab a snack whenever the craving hits.
Freezing
If you want to make these pies ahead of time, you can freeze them either baked or unbaked. For unbaked pies, freeze them on a tray first, then transfer to a freezer bag. Baked pies can be wrapped tightly in foil and stored in the freezer for up to two months. When the mood strikes, you’ll have a homemade treat ready to pop in the oven or microwave.
Reheating
To reheat, warm your pies in a preheated oven at 350°F (175°C) for about 10 minutes until heated through and the crust is crisp again. Avoid the microwave if you want to preserve that flaky texture. This way, every bite still tastes fresh and irresistible.
FAQs
Can I use frozen cherries for this Cherry Hand Pies Recipe?
Absolutely! Frozen cherries work well, especially when fresh ones aren’t in season. Just thaw and drain excess juice before using to prevent the filling from becoming too watery.
Is it okay to use store-bought pie crust for this recipe?
Yes! Store-bought crust is a fantastic shortcut that saves time without sacrificing deliciousness. Just make sure it’s thawed properly before rolling and cutting.
Can I make these hand pies vegan?
Definitely. Use a plant-based butter substitute and replace the egg wash with almond milk or a mix of maple syrup and water. For the glaze, opt for a plant milk as well and you’re set.
How do I prevent the filling from leaking during baking?
Make sure to seal the edges firmly with a fork and avoid overfilling the pies. Chilling the hand pies briefly before baking can also help the crust hold together better.
What is the best way to serve these pies warm?
Serve them right after reheating with a scoop of vanilla ice cream or a drizzle of heavy cream for a luscious, comforting dessert experience.
Final Thoughts
There’s something so sincere and heartwarming about a hand pie you can hold and savor in every bite, and this Cherry Hand Pies Recipe delivers exactly that. It’s a perfect way to celebrate fresh cherries or to bring a little homemade magic to your dessert table anytime. So grab your rolling pin, gather these simple ingredients, and dive into making these charming pies—you’ll wonder why you didn’t try them sooner!
Print
Cherry Hand Pies Recipe
- Prep Time: 30 minutes
- Cook Time: 35 minutes
- Total Time: 1 hour 10 minutes
- Yield: 10 servings
- Category: Dessert
- Method: Baking
- Cuisine: American
Description
These delightful Cherry Hand Pies are perfect for a sweet treat or dessert. Made with flaky pie crusts filled with a luscious cherry filling, then baked to golden perfection and topped with a smooth almond glaze, they are easy to prepare and sure to impress any crowd.
Ingredients
Pie Crust
- 2 pie crusts (store-bought or homemade)
- 2 tablespoons butter
Filling
- 2 cups fresh cherries, pitted and sliced
- ¼ cup granulated sugar
- 2 tablespoons cornstarch
- Pinch of salt
Egg Wash
- 1 egg
- 1 tablespoon milk
Glaze
- 2 cups sifted confectioners’ sugar
- 2–3 tablespoons milk
- ½ teaspoon almond extract
Instructions
- Prepare the cherry filling: In a saucepan, melt butter over medium heat. Add cherries, sugar, cornstarch, and salt. Cook, stirring, until the mixture thickens and bubbles, typically about 5-7 minutes. Remove from heat and allow the filling to cool completely, about 30 minutes.
- Preheat the oven and prepare baking sheets: Preheat your oven to 400°F (200°C). Line baking sheets with parchment paper to prevent sticking and facilitate easy cleanup.
- Prepare the pie crust circles: Roll out the pie dough on a lightly floured surface. Using a 3½-inch round cutter, cut out dough circles. Gather scraps and re-roll as needed to cut out additional circles.
- Fill the hand pies: Place half of the dough circles on the prepared baking sheets. Spoon approximately 2 tablespoons of the cooled cherry filling onto the center of each dough circle.
- Seal the hand pies: Cover the filled dough circles with the remaining dough circles. Use a fork to crimp the edges tightly, ensuring the pies are well sealed to prevent the filling from leaking during baking.
- Apply the egg wash: In a small bowl, whisk together the egg and milk to create an egg wash. Brush this mixture over the top of each hand pie to help them develop a beautiful golden-brown color.
- Bake the hand pies: Bake in the preheated oven for 30 minutes or until the pies are golden and the filling is bubbling. Once baked, remove from oven and allow to cool on the baking sheets for 25 to 30 minutes.
- Prepare and apply the glaze: Mix the confectioners’ sugar, milk, and almond extract in a bowl until smooth. Drizzle the glaze over the cooled hand pies for a sweet finishing touch before serving.
Notes
- Make sure the cherry filling is completely cool before filling the dough to prevent sogginess.
- You can use frozen cherries thawed and drained if fresh cherries are unavailable.
- Seal edges tightly with a fork to prevent filling leakage.
- Adjust milk quantity in glaze for desired thickness.
- Store leftover hand pies in an airtight container at room temperature up to 2 days or refrigerated for up to 4 days.


